Table of Contents
Advertisement
Quick Links
Advertisement
Table of Contents

Related Manuals for B SCIENCE Premium Series

Summary of Contents for B SCIENCE Premium Series
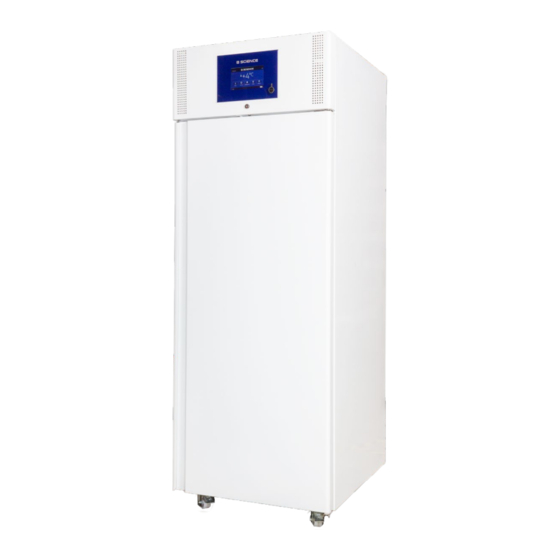
- Page 1 BIOMEDICAL FREEZER Premium Line Dear User To have efficient use of our product, which has been under quality control, please read the whole user manual carefully before taking the unit into use. Save and keep the manual until the abolition of the device.
- Page 2 The information contained in this manual and the accompanying products are copyrighted, and all rights reserved by B Science Global ApS. B Science Global ApS reserves the right to make periodic design changes without obligation to notify any person or entity of such change.
-
Page 3: Table Of Contents
Tabel of Content Chapter 1: Introduction ......................4 1.1 Intended use ............................... 4 Chapter 2: Precondition ......................5 Storage..................................5 Environmental protection and disposal........................5 Safety instructions..............................6 Chapter 3: Getting Started ....................7 Connection to the mains............................7 Before use. - Page 4 4. Change Pin for SERVICE MENU ........................23 3. User Menu ..............................24 1. Test Mode in ON mode ..........................26 3. Update software / firmware and parameter ....................27 4. Change Pin USER MENU ..........................31 5. Set Time & Date ............................31 6.
-
Page 5: Chapter 1: Introduction
Chapter 1: Introduction Congratulations on the purchase of a B Science Freezer, Premium Line. We trust that this unit will serve you for many years to come. To gain optimal benefit from your Freezer, please read the following instructions thoroughly and act accordingly. -
Page 6: Chapter 2: Precondition
Chapter 2: Precondition Before you install the Freezer, you need to prepare the site for installation. Examine the location where you intend to install the Freezer. You must be certain that the area is level and of solid construction. In addition, a dedicated source of electrical power must be located near the installation site. -
Page 7: Safety Instructions
Safety instructions. • To prevent injuries and or damage to the appliance, it should be unpacked and set up by minimum two people. If upon unpacking the appliance is found damaged, do not connect to the mains, but contact the •... -
Page 8: Chapter 3: Getting Started
Chapter 3: Getting Started Connection to the mains. • For safety reasons, the appliance must be earthed. If you are in any doubt, please contact an authorized electrician. • The appliance should be left for 1 hour before it is connected to the mains. If the appliance is connected before that, there is a risk of damaging the compressor. -
Page 9: Chapter 4: Performance Features And Safety Precautions
Chapter 4: Performance Features and Safety Precautions Refrigerant In the BMF Freezer there are used one type of refrigerants. Carefully read the below description of the refrigerants: R290. Demand for information: Personnel working with these refrigerants mentioned above and below must be educated to know about these safety sheets. -
Page 10: Accidental Release Measures
Get medical attention. INHALATION: Immediately remove to fresh air. If breathing has stopped, give artificial respiration. If breathing is difficult, qualified personal may give oxygen. Get medical attention immediately. INGESTION: Do NOT induce vomiting unless direct to do so by medical personnel. Never give anything by mouth to an unconscious person. -
Page 11: Chapter 5: Using The Bmf Freezer
Chapter 5: Using the BMF Freezer Starting Up. In case the compressor does not start when the Freezer has been plugged in, the electrical supply may not be in order. Check if there is an electricity supply to the plug or if the fuse is blown. Operating the Freezer The empty Freezer should be switched on for at least 5-6 hours prior to loading of the Freezer. - Page 12 Main Menu DISPLAY SHOWS DISPLAY GIVES ACCESS 1. Date 2. Time Temperature graph 3. Temperature inside the cabinet 10. Status 4. Room Temperature 11. Download 5. Shows if compressor is running 12. Menu 6. Defrosting cycle activated 13. ON/OFF 7. USB stick is connected 8.
-
Page 13: Temp. (Temperature Graph)
Main Menu In the main menu you get access to 1. Temperature graph 2. Status 3. Download 4. Menu 5. ON/OFF 1. Temp. (Temperature graph) Temperature graph for 1 day BMF FREEZER – USER MANUAL... -
Page 14: Status
Temperature graph for 7 days You can select a Temperature Map for either 1 or 7 days 2. Status 1. It shows the working hours of the compressor and the fan. 2. It shows the last alarms that have been activated. BMF FREEZER –... -
Page 15: Download Data From Controller
3. Download data from controller Click on select period button (No. 2) Select a period that you want to download and press ok. 1. Use arrow up or down to change the value. 2. To save the changed data click on the OK button. Then return to download menu and push the Download button (No. -
Page 16: Menu
4. Menu From menu you can gain access to. 1. Admin menu (Only access to authorized personal approved by B Science) 2. Service menu 3. User menu 4. Temp unit 5. Display 6. Language (this option is under development) BMF FREEZER – USER MANUAL... -
Page 17: Service Menu
2. Service Menu For access to service menu enter pin code. 1. Put in Pin code and click on the OK button. 2. Service Menu Service menu gives access to 1. Test Mode 2. Hysteresis 3. Manual defrosting 4. Change pin 5. - Page 18 2. Test Mode in ON mode When the unit is Switched ON and running, you can see: Which relays are ON or OFF, the temperature of each sensor, and position of Door contact. In this example: The Compressor 1 and Fan 2 is running. The Frame heater 1, Light 1 are ON, and Door 1 is open.
-
Page 19: Test Mode For Troubleshooting In Off Mode
1. Test Mode for troubleshooting in OFF mode When the unit is OFF, you can simulate each relay by pushing the square field, for testing each kind of device. (Compressor, Light, Fan motor etc.) Very good feature for service and maintenance use. - Page 20 This feature is for service and maintenance use. By this Test mode, you can check all relays and door contacts and check the temperature sensors. Switch OFF the unit by the display ON/OFF button. Type in the pin code for one of the pin codes levels, and push the OK button.
- Page 21 Type in the pin code for Service level, and push the OK button. Click on the TEST MODE button. By clicking on each white square angle, the relay for the specific component will be activated. In this example, the relay for Compressor 1, Defrost relay 1, Fan 1, Frame heater 1 and Light 1 are ON.
-
Page 22: Hysteresis
2. Hysteresis Hysteresis settings: The temperature between start and stop of the Compressor. 1. Use arrow up or down to change the value. 2. To save the changed data click on the OK button. BMF FREEZER – USER MANUAL... -
Page 23: Manual Defrost
3. Manual Defrost Manual defrost: You can start the defrost cycles in this menu manually by clicking on the YES button. • Now the defrost cycles will run automatically. If you want to cancel the defrost cycle, you must switch the unit OFF and switch ON •... -
Page 24: Change Pin For Service Menu
4. Change Pin for SERVICE MENU If needed the service pin code can be changes under Change Pin. 1. Put in New 4 numbered code. 2. Repeat new pin code. 3. Click the OK button to save change. BMF FREEZER – USER MANUAL... -
Page 25: User Menu
3. User Menu Enter pin code to access User menu 1. Put in Pin code and click on the OK button. BMF FREEZER – USER MANUAL... - Page 26 3. User Menu In user menu you can get access to. 1. Test Mode 2. Device Info 3. Update Data 4. Change Pin 5. Set Time 6. Set Temperature 7. Alarms BMF FREEZER – USER MANUAL...
-
Page 27: Test Mode In On Mode
1. Test Mode in ON mode Test mode when the unit is switched ON. 1. Test Mode Test Mode for when the unit is switched ON. You can see which relay are ON or OFF, and the sensors temperature. BMF FREEZER – USER MANUAL... -
Page 28: Update Software / Firmware And Parameter
2. Device Info In Device info you get all the information of the controller's software versions. 3. Update software / firmware and parameter Insert the USB stick in the USB port for the Controller port. Here you should be able to see if there is a USB stick connected. - Page 29 Step 2 If the controller is pass code protected, you can use the same code as for USER, SERVICE or ADMIN. Press 4 numbers in, and press OK Step 3 Press the MENU button to enter the next menu. Step 4 Press the USER button to enter the next code menu.
- Page 30 Step 6 Press on the UPDATE DATA button to enter the next menu. Step 7 In this UPDATE MENU, you can see new detected firmware which are in green color. Press the FIRMWARE RESOURCES button to update firmware. When the controller is finished updating firmware, the controller will perform a rebooting.
- Page 31 You will now get a Warning. If you are sure to update the Parameter file, press the YES button. When the controller is finished uploading parameter, the controller will perform a rebooting. Important! When you have updated all firmware and parameter, remove the USB stick and switch ON the unit, and always check the main parameters such as the Set point and Alarm settings.
-
Page 32: Change Pin User Menu
4. Change Pin USER MENU If needed the User Menu´s pin code can be changed under Change Pin 1. Put in New 4 numbered code. 2. Repeat new pin code. 3. Click the OK button to save change. 5. Set Time & Date Setting the Date and Time. -
Page 33: Set Temperature
6. Set Temperature To set the setpoint for the temperature in the cabinet. 1. Use arrow up or down to change the value. 2. To save the changed data click on the OK button. In this example the setpoint are -20,0°C and the Hysteresis are 1,0°C. - Page 34 7. Alarms Under Alarms get access to 1. Alarm List 2. Temp Alarm 3. Alarm Delay 4. Door Alarm 5. Power Alarm BMF FREEZER – USER MANUAL...
- Page 35 1. Alarm List Under alarm list it is showed which type of alarm that are occurring. The Button will be red when the failure is activated, and the remote alarm relay will be active until you click on the red button to deactivate the alarm.
- Page 36 2. Temperature Alarm To set up the High and Low temperature alarm. 1. Use arrow up or down to change the value. 2. To save the changed data click on the OK button. BMF FREEZER – USER MANUAL...
- Page 37 3. Temperature Alarm Delay To set up the time for alarm delay. 1. Use arrow up or down to change the value. 2. To save the changed data click on the OK button. 3. When the high or low temperature level are reached, this alarm delay timer will start counting.
- Page 38 4. Door Alarm To set alarm for Door alarm delay. 1. Use arrow up or down to change the value. 2. To save the changed data click on the OK button. If the Door are left open for more than 3 minutes, the Door open alarm will be activated. BMF FREEZER –...
- Page 39 5. Power Alarm Setting for Power Alarm. 1. You can enable or disable the Power failure alarm. Push ON or OFF. 2. To save the changed data click on the OK button. In case of Power cut, the Power failure alarm will be activated. Main Menu Alarm Screen When an alarm occurs, you can choose to IGNORE or ACCEPT the alarm.
- Page 40 Main Menu Alarm Screen If you choose to IGNORE the alarm, you are temporally ignoring the alarm and a red triangle will be visual on the main menu. The Red triangle (Alarm indicator) will not disappear until it has been accepted in the Alarm List Menu BMF FREEZER –...
-
Page 41: Temp. Unit
4. Temp. Unit Under Temp. Unit, you can select if you want the temperature range to be in Fahrenheit or in Celsius degrees. 1. Push °F or °C, the selected will turn green. 2. To save the changed data click on the OK button. BMF FREEZER –... -
Page 42: Display
5. Display Display Settings: To the Right you can change Light brightness. 1. Use arrow up or down to change the value. 2. To save the changed data click on the OK button. The squares to the left. 1. Help button (future option) 2. -
Page 43: Chapter 6: Maintaining The Freezer
Premium Line. Complete certification procedures and specifications are published in a separate publication Technical Manual: BMF Freezer Line Procedure Stations. This manual is available for trained and service person authorized by B Science. A complete certifier service kit is available to qualified certifiers from B Science. - Page 44 Time between each automatic defrost cycles. Starting the manual defrost cycles. BMF FREEZER – USER MANUAL...
-
Page 45: Wire Diagram
Wire diagram. BMF FREEZER – USER MANUAL...
Need help?
Do you have a question about the Premium Series and is the answer not in the manual?
Questions and answers