Advertisement
Available languages
Available languages
Table of Contents
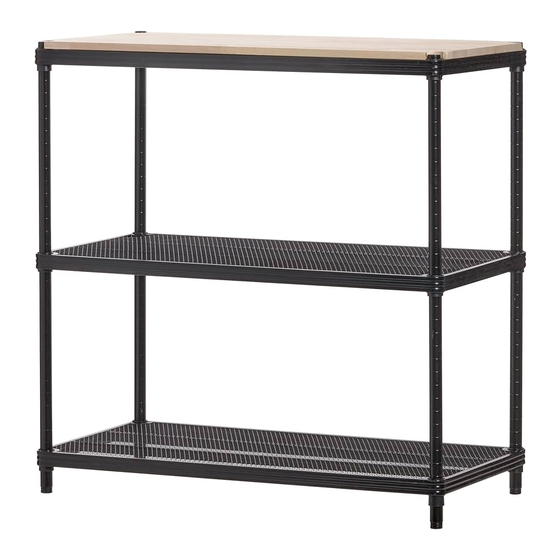
Mesh Shelf
(A) x3
Plastic Cap
(D) x4
! Do not throw away packaging materials until assembly is complete.
! To clean, wipe with a soft, dry cloth. Spot clean with a damp cloth if needed.
Leveling Foot (E)
Parts List
Pole Section
(B) x4
Leveling Foot
(E) x4
Step 1
Screw a leveling foot (E) into the bottom of each pole.
Pole Section (B)
Bottom of pole section (B)
does not have a groove.
Shelf Clip
(C) 12 clips (24 pieces)
Wood Top
(F) x1
Advertisement
Table of Contents

Summary of Contents for Design Ideas MeshWorks Shelving
- Page 1 Parts List Mesh Shelf Pole Section Shelf Clip (A) x3 (B) x4 (C) 12 clips (24 pieces) Leveling Foot Wood Top Plastic Cap (D) x4 (E) x4 (F) x1 ! Do not throw away packaging materials until assembly is complete. ! To clean, wipe with a soft, dry cloth.
- Page 2 Step 2 Once poles are assembled, select the groove (spaced in 1” increments) where you’d like your lowest shelf to rest. Position the two halves of your shelf clip (C) so that the beveled edge is facing the top. Snap the clip together around the pole and adjust until you feel it locate the groove.
- Page 3 Liste des pièces Étagère maillée Section de pôle Clip d’étagère (A) x3 (B) x4 (C) 12 clips (24 pieces) Pied de nivellement Plateau en bois Bouchon en plastique (D) x4 (E) x4 (F) x1 ! Ne jetez pas les matériaux d’emballage tant que l’assemblage n’est pas terminé. ! Pour nettoyer, essuyez avec un chiffon doux et sec.
- Page 4 Etape 2 Une fois les poteaux assemblés, sélectionnez la rainure (espacée par incréments de 1 ») où vous souhaitez que votre étagère la plus basse repose. Positionnez les deux moitiés de votre clip d’étagère (C) de sorte que le bord biseauté soit orienté vers le haut.
Need help?
Do you have a question about the MeshWorks Shelving and is the answer not in the manual?
Questions and answers