Table of Contents
Advertisement
Quick Links
Advertisement
Table of Contents

Summary of Contents for ABODOST IT01 pro
- Page 1 4K UHD Dash Camera Instruction Manual...
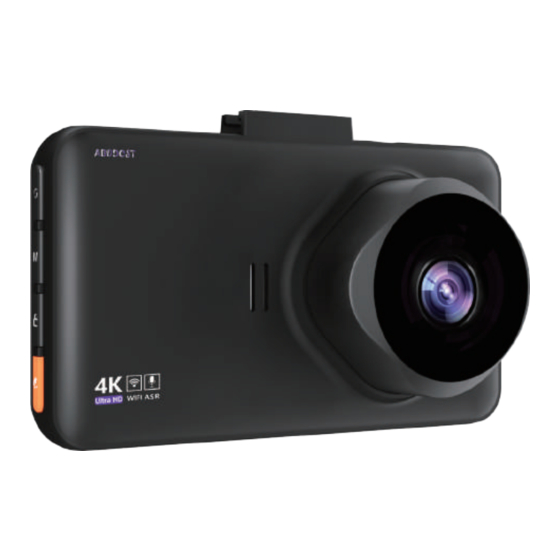
- Page 2 ABODOST-IT01 pro BUILT-IN WIFI NIGHT VISION LOOP CYCLE ULTRA HD VOICE CONTROL PARKING MODE USER MANUAL...
- Page 3 EXPERIENCING STOP PROBLEMS Item NOT as described? Damaged or defective? Missing items? Any issues what so ever? contact us before returning the item WE WILL HELP YOU RESOLVE ANY ISSUES ASAP CUSTOMER SERVICE HOURS:7*24 hours by amazon or after-sale mailbox :abodost_cs01@hotmail.com...
-
Page 4: Table Of Contents
Introduction Safety Information Getting Started Product Overview Standard package contents Buttons and Functions Installation Video Menu Setting Photo Menu Setting Playback video & photo menu Setting App Introduction GPS Player Software FAQ’ s Specifications... -
Page 5: Introduction
Introduction Thank you for purchasing our product, We hope that this user manual helps you get started with basic features that our camera has to offer. This camera is equipped with Ultra HD 3840@30FPS with Hisilicon3559 + Sony Starvis IMX335 Sensor for excellent low light sensitivity and high dynamic range which allows you to record continuous high-quality video playbacks and brings phenomenal 4K... -
Page 6: Safety Information
Safety Information Please read this manual very carefully before using the camera or installation and keep it safe for future refer- ence. It will be helpful if you haveany questions or encounter any operational problems. WARNMINGS Failure to comply with safety warnings and regulations can result in serious injury or death. - Page 7 4.You should not install this dash camera at a place that would obstruct or reduce a driver’ s view. Make sure your usage complies with pertinent vehicle codes of your state, province, territory or country. 5.You should post the required notices of recordation to occupants inside the vehicle, if voices or other informa- tion/signal pertaining to in-vehicle activities will be recorded.driver’...
-
Page 8: Getting Started
the lens to avoid compromising video quality. 10.You should use the dash cam unit in the way it is intended. You should not use the dash cam unit in a way that would be illegal or that tends to physically damage the unit, or tend to cause danger to the safe operation of the vehicle or the occupants. - Page 9 be completed when power is turned off. When the car key is plugged into the vehicle, the dash cam will automatically turn on. Please check whether the function of power on/off, the front and rear cameras display is normal. If you need to download the recording videos and images, please turn off...
-
Page 10: Product Overview
Product Overview Suction hoIder USB Power AV-IN Loudspeaker Reset button... -
Page 11: Standard Package Contents
TF card Camera Up button Menu button Down button Standard package contents 1x 4K Front Dash Cam 1x Suction Mount 1x GPS part & 1x Short "Y"USB Cable 1x 11ft Car charger 1x 22ft Cable for Rear Camera with Screws 1x Adhesive and 2x Screw 4x Cable Clips OK button... -
Page 12: Buttons And Functions
Buttons and Functions Press Once to Switch between front/rear camera when video mode UP BUTT Press and Hold to wifi O n/Off Press Once to go to previous selection under setting mode Press Once to enter video menu setting from video mode MENU Press Once to enter Photo menu setting BUTTON... -
Page 13: Installation
EMERG In the video mode, emergency video is ERCY LO locked, after pressing the key, the red flashing of video will turn to the yellow flashing of locked video BUTTON Press Once to confirm the selection under setting mode Press Once OK BUTTON to stop recording MODE S under video recording mode and then Press WITCH... - Page 14 The camera comes with the default settings which allows you to start using your camera right out of the box without changing any settings. Please make sure to format the memory card before first time use. 滚长江东逝水 Installations 1.Clean the spot on your windshield where you would like to mount the camera and confirm the placement.
- Page 15 3.Next, align the position Installations to be placed and turn the spin button to suck the suction tightly. The suction position can be changed at any time based in vacuum pressure according to your needs. 4.Install the rear camera on the rear windshield using the adhesive tape or near the license plate using screws.
- Page 16 Installations 1. 1. 6.Next, align the position to be placed and turn the spin button to suck the suction tightly. The suction position can be changed at any time according to your needs by the principle of air pressure.
-
Page 17: Video Menu Setting
7.Install the rear camera on the rear windshield using the adhesive tape or near the license plate using screws.If you want to use the reversing function then connect the red trigger cable of rear camera extension cable to the posi- tive lead of the car reversing lamp. - Page 18 Resolution Choose 4k, 2k, 1080p three resolutions RECORD LENGTH This setting allows you to control the duration of each individual loop clip. It will delete oldest files and record newer files over and over when the memory card is full Clips can be set to durations of 1 minute, 3 minutes, 5 minutes.
- Page 19 G-SENSOR The dash cam has a built-in Gravity sensor, In the event of a serious vehicle collision or rapid acceleration/ decelera- tion, the G-sensor will be triggered and immediately lock current video file so the file will not be overwritten by loop recording.
- Page 20 SCREEN SAVER Set the time after which the unit will automatically turn off screen Used to save power and reduce distraction while driving. For example, it is set to 3 minutes, if the unit is not operated in 3 minutes, the unit will automatically turn off...
- Page 21 TIMEZONE You can also set the GMT time-zone value so the camera will set the date and time based on the GMT value selec- tion when it receives the GPS signal lock. Time zone will not change automatically when it starts / ends daylight saving time, please adjust manually at that time.
- Page 22 FORMAT Formats the microSD card ready for use with the camera. YES or NO VERSION To check the dash camera system firmware version Video Menu Setting Picture...
-
Page 23: Photo Menu Setting
Photo Menu Setting RESOLUTION 12M 4032*3024/10M 3648*2736/8M 3264*2448/5M 2592*1944/3M 2048*1536 SEQUENCE Continuous photo shooting function ON/OFF QUALITY Picture quality Fine/Normal/Economy SHARPNESS Picture sharpness Strong/Normal/Soft WHITEBALANCE Auto/DayLight/Cloudy/Tungsten/Fluorescent... -
Page 24: Playback Video & Photo Menu Setting
COLOR Color/Black&White/Sepia ISO sensitivity is a measure of the sensitivity of the mobile phone CMOS sensor (equivalent to the film of a traditional camera) to light-Auto/100/200/400 ANTI-SHAKING Prevent shaking during the photo.ON or OFF PHOTO MENU SETTING PICTURE Playback video & photo menu Setting Press Once OK BUTTON to stop recording under video recording mode and then Press... -
Page 25: App Introduction
Once MODE SWITCH BUTTON to enter Photo mode, Press Once MODE SWITCH BUTTON to enter the playback video & photo menu under photo mode Front ordinary video/Rear ordinary video/Front urgent video/Rear urgent video/Front photo/Rear photo App Introduction This dash camera use Roadcam App, allows you to turn WiFi broadcast from the camera so you can connect your phone with the dash camera to access videos, photos and manage some... - Page 26 1.Search for “Roadcam” on App Store, Google Play or by scanning the QR code below:...
- Page 27 2.Allow app permissions.
- Page 28 3.Press and Hold to wifi On/Off or Turn on dash camera’ s Wi-Fi by pressing the Menu > Recording Settings > WiFi > On>SBC_XXXXXX and password 1234567890 will appear on the camera screen.
- Page 29 Navigate to your smartphones WiFi settings and look for SBC_XXXXXX network and enter the password 1234567890 to connect. Model Front...
- Page 30 4.Open the App Roadcam, Click the “Camera” icon to connect the dash camera to the App. When you see your cameras SSID it means you have connected successfully. In the App Preview mode, press the cog or settings icon on the top right corner to enter if you want to make any changes with the camera setup.
-
Page 32: Gps Player Software
GPS Player Software To download GPS Player visit http://www.gpsplayer.net/setup.html GPSPlayer for Windows (Windows7, Windows8,Win- dows10) GPSPlayer for Mac (Mac 10.11, Mac 10.11 above) With this player you can play your videos on your comput- er screen with GPS information, driving route vehicle’ s speed, distance, position, data displays, and maps. -
Page 33: Faq' S
FAQ’ s Q: VIDEO IS FUZZY? A: PLEASE MAKE SURE THE LENS OF CAMERA IS CLEAN AND THERE IS NO DIRT ON WINDSHIELD ALSO. A: REMOVE PLASTIC SCREEN PROTECTOR ON THE LENS AND ON THE Q: Camera showing Memory Error A: Please ensure that the memory card is U3 high-speed card (16GB-256GB) and format before using. - Page 34 Q: Micro SD Card is not going in. A: Please make sure you align microSD card correctly with gold contacts facing towards the screen. (See page 6) Q: Date and Time is not staying the same A: Please go to camera's recording settings > Time Zone > Set the correct GMT value >...
-
Page 35: Specifications
Specifications Brand Adobost Model IT01 pro Processor Hisilicon3559 Front camera video 4K (3840×2160P) @ 30FPS resolution Rear camera video FullHD (1920×1080P) @ 30FPS resolution Front&Rear camera Front:3840×2160P@30FP video resolution S+Rear:1920×1080P@30FPS Video Codec H.264 Audio Built-in microphone Connectivity WiFi RoadCam Memory MicroSD up to 256 GB Auto Turn On/Off... - Page 36 Screen size 3.0" IPS Working -15 - 75 ℃ Temperature Dimensions 88×52×37 mm English, Chinese, traditional Chi Menu languages nese,Japanese,Korean. 4K+1080P Front & Rear Camera Resolution , GPS, WiFi, Parking Monitor, WDR, Screen Saver, Date Features Stamp, G-Sensor, Loop Recording Time Lapse, Auto Start Record- ing, Audio Video Recording, Key Sound...
Need help?
Do you have a question about the IT01 pro and is the answer not in the manual?
Questions and answers