Advertisement
Quick Links
Advertisement

Summary of Contents for HELLO LITE HL-CLT1024
- Page 1 Touch Drawing Controller Operation Manual Touch Drawing Controller Born for Simplicity V1.9...
- Page 2 “Touch-Drawing controller, with a brand-new hand-drawing operation and programming concept, subversively changes the simplicity and speed of controlling fixtures. If you are a novice, you can be promoted to a lighting engineer immediately; if you are a lighting engineer, it will save you time and effort.
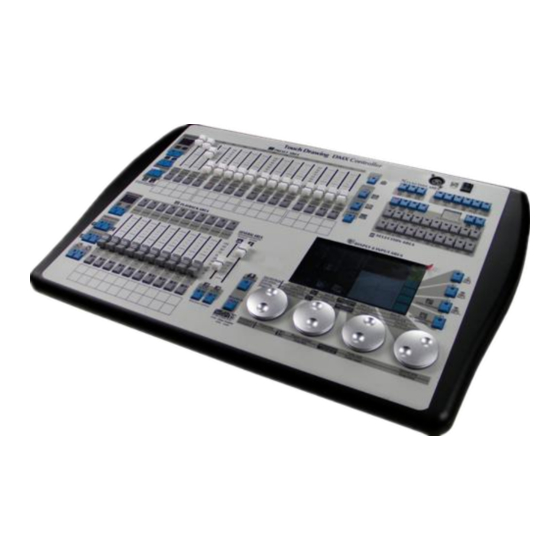
- Page 3 Panel Area Introduction Tools Area Selection Preset Area Area Keys For Function System Transform Tools Fixture Edit Tools Attribute Page Page Flip Over Clear Preset Pages of Preset Faders Fixture Selection Keyboard Area Attribute Transform Fixture Type Selection Keys Strobe Master Fader Fader...
- Page 4 Panel Icon Introduction Icon Description Icon Description Icon Description Preset Area Fixture Unit Dimmer LED Type Type Type Fixture Turn Fixture Turn Fixture Selection Mode Page Forward Page Backward Attribute First Attribute Second Selection Page Attribute Page Mode Clear Chosen Fixture Fixture or Output Icon...
- Page 5 Panel Icon Introduction Icon Description Icon Description Icon Description Display & Input Area Wheel In the Key for Wheel In the Mode of Input Wheel to turn Mode of Input Shape over pages Attribute Parameter Wheel In The Key to Set Mode of Input Key to Align the Brightness of...
-
Page 6: Touch Screen Introduction
Touch Screen Introduction ☺ Touch Screen area Introduction Function & Page Display Playback Instruction Parameter Display Function Selection Area Drawing Input F1-F4 Area Soft Turning Setup Keyboard Function Over Function Pages Selection Key Display Wheel ☺ Function & The Corresponding Relationship Between Input Value Touch Screen Main Page and Keyboard Preset... - Page 7 Touch Screen Introduction ☺ Touch Screen Function Selection Click to select a function Can slide from top left to bottom right to select function key from one area ☺ Touch Screen Turning Page Click Way Operation Step 2 Select the page Enter the function page...
- Page 8 ◆ The Color Meaning of Character display on the Numerical Touch Key – Key of valid serial number Blue Character Black Character – Key of invalid serial number to first half page – Key of invalid serial number to last half page White Character –...
- Page 9 ◆ Search Table For the Corresponding Relationship of File A and File B(Decimal)—Table 1 .02 .03 .04 .05 .06 .07 .08 .09 .10 .11 .12 Serial Number Page Number 100 101 102 103 104 105 106 107 108 110 111 112 113 114 115 116 117 118 119 120 ◆...
- Page 10 Touch Screen Introduction ☺ The Operation of Naming Touch Screen Step 2 select function key which need to name (refer to the operation of touch function selection) Step 3 write down the name in the drawing area Step 1 press the set button before select the function button, then can enter...
- Page 11 Library Editing Operation Step 1 if there is no operation manual for the fixture, please connect the controller with the fixture, set the fixture address and power up then you can begin editing library (when editing the library, we suggest you use the default patch table to control the fixture) Step 3 select an empty...
- Page 12 The Relationship of Different Operations ☺ —— Manual Operation Making Light Effect & Output Control System Setting Controller Distribute Add into Library Setting Fixture Patch Controller Set Fixture Generate an Address Table Address ☺ Manual Operation —— Making Light Effect & Output Control Use Wheel to Input Attribute Input Attribute...
-
Page 13: System Setup
System Setup Step 1 press edit key to enter Step 6 press edit key to exit Step 5 complete modifying parameter, press enter key press setup key to enter system setup function Step 2 System setup Step 3 parameter switch the parameter that want to be set... - Page 14 ◆ After setting password, user need to input correct password to enter 1) If controller is protected by password, only system setup function allows editing after starting up, while other edit function will be protected (do not allow editing) unless input password correctly 2) If want to use edit function, user must input password: select password when in system setup operation, under the group mode which locate in selection area, user can input 8 digital passwords from selection keyboard (if the password is correct, the value of formatting will change from OFF to...
- Page 15 Patch Operation Step 1 press edit key to enter Step 5 press edit key to exit and restart system Step 4 must confirm after inputting or modifying a patch group parameter Step 3-2 short press to delete a patch group Step 2 press patch while long press to restore to key to open patch table...
- Page 16 Address List Operation Address List: After the patching is complete, the controller automatically generates an address list which can be used simply by setting the contents of the patching address to the fixture and connecting the console. ☺ View Address Table Step 1 press the address key to open the address list for viewing (refer to edit...
- Page 17 Brightness Channel Setting When the brightness channel needs to be set: 1. For fixtures of CH Mode type, it is necessary to set up dimming channels to be controlled by playback faders 2. For other non-dimming attributes, if want to be controlled by the playback fader, you can set it as a brightness channel.
- Page 18 Pan and Tilt Attribute Direction Setting : The purpose of pan and tilt attribute direction setting When the fixture is relatively installed, control these fixtures simultaneously, the output effect is not symmetrical. The direction setting of pan and tilt attribute is to make these fixtures can be symmetrical output under unified control, without having to modify the light itself settings.
- Page 19 Pan and Tilt Attribute Alignment location Setting The Purpose of Alignment Location: Due to the error of fixture itself and the error between hang position and angle, when operate these fixtures synchronically, the effect of fixtures will not a straight line. At this time, alignment location can tackle this problem and improve programing efficiency and effect quality.
- Page 20 Manual Operation—Fixture and Attribute Selection ☺ Fixture Selection Operation (Unit、LED and Dimmer) Step 3 select fixture page Step 4 select fixture Step1 switch fixture type Step 2 preset keyboard to switch to fixture selection status ☺ Unit Attribute Selection Operation(must select fixture first) Step 2 select attribute page Step 3 select attribute Step 1 preset keyboard to...
- Page 21 Manual Operation——Input Attribute Value by Fader ☺ Operation of Input Attribute Value by Fader Step 2 all attribute value can be input by fader Step 1 select fixture that want to be controlled(see fixture and attribute selection operation) 【Statement】 In fixture unit type, fader can control attribute value of unit In LED type, each fader can do master control of it corresponding LED fixture In dimmer type, each fader can control one dimmer channel...
- Page 22 Manual Operation——Input Attribute Value By Wheel ☺ Make Fixture Selection Before Whirl Wheel to Input Attribute Value Step 1 select fixture that want to be controlled(see fixture and attribute selection operation) ☺ Input Attribute Value of Fixture Unit By Wheel Step 3 Wheel correspond with 4 faders function of current attribute block...
- Page 23 Manual Operation——Input Attribute Value By Wheel ☺ Operation of input LED Color attribute value by wheel (must select LED fixture first) Step1 select LED fixture master control (page1) Step 5 color 4 input (page 2) Press wheel page button Step 2 color 1 input (page 1) to make the wheel to Step 6 color 5 input (page 2)
- Page 24 Manual Operation——Drawing Effect ☺ Gradient Effect of CMY And RGB Which Made by Drawing ☺ Layout Effect of Fixture Made by Drawing ☺ Output Effect of Color Selected by Drawing ☺ Drawing Shape Effect...
- Page 25 Manual Operation——Input Attribute Value by Drawing ☺ Input Attribute Value by Drawing(take unit as an example) Step 1 use keyboard or touch screen to select the fixture want to be controlled(refer to fixture and attribute selection operation) Step 2 use attribute keyboard or touch screen to select attribute that need to operate(refer to fixture and attribute selection operation)...
- Page 26 Manual Operation——Drawing Parameter Control ☺ Drawing Layout Mode Wheel is in shape mode(green light on) (drawing mode)switch to layout mode (shape size) modify shape size (pan position) modify shape pan central (tilt position) modify shape tilt central 【Note】 layout mode can use to make gradual change and mix color of CMY and RGB;...
- Page 27 Manual Operation——Extend Fixture Display ☺ Extend Manually——Extension Effect 1 ☺ Extend Manually——Extension Effect 2 ☺ Extend Manually—— Extension Symmetrically Effect...
- Page 28 Manual Operation——Extend Manually Operation Step 1 select the fixture that want to be controlled(see fixture and attribute selection operation) Step 2 select attribute that want to be extended (see fixture and attribute selection operation) Step 3 press location key (F4 key) to make the light move to center Step 4 shift the fixture skew vertically...
- Page 29 Manual Operation——Shape Running Control Step 2 modify the attribute of pan and tilt, and set the input position of the fixtures (see fader or wheel using operation) Step 1 select fixture(see Example: fixture and attribute selection pan and operation) tilt attribute (Step 2- Step 6)
- Page 30 Manual Operation——Shape Running Parameter ☺ First page shape parameter Shape speed control Shape size control First page of shape Shape pan position parameter Shape tilt position Wheel is in shape mode (green light on) ☺ Extend Entirely Second Page Shape Parameter =>>...
- Page 31 Manual Operation——Screenshot Operation ☺ Screenshot Operation Step 1 running a shape(see shape running operation); Step 2 change parameter by whirling wheel to extend shape (see shape parameter setting; second page of wheel); Step 3 adjust shape or static parameter, stop running shape; continue to whirl wheel to change the point position of the shape in the axis to achieve the output effect of adjusting mildly (see the example below) Step 4 use playback storage operation or material storage operation to save static effect as...
- Page 32 Shape Edit Operation ☺ Step 7 press edit to exit Shape editing Step 1 press edit key to enter Step 6 press enter key Step 3 select shape page Step 2 switch to shape function from selection area Step 4 press shape key Step 5 drawing shape 【Note】...
- Page 33 Group Operation ☺ Group Edit Operation Step 1 press edit key to enter Step 7 press edit key to exit Step 5-2 press delete key to clean the group Step 6 press enter key Step 3 select group page Step 2 switch to group function from selection area Step 4 press group key Step 5-1 select fixture that have been stored in group (see fixture and attribute selection operation)...
- Page 34 Preset Material ☺ Preset Material Edit Operation Step 1 press edit key to enter Step 7 press edit key to exit Step 6 press enter key after finishing editing the attribute content(hear the buzzer sound means confirmation has made ) Step 3 switch preset material page Step 2 switch to preset material...
- Page 35 Playback——Playback Edit Step 1 press edit key to enter Step 8 press edit key to exit Step 7 after finishing editing, press enter key; if want to continue editing, repeat step 5- Step 2 switch to playback page Step 3 push playback fader up to enter playback edition state (if enter playback editing correctly, the buzzer will “dee”...
- Page 36 Playback——Playback Revise Operation ☺ Insert a playback step in a multi-step playback Step 1 use wheel to find the Wheel mode key the red position for new step want to and green light be inserted (before insert step on means it is number) in playback mode...
- Page 37 Playback——Time Line Editing Step 1 press edit key to enter Step 6 press edit key to exit Step 2 switch to playback page Step 3 press playback key Step 4 push playback fader up to enter playback editing state (if enter playback editing correctly, the buzzer will “dee”...
- Page 38 Playback——Time Line Modification ☺ Revise the position of time line program, add and delete time length Step 1 when enter timeline program, can set the running mode of timeline program: loop The red mode and sequential mode and green light on Step 2 the selection of timeline means in program step...
- Page 39 Playback——Running ☺ Playback Running Operation Step 3-2 can flash press aura Step 2 select key to output playback playback page Step 3-1 push playback fader up Step 1 select a to open corresponding playback trigger mode and push down to close; fader is to control the current playback brightness 【...
- Page 40 Playback——Running ☺ Playback Trigger Mode Trigger Mode Automatically: 1. Base on the playback program (or timeline program), the output of setting mode: loop mode, sequential mode and cross mode 2. Pause key can stop a running multi-steps playback (or time line program) Trigger Mode Manually: Every time press the trigger key, the...
- Page 41 Lighting Show of Light And Sound Play Synchronically——Drive Installation ☺ The Introduction of MH-Player Which Can Control the Playback Program Precisely MH-Player is a fixture and sound play synchronically control software specialized for touch-drawing controller, which adapt to computer version of the win7 and win10 which under the 64-bit operating system, do not need to install.
- Page 42 Lighting Show of Light And Sound Play Synchronically——Online ☺ Check If the Drive Install Successfully Step 1 Use USB Cable connect the Controller Player port and USB port, and power up the controller; then check if the drive program is work properly from the Device Manager (see the operation from the following pictures)...
- Page 43 Lighting Show of Light And Sound Play Synchronically——Edit ☺ MH-Player Edit——Adding video and audio file Step 1 click add file key Step 2 find the file want to be added Step 4 the file is in the list Step 3 open the file ☺...
- Page 44 Lighting Show of Light And Sound Play Synchronically——Edit ☺ Statement of MH-Player Lighting Show Control Order List (Step Parameter) Playback Fader Number: When the number is 0, it means Every lighting no playback output; the input show step can maximumly format: page number.
- Page 45 Lighting Show of Light And Sound Play Synchronically——Running Control ☺ MH-Player Running——Switch to Play Mode and Online Step 1 Use USB Cable connect controller and USB port (The first use must be equipped with a console driver, see drive installation operation) Step 2 Open MH-Player app, and operate controller online successfully (See online operation) Step 3 switch to...
- Page 46 Lighting Show of Light And Sound Play Synchronically——Running Control ☺ MH-Player Running——Operate Lighting Show By Computer Step 2 operate lighting show by using the player control tool Step 1 select file that want to be played from lighting show playlist file Step 3 adjust the output volume of audio and video...
- Page 47 Special application of Function key ☺ Master Control Area Master Fader: When powering on, master Strobe Fader: control is maximumly When the LED fixture output. When push up the is lit and selected, the master control fader, the strobe fader can output will be affected by control the LED the fader...
- Page 48 Special application of Function key ☺ Central Key (press to lit the fixture) Step 1 select the fixture want to be putted to center Step 2 press F4 to operate center function After center operation, the output effect of fixture ☺...
- Page 49 Special application of Function key ☺Shape Run Synchronically Selection area in shape Step 2 press function sync key several time to make two Step 1 select the shape running two shape keys simultaneously that is running ☺Check Out the Help Instructions Step 1 if the controller is being operating, please press clear key one time to...
- Page 50 Special application of Function key ☺ Fixture Bulb On/Off, Reset Operation Step 1 in the manual operation, switch wheel to fixture bulb and reset attribute status Step 2-1 Fixture bulb attribute: Step 2-1 Fixture bulb attribute: (there are 3 paragraphs for output) (there are 3 paragraphs for output) “OFF<<<”...
Need help?
Do you have a question about the HL-CLT1024 and is the answer not in the manual?
Questions and answers