Table of Contents
Advertisement
Advertisement
Table of Contents

Summary of Contents for TOMO TM-MAF0609
- Page 1 ...
-
Page 3: Table Of Contents
TABLE OF CONTENTS IMPORTANT SAFEGUARDS ............................ 3 KNOW YOUR AIR FRYER OVEN .......................... 7 Control Panel .................................... 9 Cooking Accessories ................................ 1 1 BEFORE FIRST USE ................................ 1 8 USING YOUR AIR FRYER ................................ 1 9 Setting Cook Time and Temperature Manually ...................... 2 0 Using the Preset Cooking Programs .......................... 2 1 Preset Cooking Program Chart ............................ 2 2 Pause Function ................................... 2 4 ... - Page 4 CLEANING AND MAINTENANCE .......................... 2 9 TROUBLESHOOTING .............................. 3 1 WARRANTY TERMS AND CONDITIONS ........................ 3 3 ...
-
Page 5: Important Safeguards
IMPORTANT SAFEGUARDS When using this appliance, basic safety precautions should always be followed, including the following: 1. READ ALL INSTRUCTIONS, SAFEGUARDS, AND WARNINGS BEFORE OPERATING THE APPLIANCE. FAILURE TO FOLLOW THESE SAFEGUARDS AND INSTRUCTIONS MAY RESULT IN INJURY AND/OR PROPERTY DAMAGE. 2. NEVER IMMERSE the main unit housing in water, as it contains electrical components and heating elements. Do not rinse under the tap. 3. TO AVOID ELECTRIC SHOCK, DO NOT put liquid of any kind into the main unit housing containing the electrical components. 4. If the appliance has a polarized plug (one prong is wider than the other), it is intended to fit into a polarized outlet only one way. TO AVOID ELECTRIC SHOCK, DO NOT force the plug into the outlet if it does not fit. If the plug does not fit fully into the outlet, reverse the plug. 3 ... - Page 6 If it still does not fit, contact a qualified electrician. DO NOT ATTEMPT to modify the plug in any way. 5. ALWAYS make sure that the plug is inserted into the wall socket properly and without any other appliances on the same outlet. 6. To prevent food being in contact with the heating element, DO NOT OVERFILL any of the baskets or trays. 7. DO NOT COVER OR BLOCK the air intake vent or air outlet vent while the appliance is in operation. Doing so prevents even cooking and may damage the unit or cause it to overheat. 8. While cooking, the internal temperature of the unit can get very high. TO AVOID PERSONAL INJURY, never place hands inside the unit unless it has thoroughly cooled. 9. This appliance is NOT INTENDED FOR USE by persons with reduced physical, sensory, or mental capabilities or persons with a lack of experience and knowledge unless they are UNDER THE SUPERVISION of a responsible person or have been given proper instruction to use the appliance. This appliance is NOT INTENDED FOR USE by children. 4 ...
- Page 7 10. When cooking, DO NOT PLACE the appliance against a wall or other appliances. Leave at least 10 cm of free space along the back, sides, and above the appliance. Do not place anything on top of the appliance. 11. DO NOT USE this unit if the plug, the power cord, or the appliance itself is damaged in any way. 12. 12. DO NOT PLACE the unit on stove top surfaces. 13. If the supply cord is damaged, it must be replaced by the manufacturer or its service agent or a similarly qualified person in order to avoid a hazard. 14. KEEP THE POWER CORD AWAY from hot surfaces. DO NOT PLUG in the power cord or operate the unit controls with wet hands. 15. NEVER CONNECT this appliance to an external timer switch or separate remote control system. 16. NEVER USE this appliance with an extension cord of any kind. 17. DO NOT OPERATE the appliance on or near flammable materials, such as tablecloths and curtains. 5 ...
- Page 8 18. DO NOT USE the appliance for any purpose other than described in this manual. 19. NEVER OPERATE the appliance unattended. 20. KEEP YOUR HANDS AND FACE at a safe distance from the air outlet vent, as hot air is released through it while in operation. The unitʼs outer surfaces may become hot during use. USE OVEN MITTS or use the rotisserie tong when handling hot components. Always use oven mitts when handling hot objects and surfaces. 21. Should the unit emit black smoke, UNPLUG IMMEDIATELY and wait for smoking to stop before removing oven contents. 22. When the time has run out during a cooking cycle, cooking will stop, but the fan WILL CONTINUE RUNNING for 1 minute to cool down the unit. 23. ALWAYS operate the appliance on a horizontal surface that is level, stable, and noncombustible. 24. ALWAYS unplug the appliance after use. 25. Let the appliance cool down for approximately 30 minutes before handling, cleaning, or storing. SAVE THESE INSTRUCTIONS. FOR HOUSEHOLD USE ONLY. 6 ...
-
Page 9: Know Your Air Fryer Oven
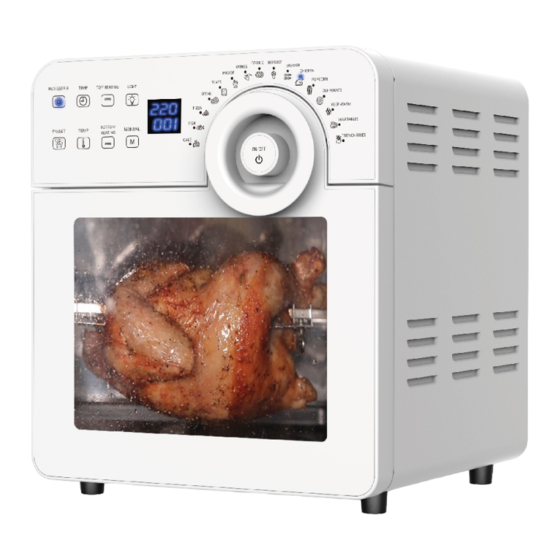
KNOW YOUR AIR FRYER OVEN 1 Housing 2 Control Panel 3 On/Off button (Rotary Knob) 4 Power Cord 5 Cooking Chamber 6 Door 7 Rotisserie Lift 8 Rotisserie Shaft & Forks 9 Wire Rack 10 Mesh Basket 11 Drip Tray 12 Rotisserie Basket ... -
Page 10: Control Panel
Control Panel Press this key to start or stop the rotisserie rotation. Press this key to set the time delay. 9 ... - Page 11 Press this key, then use the Rotary Knob to adjust the cooking time. Press this key, then use the Rotary Knob to adjust the cooking temperature. Press this key to turn on/off the upper heating element. Press this key to turn on/off the lower heating element Press this key to turn on/off the internal lamp. Press this key to manually set the cooking time and temperature. Time/Temperature Shows the cooking time and temperature. Display On/Off Button Press this to turn the unit on/off. Use the Rotary Knob to adjust time and (Rotary Knob) temperature, or to select cooking presets. 10 ...
-
Page 12: Cooking Accessories
Cooking Accessories Drip Tray Open the air fryer door. Slide drip tray into the air fryerʼs lowest position possible. Note: Always use the drip tray properly secured inside the appliance. The drip tray protects the bottom of the cooking chamber and catches excess oil, fat and grease to prevent from burning. The drip tray also doubles as a flat cooking tray when you are baking cookies, or cooking fragile food like fish. 11 ... - Page 13 Wire Rack 1. Open the air fryer door. 2. Slide the wire rack into the air fryerʼs desired position. The wire rack is best used for holding baking trays at the correct cooking distance from the internal heating element. 12 ...
- Page 14 Mesh Basket 1. Open the air fryer door. 2. Slide the mesh basket into the air fryerʼs desired position. The mesh rack is perfect for dehydration, but is also great for cooking crispy snacks and reheating pizza. 13 ...
- Page 15 Rotisserie Lift Use the rotisserie lift to place the rotisserie shaft & forks (or the rotisserie basket) inside, or take it out of the appliance. This rotisserie lift helps prevent any possible burns from hot metal and food. 14 ...
- Page 16 Rotisserie Shaft and Forks 1. Push the rotisserie shaft through the meat or food you want to cook. 2. Slide the forks onto both ends of the shaft making sure the forks are inserted into the food item securely on both sides. 3. Tighten the setting screws to hold the forks in place. 15 ...
- Page 17 4. Open the air fryer door and slide the end of rotisserie shaft into the rotisserie socket on the right side of the cooking chamber, then place the left end of the shaft on the resting slot on the left side of the cooking chamber. Rotisserie Basket 1 2 5 3 4 16 ...
- Page 18 1. Thread the rotisserie shaft through the hole in the center of the rotisserie basket. 2. Open the rotisserie basket cover and place food inside. Do not overfill the basket. 3. Open the air fryer door and slide the end of rotisserie shaft into the rotisserie socket on the right side of the cooking chamber, then place the left end of the shaft on the resting slot on the left side of the cooking chamber. 17 ...
-
Page 19: Before First Use
BEFORE FIRST USE • Remove all packaging materials, stickers and labels. • Clean the mesh basket and all other accessories with warm water, dishwashing liquid, and a non-abrasive sponge. Do not use a metal scouring pad as this may damage the coating. • Wipe the inside and outside of the air fryer with a dry cloth. Note: The appliance may emit some smoke and odor when used for the first time. This is normal and should slowly disappear after use. • Ensure that the heating element and fan inside the air fryer are both clean and clear from any obstructions. • Leave at least 10 cm free space on the back and sides and above the appliance. Do not place anything on top of the appliance and keep appliance away from curtains and other combustible materials. 18 ... -
Page 20: Using Your Air Fryer
USING YOUR AIR FRYER Open the air fryer door. Place the drip tray on the bottom of the cooking chamber. Close the door. Connect the power cord to a power source. Once the unit is plugged in, the display will flash once with a single beep. Press the ON/OFF button and the digital display will light up displaying 000/000. Unit will be in standby mode. All other keys are disabled except for M and . Note: The air fryer beeps and automatically shuts off after 60 seconds after no operation is done while in standby mode. 19 ... -
Page 21: Setting Cook Time And Temperature Manually
Setting Cook Time and Temperature Manually 1. Press the M (Manual) key. Default temperature and time are 120°C and 0:20 minutes. 2. Press the Temp key, then use the rotary knob to adjust the cooking temperature. 3. Press the Time key, then use the rotary knob to adjust the cooking temperature. 4. Press the upper and lower heating element keys as per your preference. 5. Press On/Off to start. 6. When cooking is finished, carefully open the door and remove food from the cooking chamber. Note: When cooking is done, 5 beeps will sound. The air fryer will go into Standby mode, but the fan will continue to work for 1 minute until the internal temperature cools down. The unit will eventually turn off as another 5 beeps sound. 20 ... -
Page 22: Using The Preset Cooking Programs
Using the Preset Cooking Programs 1. Turn the rotary knob to select the desired cooking program menu. Corresponding indicator light will come on. (Refer to the Preset Cooking Program Chart for details for each preset.) 2. Press ON/OFF to start. 3. When cooking is finished, carefully open the door and remove food from the cooking chamber. Note: When cooking is done, 5 beeps will sound. The air fryer will go into Standby mode, but the fan will continue to work for 1 minute until the internal temperature cools down. The unit will eventually turn off as another 5 beeps sound. You may adjust the cooking temperature and time before and at any point during the operation: • Press the Temp key, then use the rotary knob to adjust the cooking temperature. 21 ... -
Page 23: Preset Cooking Program Chart
• Press the Time key, then use the rotary knob to adjust the cooking temperature. CAUTION! The air fryer and accessories will be hot during and after cooking. Do not touch hot surfaces with unprotected hands. Allow all items to cool to room temperature, then clean them according to Cleaning and Maintenance instructions. Always use proper hand protection and exercise extreme caution when adding or removing food from the hot cooking chamber. Preset Cooking Program Chart Menu Default Temp. Default Time Temp. Range Time Range Default Heating Mode Cake 180°C 30 mins. 50 - 220°C 1 min. - 1 hour Fish 180°C 15 mins. 50 - 220°C 1 min. - 1 hour Pizza 180°C 10 mins. 50 - 220°C 1 min. - 1 hour Steak 180°C 12 mins. ... - Page 24 Toast 220°C 6 mins. 50 - 220°C 1 min. - 1 hour Proof 40°C 90 mins. 40°C 1 - 90 mins. Wings 200°C 15 mins. 50 - 220°C 1 min. - 1 hour Cookie 180°C 12 mins. 50 - 220°C 1 min. - 1 hour Defrost 80°C 10 mins. 50 - 220°C 1 min. - 1 hour Skewer 200°C 15 mins. 50 - 220°C 1 min. - 1 hour Chicken 220°C 30 mins. 50 - 220°C 1 min. - 1 hour ...
-
Page 25: Pause Function
These settings are indications. As ingredients differ in origin, size, shape and brand, we cannot guarantee the best settings for your ingredients. As you become more familiar with the cooking process, you may adjust these settings to suit your own personal tastes. Pause Function At any point during the operation, you pause the cooking by opening the oven door to check on the food, or to turn or toss your food for more even results. Close the oven door to resume the cooking program. 24 ... -
Page 26: Using The Time Delay Function
Using the Time Delay Function 1. Select a cooking preset program. 2. Press key, then use the rotary knob to set the delay time from 0:10 (10 minutes) to 9:50 (9 hours and 50 minutes). 3. Press the On/Off button to set the delay time. All other keys are disabled except for . You may cancel the set delay time by pressing the On/Off button. 4. Cooking will start once the set delay time elapses. Cooking Using the Rotisserie 1. Follow the steps under Cooking Accessories to prepare your food. 25 ... - Page 27 2. Open the air fryer door and slide the end of rotisserie shaft into the rotisserie socket on the right side of the cooking chamber, then place the left end of the shaft on the resting slot on the left side of the cooking chamber. 3. Connect the power cord to a power source. Once the unit is plugged in, the display will flash once with a single beep. 4. Press the ON/OFF button and the digital display will light up displaying 000/000. Unit will be in standby mode. All other keys are disabled except for M and . 5. Press the M (Manual) key to select cooking settings manually, or select a cooking preset. 6. Press On/Off to start cooking. 7. Press turn on the Rotisserie function (if Rotisserie indicator light is still not on). Note: Rotisserie function can be started or stopped at any time during cooking. 26 ...
- Page 28 8. When cooking is finished, carefully open the door and remove food from the cooking chamber. Note: When cooking is done, 5 beeps will sound. The air fryer will go into Standby mode, but the fan will continue to work for 1 minute until the internal temperature cools down. The unit will eventually turn off as another 5 beeps sound. CAUTION! Contents will be hot and can easily burn ‒ use caution not to let scalding meat juices or oils from falling on the skin by holding a catch tray or plate under the rotisserie contents. Always use the rotisserie lift to take the rotisserie assembly out of the cooking chamber. 27 ...
-
Page 29: Cooking Tips
COOKING TIPS • Air frying smaller items or fewer items will require a slightly shorter cooking time than larger items or a greater number of items. • Distribute any oil evenly on food and ingredients to achieve the crispiest results. Most oils can be used for air frying. Oil can also be sprayed or brushed onto foods for air frying. • For coated food, like onion rings or deep-fried pickles, use an egg wash with breadcrumbs rather than liquid-based batters to make sure that batter sticks to the food. • For super crispy fries, soak your fresh-cut potato sticks in ice water for 15 minutes, then pat them dry and spray them lightly with oil before cooking. • “Flipping” or turning larger quantities of food halfway through the cooking process assures that all the pieces are evenly cooked. 28 ... - Page 30 • Patting dry moist food items before cooking prevents excess steam and splatter and gives you crispier results. • Air frying can cause oil and fat to drip, so always use the drip tray. To prevent excess smoke, carefully remove and drain excess oil the drip pan as needed. CLEANING AND MAINTENANCE NOTE: Always allow the unit to cool completely before cleaning. Always unplug the unit from the power source before cleaning. Do not use abrasive cleaners, as they will damage the finish. Simply wipe the exterior with a clean, damp cloth and some mild dish soap. After cleaning, wipe down with a dry cloth to prevent streaking. 29 ...
- Page 31 To clean interior walls, use a damp cloth with mild dish soap, or a spray solution on a sponge. Never use harsh abrasives or corrosive products. Never use steel wool pads, etc., on the interior. After cooking greasy foods and after your unit has cooled, always clean interior of the unit. To remove baked-on grease, soak the Drip Pan in hot, sudsy water or use non-abrasive cleaners. All accessories are dishwasher safe. Alternatively, you can clean the accessories with hot water, dish soap, and a non-abrasive sponge. Make sure that the appliance is unplugged and all parts and accessories are clean and dry before storage. Gently wipe down the heating element with a damp, soft sponge or a non-abrasive brush. DO NOT use a metal brush or a coarse/metallic sponge ̶ this will damage the heating element. 30 ...
- Page 32 TROUBLESHOOTING Problem Possible Cause Solution The unit does not turn The unit is not properly Make sure the power cord is plugged into the on. plugged in. outlet properly. Outlet is not powered. Plug another appliance into the same outlet to test the circuit. The door is open. Make sure the door is fully closed. The food is not done Too much food has Use less food and cook in batches if necessary. after the been added to the Your food will also cook more evenly. recommended time is oven. up. The temperature was Adjust to a higher temperature. set too low. 31 ...
- Page 33 Food is fried Certain types of food Shake the food halfway through the cooking time, unevenly. need to be shaken or swap cooking tray positions. halfway through the cooking time. White smoke is Food is too greasy. When you fry greasy items in the Multi Air Fryer, coming out of the an amount of fat may leak into the unit. The fat appliance. produces white smoke and the unit may heat up more than usual. This does not affect the appliance or the end result. The unit or accessories White smoke is caused by grease heating up in still contain residue the unit or accessories. Make sure you clean the from previous use. unit or accessories properly after each use. Snacks are not crispy The food was not dry Make sure to properly dry the food or lightly when they come out enough or needs more brush some oil onto the snacks for a crispier of the unit. oil. result. 32 ...
- Page 34 WARRANTY TERMS AND CONDITIONS ONE-YEAR LIMITED WARRANTY ON PARTS AND LABOR TOMO provides a warranty to the original purchaser of this product against defects in materials and workmanship for one year. If a product covered by this warranty is determined to be defective within the warranty period, TOMO will repair or replace the defective part with a new or remanufactured part free of charge subject to terms and conditions stated herein: To obtain warranty service, proof of purchase in the form of a purchase invoice receipt and warranty certificate or copy thereof is required to show that a product is within the warranty period. If any one of the documents cannot be produced, corresponding fees for labor and replacement parts will be charged. 33 ...
- Page 35 Parts and Labor There will be no charge for parts and labor during the warranty period. Replacement parts or units may be new or recertified at TOMOʼs option and sole discretion. Replacement parts and units are warranted for the remaining portion of the original warranty. Our decision on all questions relating to complaints as a result of defects, either workmanship or materials, shall be conclusive and you shall agree to abide by such decision. Any units or defective parts that have been replaced shall become TOMOʼs property. After the lapse of this warranty, a charge will be made on all labor and replacement of parts. Type of Service Defective Products must be sent to any TOMO service center to obtain warranty service. TOMO is neither responsible for transportation costs to the service center nor TOMO will cover return shipping to the customer. Product returns to TOMO service centers must utilize either the original carton box and shipping material or packaging that affords an equal degree of protection. 34 ...
- Page 36 For home service, the transportation fee of TOMO service personnel will be charged to the customer, depending on the location. Our service personnel reserve all rights to refuse to attend to any equipment installed in an inaccessible location or any other hazardous situation. LIMITATIONS AND EXCLUSIONS TOMO one-year limited warranty only covers defects in materials and workmanship; however, this warranty does not cover the following: Damage resulting from accidents, transportation, misuse, abuse, alteration, tampering, or failure of the purchaser to follow normal operating procedures outlined in the user's manual. Damage caused by negligence and poor maintenance. Defects or damage due to spillage of food/liquids or improper usage of electrical supply or electrical circuit, major fluctuations in voltage, exposure to rain or moisture, wrong fuel or lid oil used. Damage, losses, defects, malfunction as a result of fire, flood, or other Acts of God. Normal wear-and-tear, corrosion, rusting, or stains. Defects & damage arising from improper testing, operation, usage of the wrong component, ...
- Page 37 Scratches & damage to the outer surface areas and externally exposed parts that are due to normal customer use. General maintenance & routine servicing. Claims for damaged/missing parts after 7 days from the date of purchase. 10. If any part or parts of the unit are replaced with a part or parts not supplied or approved by us or the unit has been dismantled or repaired by any person other than a TOMO authorized technician. 11. Any equipment/product which has its serial number removed or made illegible/tampered with. 12. If the warranty card is being altered, defaced, or erased in any manner whatsoever. The one (1) year warranty period covers the heating element, main board, motor, boilers, switches, fuse and power supply. However, this warranty does not cover parts (i.e. accessories, bulbs, heating plates, spring, knob, coffee loaders, filters, drip funnels, grinding heads, or screws, glass or plastic jar, glass carafe, blades, trays, bowls, water tanks, gears, couplings, upper and lower connector, internal and exterior casing) that are subject to wear and tear, rust, stains, or corrosion. This one-year limited warranty does not cover Products sold “AS IS”, “FACTORY RECTIFIED”, or by a non-authorized reseller. 36 ...
- Page 38 WARRANTIES, INCLUDING ANY IMPLIED WARRANTY OF MERCHANTABILITY AND FITNESS FOR A PARTICULAR PURPOSE, SHALL BE LIMITED IN DURATION TO THE PERIOD OF TIME SET FORTH ABOVE. TYLRʼ TOTAL LIABILITY FOR ANY AND ALL LOSSES AND DAMAGES RESULTING FROM ANY CAUSE WHATSOEVER INCLUDING TOMO ʼ NEGLIGENCE, ALLEGED DAMAGE, OR DEFECTIVE GOODS, WHETHER SUCH DEFECTS ARE DISCOVERABLE OR LATENT, SHALL IN NO EVENT EXCEED THE PURCHASE PRICE OF THE PRODUCT. TOMO SHALL NOT BE RESPONSIBLE FOR LOSS OF USE, COMMERCIAL LOSS, LOST REVENUE OR LOST PROFITS, OR OTHER INCIDENTAL OR CONSEQUENTIAL DAMAGES. THIS WARRANTY IS SUBJECT TO CHANGE WITHOUT NOTICE. IMPORTANT: Please present sales invoice whenever you require our service during the warranty period. ...
Need help?
Do you have a question about the TM-MAF0609 and is the answer not in the manual?
Questions and answers