Advertisement

Tablet
Operation Manual
Please read the instructions first
Please read this Operation Manual carefully before using the equipment, so as to ensure safe
and correct use.
The instructions herein are premised on the default values of the equipment.
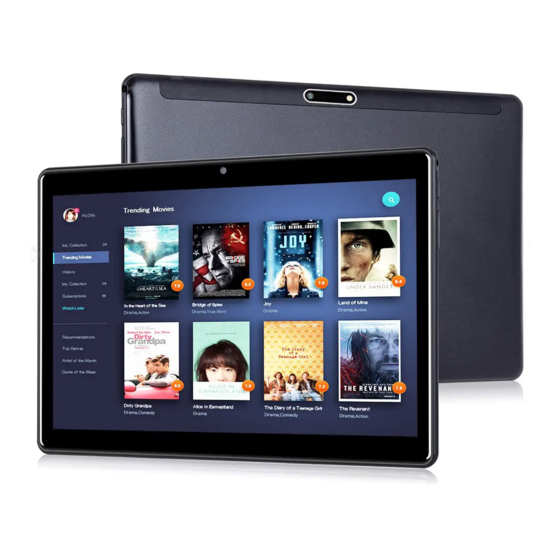
The images and screen shots used herein may differ from the appearance of the actual
product.
Available features and additional services may vary by equipment, software or service
provider.
Our company shall not be responsible for problems resulting from third-party applications.
K118
All Right Reserved (2021)

Advertisement

Table of Contents
loading
Need help?

Need help?

Do you have a question about the K118 and is the answer not in the manual?

Questions and answers

Miguel E. SUAU
January 22, 2025

FORGOT PIN SCREEN LOCKED, HOW TO RESET WITHOUT GOING TO SETTINGS

1 comments:
Mr. Anderson
May 14, 2025

To reset the screen lock PIN on the ZONKO K118 without accessing settings, follow these steps:

1. Power off the tablet.
2. Press and hold the Volume key.
3. While holding the Volume key, press and hold the Power key for about 10 seconds.
4. Release the Power key but keep holding the Volume key to enter factory mode.
5. Use the Volume+ key to select "clear EMMC" and press the Power key to confirm.
6. Select "Formatting" to restore factory settings.

This process will erase all data and remove the screen lock.

This answer is automatically generated

terri
April 14, 2025

stuck in fast boot MODE 1

Subscribe to Our Youtube Channel

Summary of Contents for ZONKO K118

  • Page 1 Tablet K118 Operation Manual Please read the instructions first  Please read this Operation Manual carefully before using the equipment, so as to ensure safe and correct use.  The instructions herein are premised on the default values of the equipment.
  • Page 2: Table Of Contents

    Contents Introduction ............................. 4    Acknowledgement ............................4   Introduction to the Product: ..........................4   Market positioning: ............................4   Design principles: ............................. 5   Detailed parameters ............................6 Getting Started ..........................1    Introduction to Accessories ..........................1  ...
  • Page 3   Clock ................................17   Tape recorder ..............................17   Calculator ............................... 17 Safety instructions ......................... 18  Precautions ..........................18-19  Answers to frequently asked questions ................. 19-20  Warranty content .......................... 20 ...
  • Page 4: Introduction

    1. Introduction Acknowledgement Thank you very much for choosing this product. K116 is a 10.1-inch tablet computer. The main chip used is SC9863A based on Android 10.0-11.0 operating system, which is novel and can easily expand the latest third-party applications in the market. The product is provided with built-in functions such as, WIFI, BT, GPS, FM,which can easily realize wireless communication and wireless network functions, and render it possible to surf the Internet anytime and anywhere;...
  • Page 5: Design Principles

    Design principles:  The SpreadtrumSC9863 main chip of MediaTek is a highly integrated baseband platform, which integrates modulator and application processing subsystem and integrates Bluetooth, WIFI, FM and GPS modules. Integrated RF solutions furnish excellent radio performance under strict environmental conditions. The chip integrates Eight-core ARM Cortex-A55 MPCoreTM, and supports all types of startup interfaces, including parallel NAND flash memory or EMMC, and 64-bit LPDDR2 or LPDDR3, to achieve the best performance in operation, so that customers can have a better experience.
  • Page 6: Detailed Parameters

    Detailed parameters Type Name Parameter Model K116 CPU type spreadtrum SC9863A CortexTM A55 MP8 1.6Ghz CPU speed 1.6GHz GPU speed IMG GE8322 Memory Hard disk 32GB System 10.0 Display 10.1-cunFHD 1920*1200/800*1280 Camera Front200/500/ back 500/1300 with flash Click screen 5-point touch/G+G WIFI 802.11b/g/n Product parameter...
  • Page 7: Getting Started

    Getting Started Introduction to Accessories Check whether there are the following items in the packaging box of the product:  MID equipment  Operation Manual  Power adapter  type-CUSB cable  Or other accessories For other accessories, please contact the dealer for purchase Install SD memory card This equipment comes with built-in storage.
  • Page 8: Description Of Buttons And Interfaces

     It is on nly allowed to o use chargers s approved by y our compan ny. Unauthor rized chargers s will cause b battery damag ge or damage to your equip pment. scription n of butto ons and i nterfaces Func ction...
  • Page 9: Boot Wizard

    Boot wizard Setting the language Click ENGLISH(UNITED STATES), then select the required national language, and then click START to proceed to the next step. Setting the WIFI Please don't link WIFI here, don't enter your password, and please select Set Up offline to operate.  ...
  • Page 10: Setting The Date And Time

    Setting the date and time Choose to adjust the local time zone, date and time, and then click Next to proceed to the next step. Setting Google Services Select the Google Service users want to open or close, and then click More to proceed to the next step.
  • Page 11: Setting Mid Password

    Setting MID password Set the PIN password. If users don't need to set the PIN password, click Skip and select Skip anyway to enter the main interface.  ...
  • Page 12: Gesture Operation

    Gesture operation Users can directly operate icons, buttons, keyboards and interfaces on the touch screen with your fingers Including the following operations:  Click: Click the screen slightly once with your fingers For example, click an application icon to open the application. ...
  • Page 13: Basic Operation

    Basic operation Main screen After booting and unlocking, users can see the main screen, which contains the following contents:  At the top of the screen is the status notification bar, which displays battery power, network signal, time and other icons. Pull down from the top to open the status notification bar panel; ...
  • Page 14: Status Notification Panel

    Display a list of recently opened applications, which can be Last run accessed quickly after being touched Main screen Pull up in the main screen to enter the APP application interface Status Display prompt information and equipment status icons, and pull notification down to expand the status notification panel Status notification panel...
  • Page 15: Locking And Unlocking The Screen

    Locking and unlocking the screen Locking the screen:  Automatic screen lock: when the equipment is not used for the set sleep time, the equipment will automatically lock the screen;  Manual screen lock: lock the screen manually by pressing the power button briefly. Unlocking the screen: ...
  • Page 16: Rotating The Touch Screen

    automatically locked. If users don't perform any operation on the equipment within the set time, the screen of the equipment will be automatically locked. Rotating the touch screen This equipment is provided with a built-in gravity sensor. When rotating the equipment, the interface will automatically rotate in the direction of the equipment.
  • Page 17: Communication Function

    Communication function E-mail Gmail Click the Gmail icon in the application list to enter. This function supports mail accounts of Google, Outlook, Hotmail, Live, Yahoo and Exchange protocols Users can receive and send mails through Gmail account, and it is necessary to add or create an account when users log in to Gmail for the first time.
  • Page 18: Network

    Network Browser Click the Browser icon in the application list to enter.  Accessing web pages 1. Enter the browser function and access the main page by default; 2. If it is necessary to visit other web pages, click the "URL Input Field", enter the URL, and click the "Go"...
  • Page 19: Play Store

    Play store Click the Play Store icon in the application list to enter. By using the Play Store, users can quickly and easily download a massive number of applications to the equipment (it is necessary to set a Google account when users log in to the Play Store for the first time) Enter the main interface of the Play Store after setting successfully: Find the required application and click to enter it;...
  • Page 20: File Manager

    Name Definition Camera b button lick to take pho otos Photo mo lick Select to en nter photo mod Video r recording lick Select to en nter the video r recording mode mode Picture p preview lick Enter to pr review the pictu ures Switch k...
  • Page 21: Browsing Pictures

    equipment; 2. Based on the file encoding method, some files may not open properly. Users can browse and open the file manager to view downloaded content, pictures or videos, audio files, documents and other files, applications, etc. Note: when storing many files, it may take some time to load the files. ...
  • Page 22: Playing Video

    in the upper right corner ; during playing, click the screen to stop playing. button  Details in the upper right corner of the title 4. To view file details, click the bar; 5. Click the picture and to send files via MMS, email or Bluetooth. Playing video Users can play videos in Album or...
  • Page 23: Clock

    schedule as required.  After finishing entering relevant information, click Finish. 2. The schedule can be viewed daily, weekly, monthly and completely. 3. To delete a schedule, click the schedule to be deleted, click and then select Delete. Clock Click Clock in the application list to enter.
  • Page 24: Safety Instructions

    Safety instructions Please use this product carefully under the following circumstances:  Plane It is forbidden to use this product on the plane, so please turn off the equipment before boarding. When the plane has not yet taken off or just landed, please also comply with the regulations of airlines on the use of wireless electronic equipment.
  • Page 25: Answers To Frequently Asked Questions

    temperature is too high or too low, otherwise the equipment, batteries and chargers may fail as a result.  Only use the original accessories of this equipment; unauthorized accessories may damage this equipment and shorten its service life.  Please do not expose the equipment, batteries and chargers to strong shock or vibration, so as to avoid equipment, battery and charger failure.
  • Page 26: Warranty Content

    in a prompt manner.  The Google account cannot be logged in in the step of the boot wizard interface. The Google account cannot be logged in the boot wizard interface. Please skip the next step and log in to Google account after entering the main interface directly. ...
  • Page 27 CE Statement Herby, Shen zhen KaiDa technology digital co., LTD. declares that this Tablet,K118 is in compliance with the essential requirements and other relevant provisions of Directive 2014/53/EU. In accordance with Article 10(2) and Article 10(10), this product allowed to be used in all EU me mber states.
  • Page 28 2. DECLARATION OF CONFORMITY I hereby declare that the product Product: Tablet Model No.: K118, K716, K718, K810, K910, K10A, K10B, K10C, K10D, K11A, K150, K116 Trade Mark: ZONKO Hardware Version: M107_MB_V1.120191212 Software Version: K116_9863A_v1.0_2021-04-28 Accessories: Adapter Information: Model: BCT050200-078U Input: AC 100-240V, 50/60Hz, 0.3A...
  • Page 29 EN 61000-3 3-3:2013+A1 1:2019 ETSI EN 30 00 328 V2.2. .2 (2019-07) ETSI EN 30 03 345-1 V1 .1.1 (2019-0 ETSI EN 30 03 345-3 V1 .1.1 (2021-0 ETSI EN 30 03 413 V1.2. .1 (2021-04) (Title(s) of regu lations, standar rds, etc.) All e essential rad...

This manual is also suitable for:

K116

Table of Contents

Save PDF