Table of Contents
Advertisement
Quick Links
Advertisement
Table of Contents

Related Manuals for BPE Smart

Summary of Contents for BPE Smart
- Page 1 AC EV ChargeDepot 22kW Smart Socket User & Installation Manual...
-
Page 3: Table Of Contents
User Manual Contents ............1 1. Safety Information..............1 1.1. Important safety instructions........1 1.2. Notes................2 2. Specification................3 2.1. Data-sheet..............3 2.2. Features.................4 2.3. Dynamic Load Balancing..........4 3. Preparation for Installation............5 3.1. Installation requirements..........5 3.2. Electrical Wiring Diagram..........6 3.2.1. 400V three phase.........6 3.3. Installation Considerations.........6 4. - Page 4 BPE Smart App Setup ..............20 1. App Setup ..................21 1.1 Download BPE App............21 1.2 Connecting the EV Charger..........21 1.3 Scanning the QR Code...........22 1.4 Home Page..............23 1.5 Set Charging Times............24 1.6 Settings Page ..............25 1.7 DLB Options..............26 1.8 Troubleshooting..............27...
-
Page 5: User Manual Contents
1. Safety Information 1.1. Important Safety Instructions This document contains important instructions and warnings that must be followed for both installation and maintenance of the EV Charger. WARNING • Read this entire document before installing or using the EV Charger. •... -
Page 6: Notes
CAUTIONS • Do not use private power generators as a power source for charging. • Incorrect installation and testing of the EV Charger could potentially damage either the vehicle’s battery and/or the EV Charger itself. Any resulting damage is excluded from New Vehicle Limited Warranty and the EV Charger Limited Warranty. -
Page 7: Specification
2. Specification 2.1 Datasheet... -
Page 8: Features
2.2. Features • Built-in with over-voltage protection, over-current protection, over temperature protection, ground fault detection, CP abnormal signal protection and Type A RCD for Europe standard. • Operating temperature range: -25°C - 55°C. • IP65 protecting rate, operating humidity range 0-95% for indoor and outdoor. • Built-in temperature sensor for fire protection. • Easy cable storage. • The ramp-down current mode protects the EV batteries. •... -
Page 9: Preparation For Installation
3. Preparation for Installation 3.1. Installation Requirements Installation of the EV Charger requires that you: • Calculate the existing electrical load to determine the maximum operating current. • Calculate the distance to ensure minimal voltage drop. • Obtain any necessary permits from the local authority that has jurisdiction and confirm that the follow-up inspection has been scheduled by an electrician after the installation is complete. •... -
Page 10: Electrical Wiring Diagram
3.2. Electrical Wiring 3.2.1. 400V Three-Phase The L1, L2, L3, PE, and N should be wired according to local requirements. The phases used must measure 400V (±10%). • WARNING: Each ground must be connected to neutral at only one point, or the EV charger cannot operate. • WARNING: Before installing the EV charger, identify the type of utility service connection available on site. If you are unsure about the type of connection available at the service panel, consult an electrician for assistance. -
Page 11: In The Box
4. In The Box Item Quantity EV Charger Wire Box Wirebox Mounting Template RFID Card (optional) M32*1.5 cable gland M6*8 Screws 8*40 Socket head screw and anchoring 8*40 Flat head screws and anchoring Position Template DLB box (sold seperatly) -
Page 12: Installation Instructions
5. Installation Instructions 5.1. Step-by-Step Installation Instructions 5.1.1. Bottom Wiring Configuration Wall Step 1 Drill Position Position the mounting template The 6 points on on the wall where the EV the position plate Charger will be located. >0.5M The picture shows the distances we recommend. - Page 13 Step 3 Install the EV Charger to the Mounting Bracket Align the side holes of the EV Charger to the panel’s side Left hole position holes. Right hole position Installation Use the 4pcs M6*8 screws to fix the EV Charger to the mounting bracket as picture shows.
-
Page 14: Top Entry Configuration
5.1.2. Top Wiring Configuration Step 1 Wall Drill Position Two points on the Position the template on top and bottom of position plate the wall where you wish to install the EV Charger. >0.5M The picture shows the distances we Side of wall recommend. - Page 15 Step 3 Knock out on the back of the EV Charger Left hole position Right hole Find the hole for the knock position out located on the back on EV Charger. Use the 4pcs M6*8 screws to fix the EV Charger to the mounting bracket as the picture shows.
-
Page 16: Rear Entry Configuration
5.1.3. Rear Wiring Configuration Step 1 Wall Drill Position The 6 points Position the mounting on the position template on the wall where plate the EV Charger will be located. The picture shows the >0.5M distances we recommend. Side of wall At a minimum of 120cm from Hole for the floor level. - Page 17 Step 3 Secure the EV Charger to the Mounting Bracket Left hole position Right hole Find the hole for the knock position out located on the back on EV Charger. Use the 4pcs M6*8 screws to fix the EV Charger to the mounting bracket as the picture shows.
-
Page 18: Set The Operating Current
WARNING: Be careful of electric shock! Before use, use a voltmeter to confirm that there is no voltage on the power supply line or terminal to ensure that the power has been cut off. 5.2. Reinstall the sealing cover and Turn Power ON • Use a screwdriver to lightly secure the sealing cover by installing only the top screws ar 1.5N·M~1.8N·M torque. •... -
Page 19: Leakage Test
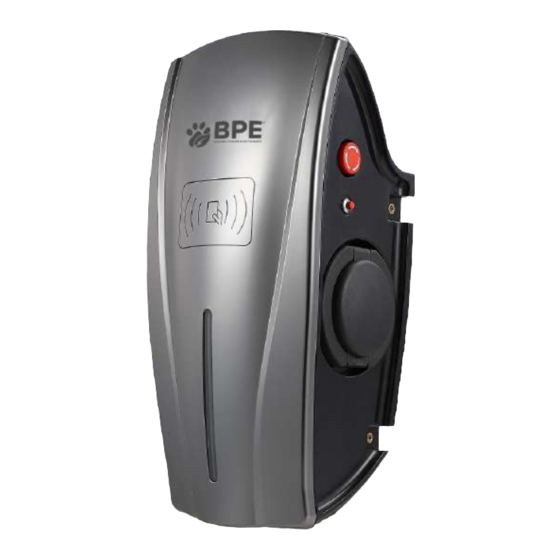
5.4. Leakage Test • Located just below the Emergency Shutdown Button is a small red button which is designed to perform a Leakage Test to ensure that there are no faults within the EV Charger. • When pressing this button, the MCU will control the circuit to send out a small 10mA analog DC leakage to the Type A RCD to ensure it is functioning properly. -
Page 20: Operating Status
6. Operating Status 6.1. Power ON Checking Check Content Check and ensure the circuit breaker for the EV Charger is correctly selected. Confirm that there is no short circuit between the AC input L1/L2/ L3/N/PE terminals. Confirm that the EV Charger is not connected to the vehicle. Ensure the circuit breaker is closed. The charger is powered on, and the power-on-self-check is completed in about 10 seconds. After the power-on-self-check is completed, observe the status of the LED indicator. Normal standby: Green flashing light ON. Equipment failure: Yellow light always ON. -
Page 21: Buzzer Prompt Description
Poor grounding/Reversed Red Light ON wire connection Over-voltage Protection Red light flashes (flashing once every 500MS intervals, and then repeats after waiting for 2 seconds) Under-voltage Protection Red light flashes (2 flashes at 500MS intervals, and then repeats after waiting for 2 seconds) Over-current Protection Red light flashes (interval 500MS) Temperature Red light flashes (interval 200MS) Leakage Protection Red light flashes (interval 500MS flashes 3 times, wait 2 seconds and repeat) LED board is offline The yellow light is on once and then flashes 2 times intermittently (after the yellow light is on for 1 second, it flashes 2 times and 2 seconds at an interval of 250MS) Plug and auto-start... -
Page 22: Maintenance Instructions
• If a ground fault occurs, first make sure that the grounding cable carries voltage, and then check that there is no high voltage in the system, and then repair the EV Charger. 7.2. Warranty Description • BPE Amstel 22kW EV Charger has a 3 year warranty. • Ensure that the EV Charger has undergone strict quality commissioning. During the warranty period, if the quality problems occur under normal use, the company will provide a replacement. • The user’s improper handling, installation, incorrect use and maintenance, negligence or natural damage to the product and failure of normal use are not covered by the warranty. -
Page 23: Risk Notification
• Do not disassemble or modify charging facilities and wiring without authorisation, otherwise it may cause fire and electric shock accidents. • In the event of a power failure, there may be a risk of electric shock; charging equipment maintenance is not allowed when the power is not disconnected, and there is a risk of electric shock. 7.4. Risk Notification • Please confirm whether the parameters of the electric vehicle and the charging equipment match before use, otherwise it may cause damage to the vehicle. • It is strictly forbidden to use the EV Charger in the case of equipment failure. -
Page 24: Bpe Smart App Setup
BE Smart App Setup... -
Page 25: App Setup
1. App Setup 1.1. Download the BE Smart App iOS: Android: 1.2. Open the App and select “Add EV Charger”... -
Page 26: Scanning The Qr Code
1.3. This will allow you to scan the QR code located on the side of the EV charger. Or you can choose to manually enter the serial number of the unit located next to the QR code. The password is set to 123456 as default, this can then be changed once the connection is complete. -
Page 27: Home Page
1.4. Once the Bluetooth connection is complete, you will be able to select the charger and enter the control page. Here you will get details of your current charging session and set your Smart Tariff charging times. You will also be able to remotely start and stop charging sessions from this page. -
Page 28: Set Charging Times
1.5. If you select "Set Charging Times", you will be able to set the precise time you wish for your EV to begin charging. This is beneficial for those who are on a cheaper night-time tariff where you can charge your EV during off-peak hours at a reduced electricity rate. -
Page 29: Settings Page
1.6. If you select the settings wheel in the top right hand corner, it will bring you to the settings page. Here you can adjust your Max Charging Current, enable RFID card use, Setup Wi-Fi, etc. -
Page 30: Dlb Options
1.7. By selecting the Dynamic Load Balancing option, you will be brought to this screen where you can choose your operating mode: Normal Mode: In this mode the DLB will act as normal. It will reduce to current draw of the EV charger to match what figure you input on the DLB box. Photovoltaic Mode: In this mode you will only be charging with 6A from the Grid. -
Page 31: Troubleshooting
10 seconds or until you hear a beep • This will reset the charger and you can attempt to reconnect to it using the Add EV Charger button on the home page If there are any further problem, please contact the BPE Technical Support Team Or reach out to: hello@badger.energy...
Need help?
Do you have a question about the Smart and is the answer not in the manual?
Questions and answers