Table of Contents
Advertisement
Quick Links
Advertisement
Table of Contents

Summary of Contents for dipper KN-201
- Page 1 Coffee Roast Analyzer KN-201 User manual Made in Taiwan Version 1.1.6...
-
Page 2: Product Description
Product description The Specialty Coffee Association (SCA), a body merged from European Specialty Coffee Association (SCAE) and American Specialty Coffee Association (SCAA), promotes using infrared analysis to assess the degree of coffee roast. The method used is called an Agtron number. A lower Agtron number indicates a higher caramelization and a deeper roasting degree. - Page 3 Agtron numbers are defined as two scale expressions designed to meet the specific needs of different types of coffee roast. Agtron Commercial Scale: This was originally defined as a roast scale, developed primarily for large commercial plants, corresponding to the carbide ratio of soluble organic matter, in order to evaluate soluble coffee in the form of dehydration.
-
Page 4: Package Contents
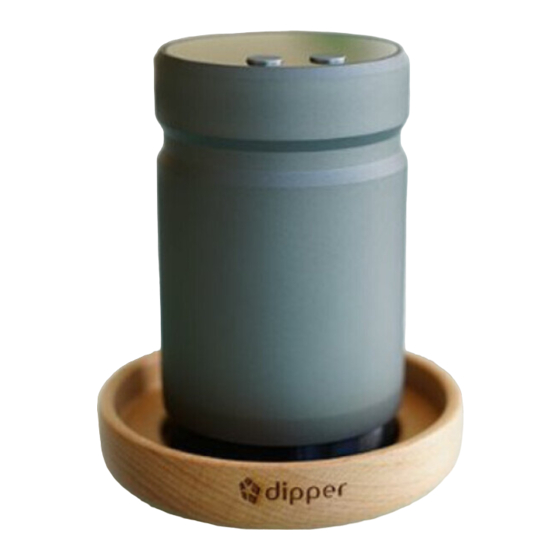
Package contents Host x 1 ● Sample cup / tray x 1 ● Flat scraper x 1 ● USB cable x 1 ● Calibration plate x 1 ● User manual x 1 ● Carry bag x 1 ● Precautions Please read this manual carefully before using the product. ●... - Page 5 When disposing this product, please follow the local legal rules. ● Features Super quality aluminum alloy body. ● Intuitive operation interface. ● Clear, easy-to-read OLED display. ● Quick warm-up and measurement process. ● Requires fewer samples and less wastes. ● Separate buttons for bean and ground measurements.
-
Page 6: Exterior Description
Exterior description Do not look directly at the NIR light source while power on to avoid injury. [Bean/Power] Press and hold to switch on/off the power supply. Short press to start measurement for coffee bean. [Ground/Setting] Press and hold to enter the set mode, short press to start measurement for ground coffee. -
Page 7: Operation Method
USB to the USB charging port of KN-201, then plug the charger into an AC110/220V socket. When orange light shows up, indicates charging is in progress; and green light indicates charging is complete. - Page 8 Press and hold [Bean/Power] button for 3 seconds in the power-on state, "PowerOff" will show on the screen. The equipment will enter into shutdown state. Coffee sample placement ● Since coffee samples that have just been roasted or are still temperature- charged will release infrared light.
- Page 9 ● First, make sure that the sample cup edge is clean and does not have any foreign objects such as coffee powder. Put KN-201 over the top of the sample cup, then press the corresponding button. For coffee bean, press [Bean/Power] button.
- Page 10 Place the colored side of the calibration plate on a flat surface, then place the KN-201 on the calibration plate. Make sure there is a solid fit all around. Press and hold [Ground/Setting] button for more than 3 seconds to enter into system setup mode (please refer to the corresponding chapter for details).
- Page 11 It is recommended to conduct calibration every six months. This product has a self-adaptability design. Frequent calibration does not help to increase accuracy. When carrying out calibration, the ambient temperature should be kept in the range of 25±5°C. Temperature outside of this range may affect the accuracy of the calibration.
-
Page 12: Setup Mode
Setup mode In the power-on state, press and hold [Ground/Setting] button for more than three seconds will enter into System Setup mode. In this mode, the left and right key functions are displayed in the table below: Short press Hold & press Left button Last Return... -
Page 13: Cleaning Method
(5) Reset Factory (1) Yes Select Yes the device will (2) No return to the factory set default parameters. The historical data will be emptied, and the calibration data will also return to the factory set value. It is recommended to carry out a calibration process after reset. - Page 14 Calibration plate cleaning ● Calibration plate surface might be stained with grease or dust due to finger or other items touched it. Contamination will cause calibration bias. To clean it, use a small amount of soft dishwashing liquid, and then rinse with water, dry quickly with soft paper towels or cloth.
-
Page 15: Specifications
Specifications Size Diameter 65mm, height 100mm Material Aerospace aluminum alloy with hard anode treatment Weight 280g (not include accessories) Display 128x64 monochrome OLED Light source NIR solid-state LED Sensor Multi-point phototransistors Warm-up time 30 seconds Measure range 0~150 Agtron Gourmet number Accuracy >99% Data records...
Need help?
Do you have a question about the KN-201 and is the answer not in the manual?
Questions and answers