
Summary of Contents for ECO DELTA POWER ECO-M-72S Series
- Page 1 ECO Shingled V2.1 Shingled single glass crystalline silicon PV Modules installation manual (IEC version) 1 / 16...
-
Page 2: Applicable Products
ECO Shingled V2.1 Crystalline Silicon Shingled Module Products Installation Manual (IEC) Applicable products This manual is intended for use with the following shingled modules: Monocrystalline PV shingled modules: ECO-xxxM-72S ECO-xxxM-60S Monocrystalline PERC PV shingled modules: ECO-xxxM-78SA ECO-xxxM-72S ECO-xxxM-72SA ECO-xxxM-72SB ECO-xxxM-66SA ECO-xxxM-60S ECO-xxxM-60SA ECO-xxxM-60SB... - Page 3 2. The introduction of installation manual 2.1 Overview Thanks for choosing the crystalline silicon PV shingled module of Eco Delta Power Co., Ltd. This manual contains important electrical and mechanical installation information. For correct installation and stable power output, please install and maintain the modules Carefully read and understand all installation instructions in the manual, and Keep this manual in a safe place for future reference (care and maintenance) and in case of sale or disposal of the modules.
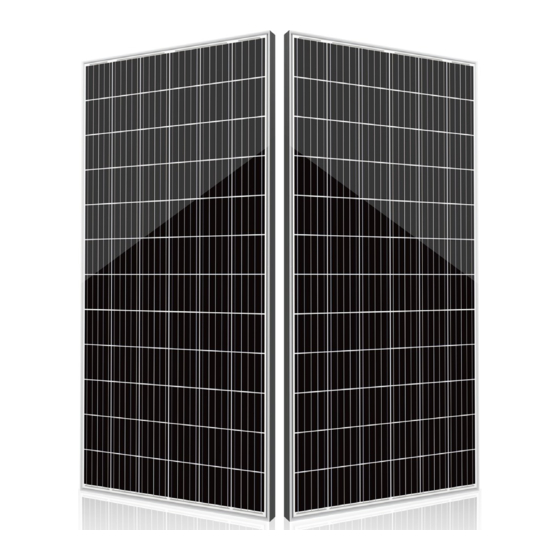
- Page 4 ECO Shingled V2.1 3. Product information 3.1 Structure and module description 1、Frame 2、Glass 3、EVA 4、Solar Cell 5、Backsheet 6、Adhsive 7、Junction box 8、Cable 9、Connector 10、Lable 11、Ground hole 12、Mounting hole 13、Drainage hole Figure 1 Section structure and module description 3.2 Module tag information Each PV module is affixed with two kinds of labels, providing the following information: Label: Describes the product name, PV module model, nominal power, rated voltage, rated current, open circuit voltage, short circuit current, maximum system voltage, PV module size and weight under standard...
- Page 5 ECO Shingled V2.1 4. Installation 4.1 General safety 4.1.1 Eco Delta’s modules have been evaluated by according to IEC61215 and IEC61730, application class A, modules rated for use in this application class may be used in system operating at greater than 50V DC or 240W. The safety class of the module is Class II, the class of fire rating is Class C (According to the standard is UL790)...
- Page 6 4.4.15 Modules can't be used to replace the roof and wall materials, partial replacement is not allowed. 4.4.16 Any part (including nameplate) of modules supplied by Eco Delta Power Co., Ltd can't be dismantled without permission.
- Page 7 ECO Shingled V2.1 5. Installation condition 5.1 Working environment Eco Delta’s PV module should operate in the following environmental conditions: 5.1.1 Ambient temperature: -20℃ to +45℃ 5.1.2 Operating temperature of the module: -40℃ to +85℃ 5.1.3 Humidity: 85%RH 5.1.4 Mechanical load bearing capacity: the modules have passed the mechanical load test of wind pressure of 2400Pa and snow pressure of 5400Pa;...
- Page 8 Figure 2 Module tilt angle 6. Mechanical installation All of the installation methods described here are for reference only. Eco Delta Power Co., Ltd is not responsible for providing the relevant installation parts and module installation services. 6.1 Conventional requirement 6.1.1 Ensure that the installed modules and supporting rail of modules are strong enough, the entire PV system...
- Page 9 ECO Shingled V2.1 during module installation shall be properly sealed to avoid rainwater leakage. 6.2.1.2 To be suitable for operation, reduce steam condensation and facilitate the ventilation & heat dissipation of the module during tile installation, the module shall be parallel to the wall or roof surface of the building, and the distance between module and surface of the wall or roof shall be at least 50mm to prevent wiring damage and to allow air circulation, ventilation and heat dissipation behind the module.
- Page 10 ECO Shingled V2.1 The supporting rail and other materials required (such as screw) shall be made of durable, resistance to environmental corrosion, anti-rust and UV-resistant materials. 6.3.2 Screw installation 6.3.2.1 Use anti-corrosion M8 bolts to fix through the mounting holes on the module frame. Each module needs to be fixed on 4 or 8 mounting holes, as shown in Table 1 Schematic diagram of mounting holes for fixed modules.
- Page 11 ECO Shingled V2.1 The support rail Clamp A Clamp B Fixture A: Fixture for edge module Fixture B: Fixture for intermediate modules For the 35*35 frame, the recommended value of X is 34mm For the 35*35 frame, the recommended value of X is 25mm For the 40*35 frame, the recommended value of X is 39mm For the 40*35 frame, the recommended value of X is 30mm Figure 4 Assembly fixture installation method...
- Page 12 ECO Shingled V2.1 Table 2 The clamping range of the fixture Note: A: Length of this type of module. B: Width of this type of module. C: The distance of clamp center1 from the edge of this type of module. D: The distance of clamp center 2 from the edge of this type of module.
- Page 13 ECO Shingled V2.1 7. Electrical installation 7.1 Electrical property 7.1.1 Under normal conditions, a photovoltaic module is likely to experience conditions that produce more current and voltage than reported at standard test conditions. Accordingly, the values of ISC and VOC marked on this module should be multiplied by a factor of 1.25 when determining module voltage ratings, conductor current ratings, fuse sizes, and size of controls connected to the PV output.
- Page 14 ECO Shingled V2.1 7.3.1 When connecting modules, make sure that the connectors of the same series module shall come from the same manufacturer or totally be compatible with each others, and the same requirements shall go to the connection terminals of series string and PV system, because the connectors from different manufacturers may not be compatible with each others, which easily leads to mismatch risk.
- Page 15 ECO Shingled V2.1 configure the inverter which allows negative grounding and contains isolation transformer (as shown in figure 7). +1500 +750 With negative Grounding Figure 7 Schematic diagram for grounding potential of the inverter 7.5.7 Eco Delta modules may be grounded using a third-party earthing device, provided that the earthing must be reliable.
- Page 16 (without limitations) and suggestions do not constitute a warranty, expresses or implied. 9.6 Eco Delta reserve the right to change the manual, module technical specification, nameplate or product information sheets without prior notice. ECO DELTA POWER CO.,LTD Office: No.65 Dangcang Road,Zhonglou,Changzhou,China Website: www.ecodeltapower.com Email: info@ecodeltapower.com...
Need help?
Do you have a question about the ECO-M-72S Series and is the answer not in the manual?
Questions and answers