Advertisement
Available languages
Available languages
Quick Links
ASTRONOMY
NIXIE IPS
MULTI-DISPLAY
CLOCK
I N S T R U C T I O N M A N U A L
V o l . 1 . 0 5 E N / D E
ATTENTION
• For safety and proper operation, please read this user manual carefully
before using it.
• In the process of transportation and storage, do not press, vibrate or immerse
the product, otherwise it will cause damage to the product.
• Do not place the product in an unstable place, in case the product falls and
breaks, causing injury.
• Do not disassemble or touch the circuit board and components in case of
danger. (May cause fire, electric shock or product malfunction.
• Use the provided USB cable and power adapter. Incorrect use of third-party
accessories may cause product failure.
• Do not repair or modify the product without authorization. Please contact
authorized dealers for repair. Manufacturer is not responsible for any
problem caused by unauthorized disassembly, repair or modification.
• Do not use this product under sunlight or humid environment.
• Children should use this product under adult supervision.
Advertisement

Related Manuals for MAINSPRING ASTRONOMY

Summary of Contents for MAINSPRING ASTRONOMY
- Page 1 ASTRONOMY NIXIE IPS MULTI-DISPLAY CLOCK ATTENTION • For safety and proper operation, please read this user manual carefully before using it. • In the process of transportation and storage, do not press, vibrate or immerse the product, otherwise it will cause damage to the product.
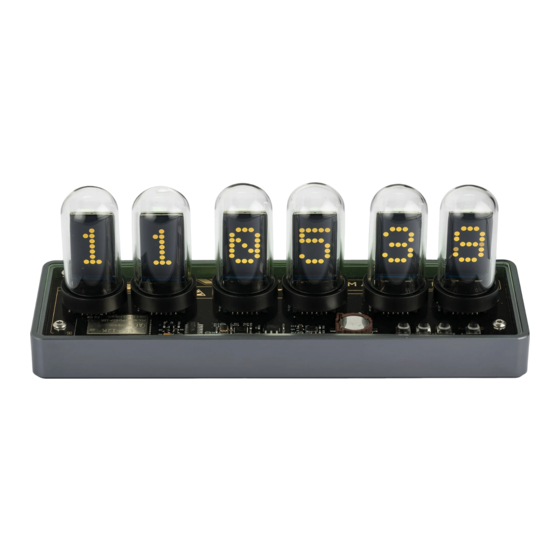
- Page 2 PARTS & SIZE CONTENTS FRONT Before assembling, please check whether the accessories in the package are complete. QUARTZ TUBE IPS SCREENS SPEAKER ALUMINIUM ALLOY BASE (Under) FINISHED PRODUCT BACK RGB LED FRONT BACK MAIN PART IPS DISPLAYS QUARTZ TUBES 6 PEICES 6 PEICES TYPE-C PORT PCIE CONNECTOR...
- Page 3 SPECIFICATION ASSEMBLY SILICONE PATS PRODUCT NAME MAINSPRING ASTRONOMY Place the pads at the bottom of the four corners of the product body. NIXIE IPS MULTI-DISPLAY CLOCK Silicone pads prevent product from slipping and scratching. It is DISPLAY TYPE 1.14” IPS DISPLAY recommended to install them before assembling rest of the accessories.
- Page 4 QUARTZ TUBES FIXATION(OPTIONAL) TIME & DATE Note: this step is optional. Align the quart tube to the circular double-sided tape and press down to secure it. Double-sided tapes ensure the tubes stick to the product securely, so as not SETTING TIME & DATE to break the glass tube accidentally.
- Page 5 ALARM CLOCK FACES SELECTING FACES SETTING ALARMS Double-click to preview alarms. Press to switch between six There are six faces preloaded. Click at time mode to preview faces. Select face by moving the cursor. Click to save and return to time alarms.
- Page 7 ASTRONOMY ACHTUNG NIXIE IPS MULTI-DISPLAY • Bitte lesen Sie diese Bedienungsanleitung vor der Verwendung des Geräts sorgfältig durch, um die Sicherheit und den ordnungsgemäßen Betrieb zu gewährleisten. • Während des Transports und der Lagerung darf das Gerät nicht belastet, erschüttert oder eingetaucht werden, da es sonst beschädigt werden kann.
- Page 8 TEILE & ABMESSUNGEN INHALT VORDERSEITE Überprüfen Sie bitte vor dem Zusammenbau, ob das mitgelieferte Zubehör vollständig ist. QUARZ-RÖHRE IPS SCREENS LAUTSPR ALUMINIUMSOCKEL ECHER (unten) FERTIGES PRODUKT RÜCKSEITE RGB LED VORNE HINTEN HAUPTTEIL IPS-ANZEIGEN QUARZ-RÖHREN 6 STÜCK 6 STÜCK TYPE-C BUCHSE OBEN PCIE ANSCHLUSS TYP-C USB...
- Page 9 TECHNISCHE DATEN MONTAGE SILIKON-PADS PRODUKTNAME MAINSPRING ASTRONOMY Befestigen Sie die Pads an der Unterseite der vier Ecken des Produktkörpers. NIXIE IPS MULTI-DISPLAY UHR Die Silikonpads verhindern, dass das Produkt verrutscht und zerkratzt. Es DISPLAY TYP 1.14” IPS DISPLAY wird empfohlen, sie vor der Montage des restlichen Zubehörs anzubringen.
- Page 10 BEFESTIGUNG DER QUARZ-RÖHREN ZEIT & DATUM (OPTIONAL) Hinweis: Dieser Schritt ist optional. Richten Sie die Quarz-Röhre auf dem runden doppelseitigen Klebeband aus EINSTELLEN VON ZEIT & DATUM und drücken Sie sie nach unten, um sie zu sichern. Doppelseitige Klebebänder Doppelklicken Sie auf , um das Zeiteinstellungsmenü...
- Page 11 ALARM ZIFFERBLÄTTER AUSWAHL DER ZIFFERBLÄTTER ALARMEINSTELLUNG Doppelklicken Sie auf , um eine Vorschau der Alarme anzuzeigen. Es sind sechs Zifferblätter vorinstalliert. Klicken Sie im Zeitmodus auf um eine Vorschau der Zifferblätter anzuzeigen. Wählen Sie ein Drücken Sie , um zwischen sechs Alarmen zu wechseln. Verwenden , um die Alarmzeit einzustellen.
- Page 12 BILDSCHIRMSCHONER Doppelklicken Sie auf in TIME MODE, um den Bildschirmschoner aufzurufen. Drücken Sie zum Beenden. Drücken Sie , um das Einstellungsmenü aufzurufen, gehen Sie zu SYSTEMEINSTELLUNG-BILDSCHIRM- , um die Farbe des Bildschirmschoners einzustellen. Drücken SCHONER-FARBE zum Beenden.
Need help?
Do you have a question about the ASTRONOMY and is the answer not in the manual?
Questions and answers