Table of Contents
Advertisement
Quick Links
User Manual
Welcome to SpiroClinic Pro
Before using your SpiroClinic Pro device and mobile application, please ensure that you
have read this user manual, all labeling and information provided with the product. The
user manual can be downloaded and/or printed from Inofab Health website and Apps.
13513.03
SCP-TF-18 R03
2/123
Advertisement
Table of Contents

Related Manuals for SpiroClinic Pro

Summary of Contents for SpiroClinic Pro
- Page 1 User Manual Welcome to SpiroClinic Pro Before using your SpiroClinic Pro device and mobile application, please ensure that you have read this user manual, all labeling and information provided with the product. The user manual can be downloaded and/or printed from Inofab Health website and Apps.
- Page 2 Device Indicators Handpiece Dock Performing a Lung Function Test General Method Performing a Spirometry Test with SpiroClinic Pro: Types of Breathing Maneuvers Expiration-Only (Ex-Only) Test Breathing Maneuver: Full Loop Test Breathing Maneuver: The Maximum Voluntary Ventilation (MVV) Test Breathing Maneuver:...
- Page 3 Preparation of Calibration Check Cleaning and Disinfection Batteries Instructions for Handpiece Battery Replacement Instructions for Dock Battery Replacement Disposal of SpiroClinic Pro Troubleshooting Orderable Accessories Terms of Warranty Electromagnetic Compatibility Manufacturer Information SpiroClinic Pro SCP-TF-18 R03 4/123...
-
Page 4: Product Description
SpiroClinic Pro is a spirometer that pairs (via Bluetooth ) and operates with smart devices running iOS, Android, or Windows. SpiroClinic Pro measures and displays certain parameters of lung function of the user. The user performs a spirometry test as described in the Performing A Lung Function Test section of this user manual. -
Page 5: Intended Use
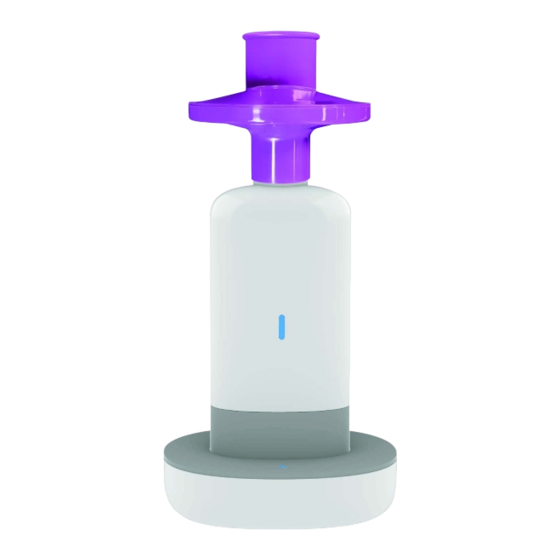
Figure 1: SpiroClinic Pro Box Content. Caution: Please check to ensure that there is no visible damage on any of the components of the SpiroClinic Pro. If the damage is present, do not use or attempt to repair the device, please contact the manufacturer directly. - Page 6 SpiroClinic Pro. SpiroClinic Pro is a multi-user device. The device can log the information and test results that belong to each specific patient. For each new patient, a new patient account must be created on the SpiroClinic App, so that each user's personal information and test results can be stored and logged.
- Page 7 ➢ Physical conditions predisposing to the transmission of infections, such as hemoptysis, significant secretions, or oral lesions or oral bleeding Please ask the patient if they have or suspect having any of the conditions above before use of the Spiro Clinic Pro. SCP-TF-18 R03 8/123...
- Page 8 1.5. Parameters The SpiroClinic Pro records and displays the following spirometry data: Parameters Definition Unit Forced Vital Capacity — The volume of air that can forcibly be blown out after taml inspiration Forced Expiratory Volume within 0.75 seconds: The volume of air that can forcibly be blown out within 0.75 seconds, after taml...
- Page 9 with MEF Forced Expiratory Flow from 25% to 75% of vital capacity — 25-75 synonymous with MMEF Mı̇ d-Expı̇ ratory Tı̇ me — synonymous with FET 25-75 25-75 /FEV The ratio of FEV to FEV 0.75 0.75 /FEV The ratio of FEV to FEV /FVC The ratio of FEF...
-
Page 10: Operation
2. Operation 2.1. Operating Environment The SpiroClinic Pro is designed for use in a clinical setting by multiple users. The operating conditions for the SpiroClinic Pro are specified as: Temperature: +15°C to +35°C Relative Humidity: 10% to 85%... - Page 11 SpiroClinic Pro should not be used in rapidly changing environmental conditions even if the conditions are in the recommended range. SpiroClinic Pro should not be used in the presence of flammable liquids or detergents, nor in the presence of inflammable anaesthetic gases (oxygen or nitrogen).
- Page 12 Place the AA batteries in the correct orientation, screw the battery cover back to the closed position. SCP-TF-18 R03 13/123...
- Page 13 The handpiece should give an indication light and be ready to use. SCP-TF-18 R03 14/123...
- Page 14 2.2.2. Dock Remove the battery cover by unscrewing it with the screwdriver provided with the device. SCP-TF-18 R03 15/123...
- Page 15 Place the AA batteries in the correct orientation, screw the battery cover back to the closed position. SCP-TF-18 R03 16/123...
- Page 16 The dock should give an indication light and be ready to use. SCP-TF-18 R03 17/123...
- Page 17 2.2.3. Airway Insert the SpiroWay Pro to the body with the handle forward. SCP-TF-18 R03 18/123...
- Page 18 2.2.4. Bacterial Viral Filter (BVF) Attach Bacterial Viral filter (BVF) to the SpiroWay Pro which is attached to the SpiroClinic SCP-TF-18 R03 19/123...
- Page 19 Do not use SpiroClinic without BVF. Do not use BVF more than once, and adhere to user instructions of the used BVF. Not all BVFs will make a sealed fit to SpiroWay Pro. Furthermore, some BVFs may not have the required low resistance, quality, or repeatability to ensure accurate measurements and effective protection against cross-contamination.
- Page 20 Follow the steps given in the app to create a user account or login to an existing account. ® Enable Bluetooth on the smart device or PC and pair it with the SpiroClinic Pro by following the instructions on the app. SCP-TF-18 R03 21/123...
- Page 21 2.3. Device Indicators 2.3.1. Handpiece There are LED lights located on the front of the device. These LED lights may be turned on and/or flashing various colors in various patterns. The LED lights indicate the current status of the device. Please see the following information for guidance on LED light indications.
- Page 22 There is a foreign object between the sensors. The LED is flashing red. (Check device error in troubleshooting section) The LED is flashing yellow and red. Over-the-air connection is being established. The LED turns on as solid red and fades out Battery low warning.
- Page 23 1. Make sure that the device and dock has batteries and is powered. 2. Insert the SpiroWay Pro into the device in the correct orientation. A ‘click’ will be heard when the SpiroWay Pro is inserted correctly all the way into the handpiece.
- Page 24 3. Attach a newly opened bacterial viral filter to the SpiroWay Pro. SCP-TF-18 R03 25/123...
- Page 25 4. Place the handpiece on the dock. SCP-TF-18 R03 26/123...
- Page 26 5. Open the SpiroClinic App on your smart device or PC. Log into your account or if you do not have one then first create a new user account. Select patient name from the patient list, or create a new patient account and enter the patient’s information. Entering the correct information is critical for calculating expected values.
- Page 27 6. After selecting the patient from the patient list, tap the plus button on the screen to start the test procedure. 7. Select the desired test mode and then follow prompts for the device to automatically adjust the zero-flow level. The device can perform the zero-flow level adjustment only if it is on the dock.
- Page 28 8. The app will prompt the operator to start a spirometry test. Ask the patient to sit with their back straight and feet resting on the ground. The patient will then need to place the BVF (Bacterial Viral Filter) in their mouth, past their teeth. (necessary for measurement accuracy) and form a tight seal around it with their lips.
- Page 29 1. Ensure that the device is connected. Select the Ex-Only test mode and the test screen will appear. 2. Read and follow the steps on the SpiroClinic application. 3. Follow the prompts from the SpiroClinic application for zero-flow level adjustment. SCP-TF-18 R03 30/123...
- Page 30 4. Patient will need to perform a forced expiratory maneuver. a. Tidal Start On: To ready the patient, direct him/her to inhale and exhale normally a couple of times through the device, then ask to take a fast and deep breath, filling lungs completely.
- Page 31 2. Approve the required ambient conditions provided by SpiroClinic Dock (make sure the values are correct as the measurement may be significantly affected by a wrong value) like temperature and relative humidity and then adjust zero flow level for the device. To get ready, the patient should inhale and exhale normally a couple of times.
- Page 32 ➢ The Maximum Voluntary Ventilation (MVV) Test Breathing Maneuver: 1. Ensure that the device is connected. Select the MVV test mode and the test screen will appear. 2. Enter the required ambient conditions (make sure you entered the correct values as the measurement may be significantly affected by a wrong value) like temperature and relative humidity and then adjust zero flow level for the device.
- Page 33 4. When the test starts, the patient should inhale and exhale normally at least 4 times, then the patient should inhale as deep as the patient can and fill his/her lungs completely. 5. After that, the patient should exhale the whole air in his/her lungs gently and slowly until the patient feels that all the air in his/her lungs feels completely empty without breaking the seal of his/her lips.
- Page 34 Must have no cough in the first second of expiration* Must have no glottic closure in the first second of expiration* Must have no glottic closure after 1 s of expiration Must achieve one of these three EOFE indicators: 1. Expiratory plateau (≤0.025 L in the last 1 s of expiration) 2.
-
Page 35: Signs And Symbols
NA: Not Applicable 2.6. Signs and Symbols Please note the following label, signs and symbols provided for the safe use and storage of the SpiroClinic Pro. Markings Descriptions “Manufacturer” This symbol accompanied by the name and the address of the manufacturer... - Page 36 Temperature Limit Humidity Limit Atmospheric pressure limitation Do not use if the package is damaged Keep away from sunlight Keep dry Explanatory information Type BF of Medical Electrical Equipment Serial Number SCP-TF-18 R03 37/123...
-
Page 37: Technical Features
Lot Number Ref Number IP Number Antenna symbol for devices that include RF transmitters The instruction manual/booklet must be read. Caution User Manual Bluetooth 2.7. Technical Features Flow / Volume measurement method Ultrasonic transducer measurement Power Supply Handpiece 2 x 1.5V AA alkaline batteries Power Supply dock 2 X 1.5V AA Alkaline batteries Dimensions handpiece... -
Page 38: Safety Warnings And Precautions
Weight handpiece (Without 192 gr batteries) Weight dock (With batteries) 196 gr Weight dock (Without batteries) 150 gr Weight of the Airway 21 gr Flow range 0 - 14 L/s Maximum volume measured 10 L Volume accuracy (Average) 2.00 % Resistance* 130 Pa x s/L*,** Volume resolution... - Page 39 To prevent damage to the Spirometry Module due to battery leakage or oxidation, remove all batteries if the SpiroClinic Pro and Dock is not to be used or is to be stored for a long period of time.
- Page 40 The user should also report such incidents to the manufacturer. The SpiroClinic Pro should never be used with a charging smart device. Make sure the smart device is unplugged from its charger before conducting a spirometry test.
-
Page 41: Maintenance
Handle SpriClinic Pro and all its accessories with care and make sure not to drop or expose to any extreme stress. When inserting the SpiroWay Pro airway into the SpiroClinic Pro device be caretam not to get your skin caught and pinched between the components. - Page 42 SpiroClinic App. 5. Then choose the Calibration-Check type as Multi-Flow Calibration Check or Linearity Calibration Check and follow the instructions from SpiroClinic App. If any problem with the calibration of the device is detected, contact the manufacturer immediately and do not perform any further tests with the device.
-
Page 43: Cleaning And Disinfection
● Hold the SpiroWay Pro under running tap water to rinse ● Leave the upright on a clean lint-free cloth at room temperature until it is completely dry. CAUTION: Do not insert the SpiroWay Pro into the SpiroClinic Pro device until it is completely dry. - Page 44 Once the SpiroWay Pro has been removed, use a a disinfectant* (Hydrogen peroxide >= 1 - < 2.5%, Glycolic acid >= 1 - < 2.5%) to wipe (for at least 30 seconds) all accessible surfaces of the device and dock to remove all visible contaminants as shown below. Please be extra caretam and gentle when cleaning the sensors to avoid any damage to them.
- Page 45 3.3. Batteries The SpiroClinic Pro device must be powered by 1.5V AA Alkaline batteries. The battery life of the SpiroClinic Pro is approximately 12-18 months when one session (2 tests) is performed per day. The battery charge level is continuously monitored by the device. When the device battery charge level is low, the device will not turn on and the device will notify the user as described in the Device Indicators section of this user manual.
- Page 46 2. Remove the battery cover as shown. 3. Remove the empty batteries. SCP-TF-18 R03 47/123...
- Page 47 1. Place the new batteries in the correct orientation. SCP-TF-18 R03 48/123...
- Page 48 2. Screw the battery cap back on SCP-TF-18 R03 49/123...
- Page 49 3. Store the device according to the storage requirements until next use. 3.3.2. Instructions for Dock Battery Replacement 1. Unscrew the battery cap using the screwdriver provided. SCP-TF-18 R03 50/123...
- Page 50 2. Remove the battery cover as shown. 3. Remove the empty batteries. SCP-TF-18 R03 51/123...
- Page 51 4. Place the new batteries in the correct orientation. 5. Screw the battery cap back on SCP-TF-18 R03 52/123...
-
Page 52: Troubleshooting
6. Store the device according to the storage requirements until next use. 4. Disposal of SpiroClinic Pro This product is not to be discarded as regular household waste but should be discarded as electronic waste in accordance with local regulations and returned to a collection point of recycling for electric and electronic devices. - Page 53 Remove causes of direct air current e.g. air Dock conditioner, opened window, fan, etc. The test does not start - Cannot Damaged or faulty Replace the SpiroWay Pro, contact the perform zero flow SpiroWay Pro manufacturer level adjustment Remove the batteries of the dock station, wait Error with the dock for 30 seconds and reinstall the batteries.
- Page 54 SpiroWay Pro is Refer to user manual for proper installation of installed incorrectly SpiroWay Pro There is a foreign object Check SpiroWay Pro to ensure that the lumen Device error between the sensors is not obstructed screen displayed SpiroWay Pro is dirty...
-
Page 55: Orderable Accessories
İnofab at https://www.inofab.health/. 7. Terms of Warranty SpiroClinic Pro, together with any accessories provided, is guaranteed for a period of 24 months, effective from the date of purchase, upon the provision of an invoice or sales receipt. -
Page 56: Electromagnetic Compatibility
8. Electromagnetic Compatibility Meeting the requirements for EMC (electromagnetic compatibility) and preventing the unsafe use of the device, medical devices including SpiroClinic Pro manufactured by Inofab Health Technologies conform to the EN60601-1-2 standard which defines the levels of immunity to electromagnetic interference as well as maximum levels of electromagnetic emissions for medical devices. - Page 57 Guidance and manufacturer’s declaration – electromagnetic immunity SpiroClinic Pro battery-operated spirometer devices are intended for use in the electromagnetic environment specified below. Users of these devices should assure that it is used in such an environment. Immunity Test IEC 60601...
- Page 58 61000-4-6 communications equipment should be used no closer to any part of the Radiated RF 3 V/m 80 MHz 3 V/m SpiroClinic devices including IEC 61000-4-3 to 2.7 GHz cables, than recommended separation distance calculated from the equation appropriate to the frequency of the transmitter.
- Page 59 RF transmitters, an electromagnetic site survey should be considered. If the measured field strength in the location in which the SpiroClinic Pro devices are used exceeds the applicable RF compliance level above, the SpiroClinic Pro device should be observed to verify normal operation.
-
Page 60: Manufacturer Information
İnofab Sağlık Teknolojileri A.Ş. Address: Üniversiteler Mah. İhsan Doğramacı Blv. No: 17/115 Çankaya / Ankara / Turkey Tel: +90 312 988 03 08 Web: https://www.inofab.health/ The SpiroClinic Pro Ultrasonic Spirometer and Accessories are CE certified (NB1984) products. SCP-TF-18 R03 61/123...
Need help?
Do you have a question about the Pro and is the answer not in the manual?
Questions and answers