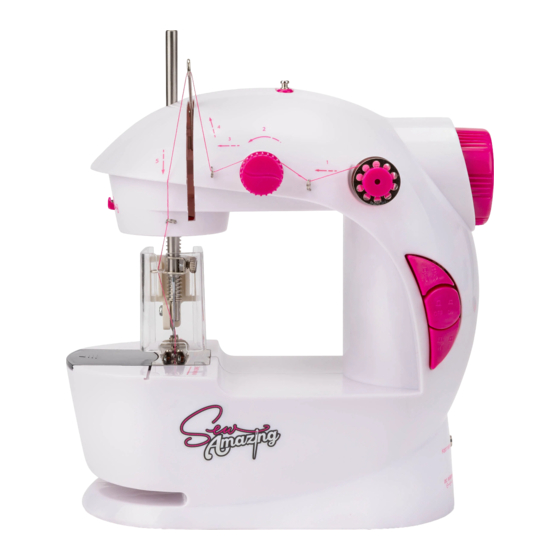
Summary of Contents for Sew Amazing Sewing Station TY6142
-
Page 2: Getting Started
GETTING STARTED? Scan the below code to access our tutorial videos Iphone: Open camera app and point at QR code then open link at top of screen Android: Use QR code reader or Google lens to scan code... - Page 3 (please refer to illustrations below for the locations of components mentioned throughout this manual) Thread Spindle Bobbin Winder Spindle Tension Hand-wheel Screw (Q) (2) Bobbin Holder Thread Trimmer Take up Lever (D) (4) Light Finger Guard Light On/O Switch Auto Sew Mode Needle On/O Switch Clamp...
- Page 4 IMPORTANT! Before inserting batteries or connecting to the mains, always make sure that the Auto Sew • button is in the o position (up position). • If you are using batteries, insert x 4 AA batteries into the battery compartment on the underside of the machine.
- Page 5 Remove the finger guard by squeezing in the 2 sides and pulling it out towards you. Remove Bobbin Holder by pulling the exposed top outwards. Be careful not to lose the spring. Place the Bobbin onto the bobbin holder so that it sits all the way to the end, then place the spring back onto the end of the Bobbin holder.
- Page 6 Remove the finger guard by squeezing on the 2 sides and pulling it out towards you. Remove cover to the bobbin compartment by sliding it o and away from the machine. Place the bobbin with the thread colour of your choice into the bobbin compartment leaving about 12cm of the thread extended out.
- Page 7 To ensure a smooth and flat seam on both sides of the fabric, a correct thread tension is needed. To loosen the thread tension, turn the tension screw to the left. Loosening the thread tension can be very useful while threading the machine as it is easier to pull thread through. Sewing on heavier fabric may also benefit from a looser tension.
- Page 8 Remove the finger guard by squeezing in the 2 sides and pulling it out towards you. Turn the hand-wheel away from you to raise the needle to its highest position. Loosen the needle clamp by turning the clamp screw toward you. You may need to use a small flat headed screwdriver, small pliers or a coin.
- Page 9 • Warning! Not suitable for children under 3 years. Sharp functional points, puncture hazard. • To be used under direct supervision of an adult. • For ages 6+ • ATTENTION! Non-rechargeable batteries are not to be charged. Rechargeable batteries are only to be charged by an adult or by children over 8 years of age.
- Page 10 Power Cuts out Machine could be jammed Power O . Check for blockages. Lift up footplate and wind hand wheel to lift the needle. Remove any material and or tangled thread. Make sure there is no damage to thread or needle, rethread if needed.
- Page 12 TY6142 Wilton Bradley Ltd., Heath eld, Newton Abbot, TQ12 6TL, UK. Wilton Bradley Europe B.V., Barbara Strozzilaan 201, 1083HN, Amsterdam, Netherlands. Design rights © 2019. Sew Amazing™ is a trade mark of WBL. Made in China.

Need help?
Do you have a question about the Sewing Station TY6142 and is the answer not in the manual?
Questions and answers