Advertisement
Table of Contents
Advertisement
Table of Contents

Summary of Contents for Microkit Solutions V2
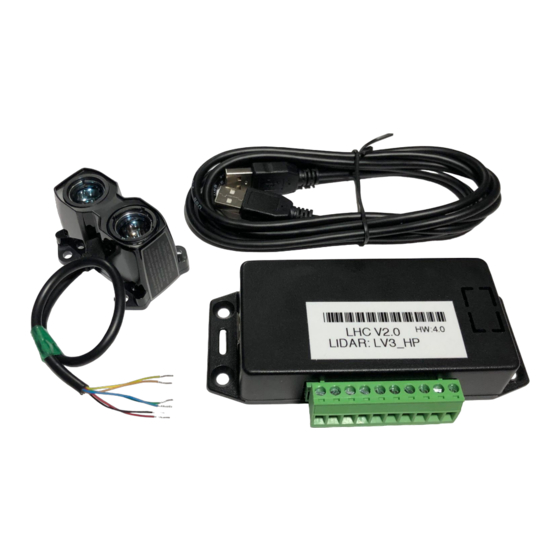
- Page 1 Announcement Controller V2.0 HW:4.0+ User’s & Installation guide Note: This guide is for V2 of the controller pictured below. If you have the previous unit, please use the other guide found at the product page online. Copyright © Microkit Solutions LLC...
- Page 2 The Zero point can be calibrated by shifting it +/- 1-4” inches to take into the account any flaring angle depending on the location of the LIDAR in compared to the main landing gear wheels. CONNECTIONS Refer to the following table for explanation of each PIN and connections. Copyright © Microkit Solutions LLC...
-
Page 3: Pin Connector
(Output) Audio (-ve) . D ifferential Audio output. (-ve line) No Connection. Leave empty. No Connection. Leave empty. No Connection. Leave empty. Please see Notes & Recommendations at the end of this guide Copyright © Microkit Solutions LLC... -
Page 4: Installation
If desired, Audio can be tested before installing or connecting the LIDAR unit. Just by applying power (even from a +9V small battery) and connecting the Audio cables. The software section explains how to test the Audio using USB. Copyright © Microkit Solutions LLC... - Page 5 EBridge_LHC. Use the driver if Windows did not auto-detect the USB COM Port. If you do need to install the driver, point it to the location you saved the driver folder. For Windows, a Simple Copyright © Microkit Solutions LLC...
- Page 6 Once you load the program, Click on Settings, and change Baud to 9600 if it was not selected. COM port could be different from shown here. The rest of the options are correct as default. Copyright © Microkit Solutions LLC...
- Page 7 Connect to the controller by typing: s creen /dev/tty.usbmodem14221 9600 Note 14221 can be different in your laptop. Use the same commands to test/verify/show and setup. Unpower the device and remove USB to complete the setup. Copyright © Microkit Solutions LLC...
-
Page 8: Usb Commands
30.44. System automatically takes the value once it detects correct sequence of number entered. Any mistake, just press enter and do it again. You can’t damage the controller by making mistakes here. Use Show command to confirm. Copyright © Microkit Solutions LLC... - Page 9 Its recommended the system is tested using a dummy access panel cover to attach the LIDAR before final location is selected and drilled. Copyright © Microkit Solutions LLC...
- Page 10 10) Almost all Audio panels/intercom will amplify the Audio signal, in certain situation or older equipments, it maybe necessary to add a small low-cost amplifier module to boost the audio. Contact us for some suggestions to resolve any audio issues. Copyright © Microkit Solutions LLC...
Need help?
Do you have a question about the V2 and is the answer not in the manual?
Questions and answers