Table of Contents
Advertisement
Advertisement
Table of Contents

Summary of Contents for mitrefinch T2
- Page 1 T2 and Management Portal User guide...
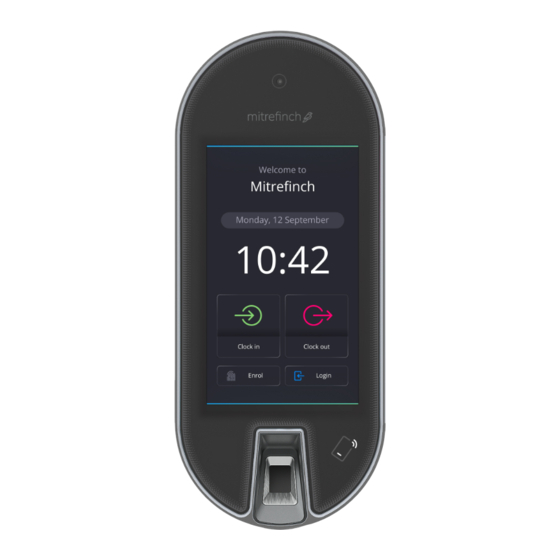
- Page 2 What is a T2? A T2 is a biometric authentication terminal used to allow a business to authenticate and track clocking data for users. The users do this by interacting with the device to register their arrival and departure time.
-
Page 3: Table Of Contents
Contents Specifications Installation procedure Installation steps Cabling and physical installation options Wall mounting bracket IP66 installations Configuration and deployment Connectivity Network settings and hardware registration Powering on and resetting the T2 Power and batteries... -
Page 4: Specifications
Specifications Everything you need to know about the T2 Case PTFE coated Magnesium Alloy Networking Ethernet, Wi-Fi (2.4Ghz) IP Rating IP66 Battery Backup Up to 60 mins Authentication Modes Face/Finger/Prox Contactless Clocking Onboard User Enrolment HD Video Camera Mic/Speaker 7” Hi-Res Colour Touchscreen (Capacitive) - Page 5 Mitrefinch OS Operating System Cabling Conduit Adaptor (Optional) Power 10W (typ) DC or PoE -10 to 40°C Operating Temperature Range Certifications CE/CB/FCC/MET/RCM/NRTL/UK CA Dimensions (H x W x D mm) 296x126x39...
-
Page 6: Installation Procedure
Fix the steel wall bracket to the wall in an appropriate position, ensuring there is enough space to mount the T2. Run all necessary cables to their position near the terminal. The T2 can be cabled directly into the back via a wall conduit or from underneath. The rear access port is recommended when an IP66 installation is required. -
Page 7: Cabling And Physical Installation Options
Mitrefinch specialist to do so. Cabling and physical installation options The T2 supports a wide variety of installation options. If installed correctly the T2 can offer full IP66 water and dust ingress protection to support use both outside and in environmentally challenging environments. -
Page 8: Wall Mounting Bracket
Cables can be fed through the circular hole ready for the T2. Once all the cables have been inserted, the T2 backplate can then be screwed to the T2, the set screws screwed into the holes in the bottom of the T2, and the T2 hooked onto the wall bracket. -
Page 9: Ip66 Installations
Placement IP66 installations The T2 is IP66 certified - installations that require protection against the ingress of water or dust must use the rear cable entry. Rubber seals are supplied as standard with all units and must be left fitted to the cable slots in the bottom of the unit before the rear plate is affixed. -
Page 10: Configuration And Deployment
T2. When on-site, wire the solution exactly as detailed in the graphical configuration (downloadable). During the setup phase for the T2, a device specific engineer pin code will be required in order to enable and configure the device. -
Page 11: Connectivity
Connectivity On the back of the T2 is an illustrative sticker detailing the connections on the unit. The following diagram outlines the purpose and function of these connections. Antennae (Not currently supported) An external antenna can be attached here with an MCX terminal... -
Page 12: Network Settings And Hardware Registration
If you have Ethernet and Wi-Fi and the ethernet fails, the unit will automatically switch over to Wi-Fi. Once booted the T2 will ask you to select your preferred network connection and configure DHCP or a static IP address. -
Page 13: Powering On And Resetting The T2
The engineering pin code(s) will be supplied to the installation engineer prior to installation. It is vital to remember that there is a unique code for each specific T2. Note: The factory reset option will erase the T2 and require it to be registered again. - Page 14 Restore current version This will re-install the current version. Note: The factory reset option will erase the T2 and require it to be registered again. The current config and user data will be restored back to the device after re-registering.
-
Page 15: Power And Batteries
T2 may be covered under the terms of that agreement, depending on your global location and the terms of your agreement. In the event of a failure you should call Mitrefinch on 0330 726 0066 for guidance. Warning The T2 is not user serviceable and physically opening the T2 will destroy the screen and the glass faceplate and should not be attempted. - Page 16 Manufactured by Mitrefinch Ltd., Mitrefinch House, Green Lane, Clifton, York, United Kingdom, YO30 5YY, Unit 4L, The Square Industrial Complex, Tallaght, Dublin 24, Ireland Contains radios for 802.11b/g Wi-Fi (2.4GHz) and 13.56MHz RFID. Compliant with directives 2018/53/ EU and 2011/65/EU. Full compliance information and certificates are available at the following internet address: https://mitrefinch.co.uk/compliance/...
Need help?
Do you have a question about the T2 and is the answer not in the manual?
Questions and answers