Advertisement
Quick Links
Advertisement

Summary of Contents for AMERICA FOOD SOLUTIONS TG16e
- Page 1 !"#$% !&'(% !)* +),-./0% 12%&3 4&0567% User Manual...
- Page 2 Company Profile !"#$%&'"()* '+ ,--./ 0)1( 2)&$#3 45$+* 6$+78$1#75'+9 :$'+&; "<)1'$&'=)" '+ >?@ $+* !"# $%&'()* :$+78$1#75'+9 #(5)) A'+*" 38 <53*71#" '+1&7*'+9 13::)51'$& '1) 15)$: :$1('+)"/ '1) :$A'+9 :$1('+)" $+* A'#1()+ 5)85'9)5$#35"B C# <5)")+#/ D) ($E) #D3 <53*71#'3+ %$")B F()5) D) 5)"<)1#'E)&;...
- Page 3 Introduction of the machine 7 inch LCD table top ice cream machine, small and exquisite and not take up much place, could place at random; Night keeping fresh mode Left material, will not be spoiled next day, no need to wash for 7 days; The capacity of machine is 12-16L/H;...
- Page 4 Parameter of machine Size 554*210*740(L*W*H) Cylinder volume 1.2L Hopper volume 4.8L Hourly capacity 60 cups/70g per hour Compressor Tecumseh/Danfu Voltage 220V/60Hz(115V/50Hz) Puffing method air pump inside low noise compressor and silent deceleration system Product configuration Full stainless steel 304 no residue hopper; Full stainless steel 304 integrated stretched hopper. Full stainless steel 304 evaporator and beater Optional function Pre-cooling system/Pasteurizer function/Hopper beater/ Touch button screen.
-
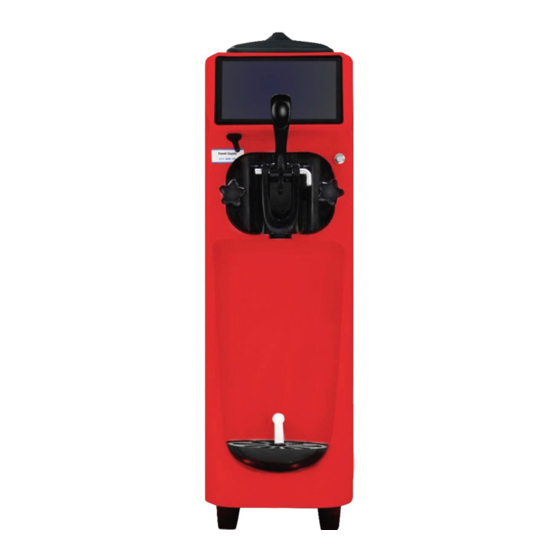
Page 5: Machine Appearance
Machine Appearance Control panel Water outlet valve Rebirth button Thickened water outlet valve Fasten screw Ware well and durable Fasten screw 2016 upgrades More suitable for body mechanics water drip tray More convenient,more easy Rebirth button: Ice cream cannot shape well when discharged after long time stops, press “Rebirth button”... - Page 6 Beater !G "#$%&'(&)$* +$, -.#$ /$'-$0 Special framework of beater Strong PC blade, can fit better with the inside of the cylinder ice cream is beaten more sufficient and make more creamy and softy ice cream 1.Stainless steel main frame of beater 2.Vane of beater 3.Blade of beater 4.Principal axis...
-
Page 7: Operation Interface
Operation interface Freezing: begin to make ice cream Play: common operation introduction Keeping Fresh: pre-cooling function of hopper, keeping material fresh Wash: press when need cleaning, only beater stirs Unfreezing: make the material soft Set:some setting of parameter... - Page 8 Refrigeration Interface Dynamic Condition Status Notification Current Ambient Temp. of Shape Ratio The current hardness of Current value ice cream Sensitivity of lacking The current motor speed material Number of cups of ice left time to freeze cream has been discharged Shape Ratio of ice cream Hopper Temp.
- Page 9 Refrigeration Interface Status Notification Current Ambient Temp. Current hopper Current Cylinder Temp. Temp. Current ice cream Shape Ratio of ice cream gear shift Stop freezing (go back to primary menu)
- Page 10 Fresh interface The equipment enters the fresh condition and the temperature of the basin is kept at a low temperature...
- Page 11 Defrost interface When the freezing cylinder opens, the temperature of the freezer rises,automatically returned after finishing defrost...
- Page 12 Cleaning interface Simple cleaning The icon of cleaning introduction dynamic state Depth cleaning introduction Stop cleaning button (var menu)...
-
Page 13: Setup Interface
Setup interface Rotate revising: no adjustment is recommended Hopper temp.: no adjustment is recommended Current protection: no adjustment is recommended Troubleshooting Checking: equipment failure warning Wifi setting: Internet of things exclusive Factory setting: return to factory parameters Stall settings: If the ice cream taste too soft, increase the value of some; the other hand, reduce the value of some Expansion-setting: the degree of puffing of ice cream Cycle time: when the refrigeration reaches 100%, the equipment enters the standby state time (not recommended adjustment) Lack sensitivity: the feed cylinder has the material, the equipment prompts the lack of material, the numerical adjustment of the... -
Page 14: Set Interface
Set interface Running current value: current running current value Power consumption: how much electricity is used Number of cups reset: the current cup number is zero Time setting: time date setting Due to environment temperature, the use of raw Power consumption/24h: how much electricity was used that day materials, personal taste different, can be adjusted Present cone: check the number of cups before that (When the hands pick up the top of the according to actual condition, the adjustment of... -
Page 15: Very Important
Very important Received equipment, ready to use in order to ensure food safety and health, first of all equipment to carry out the depth of cleaning... - Page 16 Prepare for the disinfectant Prepare for the things below: 1: Brush of different size 2: disinfectant 3: disinfectant effervescent tablet...
- Page 17 Equipment removal Put in clear water Gradually removed Gradually remove the head of the machine, the coupling, the coupling, the mixer, the blade of the mixer, the head of the mixer, and the sealing ring of the head,Spare parts including, discharge handle, lateral pin of discharge handle,valve pole,seals for valve pole, water drip tray, e.g. are put into a basin, add clean water and one piece of disinfectant effervescent tablet, use a towel and clean them up.
-
Page 18: Cleaning Parts
Cleaning parts Clean the discharge head and the D-ring Clean the beater shaft Clean the blender blades Cleaning the cylinder beater Clean the discharge head seal Cleaning the flute Clean the handle Cleaning couplings and seals After cleaning, dry the water on all parts and install them on the machine in the following order... - Page 19 !"#$%&%' ()*+#,-)# Hopper beater groove The hole of water outlet valve The seal groove of water outlet valve The hole of water outlet valve pole The hole of beater The hole of vane of beater Neck of beater blade The hole of coupling seal When cleaning parts, be sure to use the brush to clean the groove of the holes of each part, so as to avoid the residue of the raw material.
- Page 20 Smudge Vaseline Discharge handle horizontal tip Feeding stem Coupling seals Vaseline D-type sealing ring coupling Smudge vaseline to rubber parts before installing parts (In order to extend the service life of the parts, use a little bit more.)
-
Page 21: Beater Assembly
Beater assembly 1)the blade of the mixer is combined with the mixer. Note that the 2)The beater shaft is combined with a pre-installed mixer slots can be combined together (as shown in the picture above). (as shown in the figure above) Stirring shaft The beater blade 3)two beater pieces are installed on top of the mixer, with a special... -
Page 22: Equipment Installation
Equipment installation Installed in the ice cream machine freezer in the Be sure to install the sealing ring before installing innermost groove, insert the card into the the coupling (* notice the direction of the extension when there will be a sense of expansion installation of the sealing ring, as shown). - Page 23 !"#$%&'() *(+),--,)$.( Discharge valve stem, D-type seal before the installation, be sure to Insert the material stem into the Adjust the stem direction properly and the apply Vaseline material head, and notice the upper and square opens to itself. The installation is lower direction of the valve stem correct as shown in the figure.
- Page 24 !"#$%&'() *(+),--,)$.( Tighten the fastening nuts on both sides of the material head Put on the handle and put the top of Installed the handle...
- Page 25 !"#$% &%'$#"#( Injection water fclean the feeding pipe Pour out the waste water 1.Add 5 liters of water plus a Disinfection tablets to the hopper of the machine and clean the feeding pipe with a brush. Press the cleaning button for 5- 10 minutes and then pour out the hot water.3 times or more than 3 times, pour into the hopper until the hot water is poured out again and again.
- Page 26 Ice cream making Make sure that the above work is done and you can start making ice cream...
- Page 27 Ice cream making Pour the prepared material into the hopper Press "Wash" Press“Stop”after 2 minutes Press "Freeze" Refrigeration interface 1 Refrigeration interface 2...
- Page 28 Ice cream making As the display screen show, The machine can make the ice cream after the shape rate up to 85. At the first time to make the ice cream, it need to make first 4 pieces ice cream and pour it again into the hopper in order to prevent the material from asymmetry After that, it depends on the softness or hardness you like.
- Page 29 Ice cream making Crispy cone ice Cup type strawberry cream ice cream Generally, can make the ice cream when the shape rate arrive at 66 or more , but if it reach to 80,the ice cream will be tastier.
- Page 30 !"#$%&' (')*+ Before opening, please make sure that all the preparatory work are finished and the machine without any problem...
- Page 31 Before opening, please do the clean for the machine. Pi water into the hopper Clean the feeding pipe Press "Wash" Pour water into the hopper and use the brush to clean the feeding pipe. Press the cleaning button to pour out the waste water. ( Cleaning function: make the beater work and convenient for water to go into freeze cylinder)
- Page 32 !"#$% &%'() Pour hot water into hopper Let the dirty out Add 5 litres of boiled water (above 95 degrees) to the hopper, plus a disinfectant tablet.Press the cleaning button for 10 minutes and then pour out the hot water.3 times or more than 3 times, pour into the hopper until the hot water is poured out again and again.
- Page 33 !"#$%&'() Pour the prepared material into the hopper Press "Freeze" Put the all the water out, add the ice cream powder , press " Freeze" making the ice cream.
- Page 34 !"##"$ %&'()*+(,"&' The machine can make the ice cream if the shape rate reach 85 (please make first 3-4 piece ice cream and pour it again into the hopper to make sure the taste)...
- Page 35 !"#$% &' (")*" Refrigeration interface Standby mode When the shape rate reach 100, the machine will convert to standby mode for 5 minute. after 5 minutes, the machine will be automatically redirected to the refrigeration mode. in the standby mode, the machine can make the ice cream normally and the system of the machine will be directly convert to the refrigeration mode.
- Page 36 !"# Journal Before closing , if there still left some or even no ice cream liquid in the cylinder, and the next day also sold normally, we suggest to do the cleaning for the machine. Pour water Clean the feeding pipe Turn off the powe Clean machine 1.If there is left some ice cream machine material, you can pour it out and keep it fresh in the refrigerator in order to be use again in the next day.
- Page 37 !"#$% &'() Before closing , if there still left some or even no ice cream liquid in the cylinder, and the next day also sold normally, please open night preservation mode( with Pre-cooling system) Click "Fresh) Fresh interface Clean machine 1.Please open preservation mode if there is left liquid in hopper before closing.
- Page 38 !"#$%$&$#' ()*+,) -). /"0 Please clean carefully the ice cream that sticks to the plastic head outlet and fully sterilize it with disinfectant 1. Please spray 3-5 times of disinfectant to the plastic head outlet to drop the attached ice cream down 2.
- Page 39 !""# $%%&'()* Tighten D rings Tighten outlet head nut evenly The bulge of sealant seal of the outlet head must be matched with the concave part of the outlet head. If cannot match, it will lead to spill ice cream around the outlet head. Please tighten the outlet head nut when installing, which in order to prevent ice cream from leakage...
- Page 40 !"#$% &''$()*+ 1.The power supply must be up to 2000w and the best is to be equipped with independent 10A air switch 2.Factory set is 4 level, please do not change at random, high level will lead to freezing cylinder, and the machine will be wearing out.
Need help?
Do you have a question about the TG16e and is the answer not in the manual?
Questions and answers