Advertisement
Quick Links
Advertisement

Summary of Contents for reelanx V1
-
Page 2: Table Of Contents
Contents I. Safety Instruction and Important Tips II. Appliance Structure and Control Panel Interface III. How to Make a Bag from A Vacuum Roll IV. How to Vacuum Seal with Vacuum Bags V. How to Vacuum Seal with Vacuum Container VI. -
Page 3: Safety Instruction And Important Tips
I. Safety Instruction and Important Tips Safety Instructions For your own safety, always follow these basic precautions when using a Vacuum Sealer. Read the User Manual carefully for operating instructions. Do not use appliance on wet surfaces or in a humid environment. To protect against electric shock, do not immerse any part of appliance, power cord or plug in water or other liquid. - Page 4 seconds). Vacuum Sealing is not a substitute for the heat process of canning. Perishables still need to be refrigerated or frozen. For best results, use only with Vacuum Bags, Rolls, Containers and Accessories. During the vacuum packaging process, small amounts of liquids, crumbs or food particles can be inadvertently pulled into the Vacuum Channel.
-
Page 5: Appliance Structure And Control Panel Interface
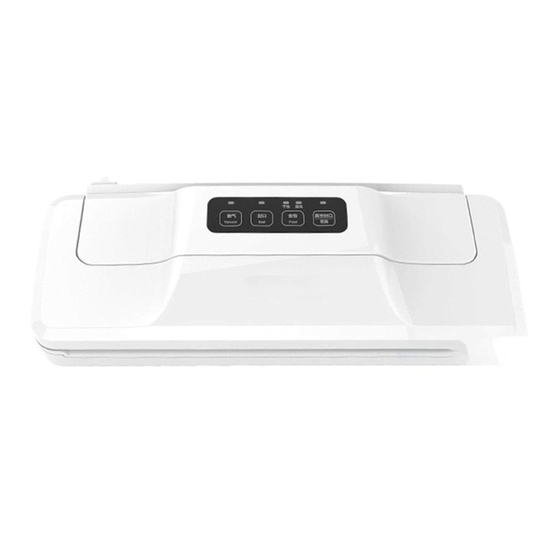
II. Appliance Structure and Control Panel Interface Appliance Structure A: Sealing Bar B: Upper Foam Gasket C: Lock D: Control Panel E: Appliance Lid F: Lower Foam Gasket G: Sealing Strip H: Drip Tray I: Vacuum Channel J: Vacuum Nozzle K: Roll Cutter L: Cutter Button... - Page 6 Control Panel Interface Vacuum: Press to only vacuum package. Seal Press to create a bottom seal when making bags from Vacuum Roll. Press to create a seal on Mylar bags (i.e. a potato chip bag) to keep food sealed airtight. Vac Seal / Cancel Press to vacuum package and seal food airtight.
-
Page 7: How To Make A Bag From A Vacuum Roll
III. How to Make a Bag from a Vacuum Roll Open one end of the roll cutter, put the vacuum bag roll between the roll cutter and appliance Hold the bag with your left hand, and slide the cutter button from left to right with your right hand to get a bag with open ends Open appliance lid and place one end of the bag across sealing strip. - Page 8 IV. How to Vacuum Package with Vacuum Bags Place item(s) in bag, allowing at least 5-7cm of space between bag contents and top of bag. Open appliance lid and place open end of bag into Vacuum Channel. Make sure you stretch the bag flat.
-
Page 9: How To Vacuum Seal With Vacuum Container
V. How to Vacuum Seal with Vacuum Container Place the item you wish to seal inside the Container, leaving at least 3cm space between the contents and the top rim of the Container. Insert the Accessory Hose into the Vacuum Sealer Nozzle on your appliance. - Page 10 Vacuum Packaging and Food Safety The vacuum packaging process extends the life of foods by removing most of the air from the sealed container, thereby reducing oxidation, which affects nutritional value, flavor and overall quality. Removing air can also inhibit growth of microorganisms, which can cause problems under certain conditions: Mold –...
- Page 11 vacuumed packaged. IMPORTANT: Vacuum packaging is NOT a substitute for refrigeration or freezing. Any perishable foods that require refrigeration must still be refrigerated or frozen after vacuum packaging. Vacuum Packaging Non-Food Items The Vacuum Sealer also protects non-food items from oxidation, corrosion and moisture.
-
Page 12: Storage Guide For Various Foods
VII. Storage Guide for Various Foods Meat, Cheese, Vegetables, Fruits Storage Life Where Normal with V1 Foods to Store Storage Life Vacuum Sealer Meat Beef, Pork, Lamb Freezer 2-3 years 6 months Ground Meat Freezer 1 year 4 months Poultry... - Page 13 Huckleberries Refrigerator 2 weeks 3-6 days Baked Goods, Coffee, Snacks and Liquids Storage Life Where Normal with V1 Foods to Store Storage Life Vacuum Sealer Baked Goods Bagels, Bread, Pastries Freezer 1-3 years 6-12 months Nuts Almonds, Peanuts Pantry 2 years...
-
Page 14: Trouble-Shooting
VIII. Trouble-Shooting Problem Solution Vacuum Pump is If making a bag from a roll, make sure one end of bag is running, but bag sealed. See How to Make a Bag from a Vacuum Roll. is not evacuating Adjust the bag and try again. Make sure the open end of the bag is down inside the Vacuum Channel. - Page 15 to allow appliance to seal bag for a longer time. Gasket is loose or Take out the Gasket, clean it and reinsert the Gasket into the has a tear Vacuum Channel. Contact an authorized party or the manufacturer for replacement.
- Page 16 Sealing Strip may have become too hot. Always wait at least 20 seconds for appliance to cool down before you vacuum package another item. Use Vacuum bags. Our Bags and Rolls are specially designed for V1 Vacuum Sealer. If you need Contact us at support@reelanx.com further...
-
Page 17: Year Limited Warranty
IX. 1 Year Limited Warranty We warrants this product for a period of one year from the date of purchase, this product will be free from defects in material and workmanship. We will repair or replace this product or any component of the product found to be defective during the warranty period. - Page 18 This warranty gives you special legal rights, and you may also have other rights that vary from province to province, state to state or jurisdiction to jurisdiction. How to Obtain Warranty Service Contact our one of our sales representatives or write us at support@reelanx.com.
Need help?
Do you have a question about the V1 and is the answer not in the manual?
Questions and answers
Запаивает . Но одновременно откачать воздух и запаять не получается.
To vacuum and seal with the Reelanx V1:
1. Insert the open end of the bag into the Vacuum Channel.
2. Ensure the bag is flat and free of wrinkles near the sealing area.
3. Leave 5–7 cm of space between the contents and the open end.
4. Press the "Vac Seal" button for automatic vacuuming and sealing.
5. If sealing only, use the "Seal Only" function.
6. Make sure the gasket is clean and correctly inserted.
7. Ensure no moisture, food particles, or sharp items affect the seal.
The machine uses a 4mm heating wire and -60KPa pressure to ensure a firm seal.
This answer is automatically generated