
Related Manuals for Pooli Climber Pro

Summary of Contents for Pooli Climber Pro
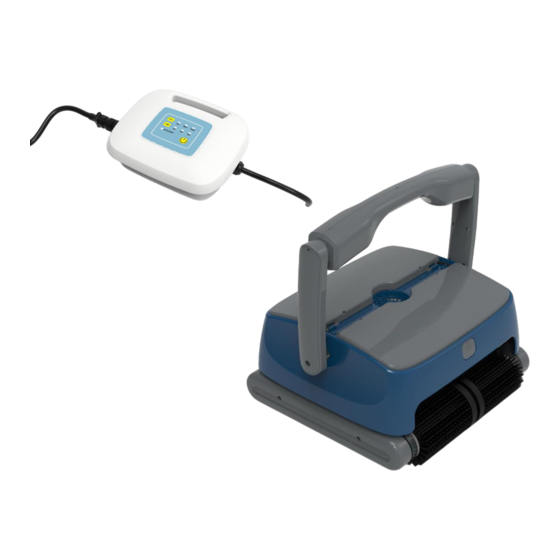
- Page 1 CLIMBER PRO© SKU: PR010999 ANVÄNDARMANUAL Tack för att du har köpt en Pooli poolrobot. Om du har några frågor eller problem, vänligen kontakta kundservice hos din lokala återförsäljare.
-
Page 2: Table Of Contents
Innehållsförteckning VIKTIGA FÖ RSIKTIGHETSÅTGÄRDER ........................... 1 I. FÖ RBEREDELSER ..............................3 II. SÄKERHET ................................3 III. SPECIFIKATIONER ..............................4 IV. DRIFTSINSTRUKTIONER............................4 4.1 I NSTRUKTIONER DRIFTSPANEL ..................................4.2 M ODELL MED INBYGGD ANTENN ..................................INSTRUKTION FÖ R MANÖ VERPANEL..................................4.4 A PPSTYRNING FRÅN SMARTPHONE VIA LUETOOTH ............................ -
Page 3: Viktiga Försiktighetsåtgärder
Viktiga försiktighetsåtgärder Läs igenom manualen noga och använd roboten i enlighet med manualen. Vi är inte ansvariga för förlust eller skada orsakad av felaktig användning. Låt inte barn åka på eller leka med poolroboten. För att undvika allvarliga skador på roboten, slå aldrig på strömmen när den inte är i poolen. 4. - Page 4 Observera 1. För att undvika repor på poolen, rikta robotens undersida mot poolväggen när den sänks ner eller lyfts upp ur poolen. Håll i handtaget upptill och sänk ner den i poolen. Låt roboten sjunka ner till poolbotten efter att all luft inne i roboten har släppts ut (all luft måste tömmas ut helt och hållet, annars kan robotens prestanda påverkas).
-
Page 5: Förberedelser
I. Förberedelser Poolrengörare PR010999 är en ny typ av energisparande poolrobot. Genom sitt avancerade datastyrda program rengör den automatiskt både väggar och botten i poolen. Samtidigt filtrerar den vattnet i poolen och tar bort uppslammade partiklar utan att vattnet behöver bytas – absolut miljövänligt. Poolroboten drivs med 28 V likström för att ge trygg och säker drift. -
Page 6: Specifikationer
III. Specifikationer VARNING: · Använd endast den medföljande nätaggregatet · Sänk inte ner strömförsörjningsenheten i vatten · Koppla inte från strömförsörjningsenheten innan du rengör vattnet · Koppla ur strömförsörjningsenheten före varje serviceaktivitet Se till att eluttaget är skyddat av en jordfelsbrytare (GFI) eller en jordfelsbrytare (ELI) 1. -
Page 7: Modell Med Inbyggd Antenn
4.2 Placera städaren i vattnet Håll i handtaget och placera poolroboten i poolen med robotens botten mot väggen för att undvika eventuella repor. 4.3 INSTRUKTION FÖ R MANÖ VERPANEL... - Page 8 Bild 4-1 lnstmktioner knappar och indikatorer funkt1onsbeskrivning lndikator lnstrnktion Tryck denna knapp att starta roboten. PA/AV Strom pa/av Tryck en gang att sla andra roboten. for att ALL: rengora poolens batten, •(batten vaggar vattenlinje vaggar gang, en gang) WALL: for attendast rengora poolens...
- Page 9 1H: roboten är i drift 1 timme 2H: roboten är i drift 2 timmar 3H: roboten är i drift 3 timmar Indikerar driftläge och rengöringsstatus 2 eller 3 indikatorer på Roboten stannade “1H” blinkar sakta Roboten är i drift i 1 timme “2H”...
- Page 10 följd “3H” >> “2H”>>”1H” Manuell: vänster vändning blinkar i följd “1H” >> “2H”>>”3H” Manuell: höger vändning blinkar i följd Alla indikatorer blinkar Autokörning avslutad sakta Förslag Avbryt Alla indikatorer blinkar Strömförsörjningen användningen snabbt och ljuder är överbelastad och kontakta service “WALL”...
-
Page 11: Appstyrning Från Smartphone Via Bluetooth
4.4 Appstyrning från smartphone via Bluetooth 4.4.1 Första gränssnitt Sökikon Språkikon Anslutningstatus Ö ppna appen och anslut den till roboten 4.4.2 Interface of manual operation Indikation Funktion ● Frånkopplad Anslutningsstatus ● Ansluten Tryck "start the cleaner" Starta rengöring Tryck på knappen till Riktningsknapp vänster;... - Page 12 4.4.3 Gränssnitt för automatisk drift Indikator Funktion ● Ej ansluten Anslutningsstatus ● Ansluten ● Poolbotten – rengör endast botten ● Poolväggar – rengör endast väggar Auto-läge ● Botten rengörs en gång, väggar en gång ● Botten rengörs tre gång, väggar en gång ●...
-
Page 13: Ta Ur Roboten Ur Vatten
Indikator Funktion ● Ej ansluten Anslutningsstatus ● Ansluten En rengöring Fördröjd start Inställning för en rengöring Intervall: 1– 23 timmar Genom att trycka på den här knappen kommer appen på smartphonen att skicka Bekräfta den gjorda tidsinställningen till strömförsörjningen via Bluetooth och samtidigt starta timern. -
Page 14: Filterrengöring
4.6 Filterrengöring 4.6.1 Ta ut filterkorgarna: a. Tryck på öppningsknappen (se Bild 1) b. Det övre locket öppnas upp automatiskt (se Bild 2) c. Lyft upp det övre locket (se Bild 3) d. Ta ut filterkorgarna (se Bild 4) Bild 1 Bild 2 Bild 3 Bild 4... -
Page 15: Fö Rvaringsråd
4.6.2 Rengör filterkorgarna 4.6.3 Sätt tillbaka filterkorgarna Var noga med att sätta i korgarna i rätt läge och stäng det övre locket. Breda sidan mot mitten Tryc 4.7 FÖ RVARINGSRÅD Dra ihop kabeln och förvara renare på en sval och ventilerad plats. ·... -
Page 16: Flöte
V. Flöte Följ följande moment om det är svårt att få roboten att klättra på väggen och rengöra vattenlinjen. Följande moment behöver inte utföras om roboten klättrar lätt på väggen. Ö ppna locket upptill och fäst flötet i det läge som visas på bilden nedan. Fäst även ett flöte på andra sidan. -
Page 17: Packlista
VI. Packlista Artikel Namn Modell Applikation Anmärkning Antal PR010999 Robotaggregat I kartong PR010999 Strömförsörjning I kartong Robot Användarmanual, certifikat & I plastpåse säkerhetsrep VII. Garanti Den här produkten har genomgått alla kvalitetskontroller och säkerhetstester som utförs på fabrikens tekniska avdelning. Garantiinformation: 1. - Page 18 ROBOTIC POOL CLEANER Climber Pro© Art.nr: PR010999 USER MANUAL Thank you for purchasing Pooli Robotic Pool Cleaner. If you have any questions or issues, please contact your local dealer for customer service.
- Page 19 Contents IMPORTANT PRECAUTIONS I. INTRODUCTION II. SAFETY III. SPECIFICATIONS IV. OPERATION INSTRUCTIONS 4.1 Preparing cleaner for use 4.2 Placing the cleaner into water 4.3 Instructions for operation panel 4.4 App control on smartphone via Bluetooth 4.4.1 Initial interface 4.4.2 Interface of manual operation 4.4.3 Interface of automatic operation 4.4.4 Interface of "Auto Start"...
-
Page 20: Important Precautions
Important Precautions 1. Please read the manual carefully, and use the cleaner according to the manual. We are not held liable for any loss or injury caused by improper use. 2. Please do not allow children to ride on it or play with it as a toy 3. - Page 21 Attention Put into or lift out of the pool with the cleaner bottom towards the wall to avoid any possible scratches to the pool. Hold the top handle and put it into the pool. Let the cleaner immerse into the pool floor after emptying the air inside it (the air inside should be exhausted completely, otherwise its normal working will be affected).
-
Page 22: Introduction
I. Introduction robotic pool cleaner PR010999 is a new type of highly efficient and energy- saving swimming pool cleaning robot. Through its advanced computer- controlled program, it can clean the pool walls and bottom automatically. At the same time, it filters the pool water and gets rid of suspended particles without replacing the pool water. -
Page 23: Specifications
III. Specifications CAUTION: · Only use the original supplied power supply unit. · Do not immerse the power supply unit in water. · Do not plug the power supply unit in before placing the cleaner in the water.; · Unplug the power supply unit before any serving activity. ·... -
Page 24: Placing The Cleaner Into Water
for the whole pool, meanwhile at least 3.5m away from the swimming pool edge. 4.2 Placing the Cleaner into the Water Hold the handle and place the cleaner into the pool with the cleaner bottom; towards; the wall to avoid any possible scratches. - Page 25 Table 4- 1 Instructions for button and indicator Sign Instruction Function description Press this button, the cleaner is power- on. ON/OFF Power on/off Press a second time, cleaner is off. MODE ALL: to clean pool floor, walls and waterline (once floor, once wall) WALL: to clean the pool walls only...
- Page 26 ALL + FLOOR: to clean the pool floor three times and pool walls once 1H: cleaner running for 1 hour TIME 2H: cleaner running for 2 hours 3H: cleaner running for 3 hours Indicators Indicate the operation modes and cleaner status Working 2 or 3 indicators on Cleaner stopped...
- Page 27 Working under mode “WALL” on “WALL”...
- Page 28 Working under mode “ FLOOR” on “ FLOOR” Working under mode “ ALL” “ ALL” & “ FLOOR” on & “ FLOOR” “ ALL” >> Manual: forward “ WALL” >>” FLOOR” flash in order “ FLOOR” >> Manual: backward “ WALL” >>” ALL” flash in order “...
-
Page 29: App Control On Smartphone Via Bluetooth
overloaded Cleaner is Empty the air “WALL”, “ FLOOR”, out of inside the “ 2H” & “ 3H” flash quickly water and cleaner and with buzz cannot be restart it restarted Indicator off: no reservation AUTO Auto- start Indicator on steadily: reserve successfully, and wait for START function the start... -
Page 30: Interface Of Manual Operation
4.4.2 Interface of manual operation Indication Function ● Disconnected Connection status ● Connected Start to clean Press to start the cleaner Press the button to left, ; Direction button right, forward and back to ; move the cleaner, the ; Direction control ;... -
Page 31: Interface Of "Auto Start
4.4.4 Interface of “Auto Start”... - Page 32 Indication Function ● Disconnected Connection status ● Connected Single cleaning Delay start Setting for single cleaning Range: 1 hour – 23hours By pressing this button, the APP on smartphone will send the current Confirm reservation settings to the power supply via Bluetooth, and start the timing at the same time.
-
Page 33: Download Address
4.4.5 Download address For Android: search “ Opson Pro” in Google (*Requires Android 8.0 and up) Play For IOS: search “ Opson Pro” in AppleStore (*Requires iOS 12.0 or later) 4.5 Taking the Cleaner Out of the Water Pull the floating cable gently until the pool cleaner has risen to the surface then lift by; the handle. -
Page 34: Filter Cleaning
4.6 Filter cleaning 4.6.1 Take out the filter baskets: a. Press the opening button (see Figure 1) b. The top cover will pop- up automatically (see Figure 2) c. Open the top cover (see Figure 3) d. Take out the filter basket (see Figure 4) 4.6 Filter cleaning Figure 1 Figure 2... -
Page 35: Clean The Filter Baskets
4.6.2 Clean the filter baskets 4.6.3 Re- install the filter baskets Pay attention to the installation position and close the top cover. Wide side in the middle Press 4.7 Storage Advice Coil the cable and store the cleaner in a cool and ventilated place. ·... -
Page 36: Floatblock
V. Float block Please refer to following operation if it is difficult for the cleaner to climb the wall and clean the waterline. The following operation is not necessary if the cleaner climbs the wall well. Open the top cover and glue the float block at the position shown in the belowpicture. The other side is also glued. -
Page 37: Packinglist
VI. Packing list Item Name Model QTY (pc) Remark PR010999 Cleaner body In carton PR010999 Power supply In carton Foam In plastic bag Cleaner User manual In plastic bag & safety rope... -
Page 38: Warranty
VII. Warranty This product has passed all quality control and safety tests, conducted by the technical department of the factory. Warranty information: 1. The warranty is covered for 24 months (only for motors &PCB) from the date of its original purchase. 2.
Need help?
Do you have a question about the Climber Pro and is the answer not in the manual?
Questions and answers
Pooliiclimber stannar. Går inte att tvälja cykel. Både 2 och 3 timmar lyser. On/odd reagerar inte
The Pooli Climber Pro showing lights for both 2 and 3 hours indicates it is in a working state. It is responding and currently running under a cleaning mode, not stopped or in error.
This answer is automatically generated
My pooli climber stopped working this summer. I think it’s the engine Hope you can help
If the Pooli Climber Pro stopped working, one possible issue could be that the power supply is overloaded. The manual indicates that if all indicators flash quickly with a buzz, the power supply may be overloaded, and the user should stop using the device and contact after-sales support. This could be related to an engine issue if the motor is drawing excessive power or malfunctioning.
This answer is automatically generated