
Subscribe to Our Youtube Channel
Summary of Contents for AMTIFO A6
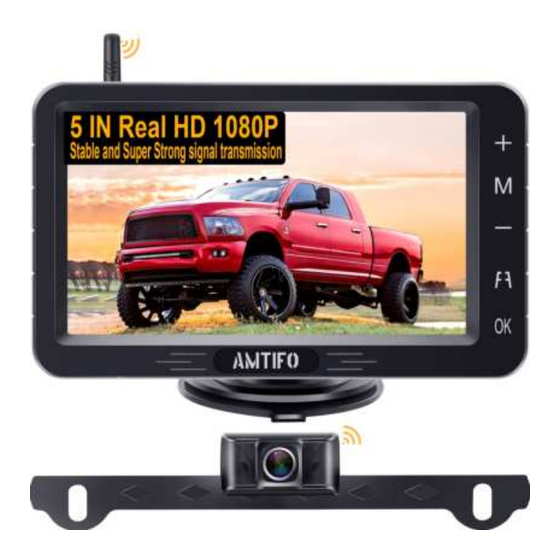
- Page 1 Digital Wireless Backup Camera & Monitor Kit Product Manual / Installation Instructions Please read this manual thoroughly before operating the device, and keep it for future reference.
- Page 2 1. Useful accessories: Thank you for buying our camera. In return for your purchase, we would like to offer you a useful accessory. 2. Certificate: This system was certified by: CE & FCC & EMC & RoHs & Waterproof 3. Package Includes: •...
- Page 3 4. Working Range: This system is designed mainly for cars, trucks, campers, SUVs, vans, and minivans. Vehicles under 33FT---High-Speed Driving Observation Vehicles under 40FT---Slow-Speed Driving or Reversing...
- Page 4 If your vehicle is too large or you encounter signal issues, please contact us immediately and we will provide a solution. 5. Before installing, read the information below: 1) Please note the acceptable power supply voltage input to the monitor and camera. Monitor: Voltage range 9V-35V Camera: Voltage range 9V-24V Note:...
- Page 5 2)Before installation, you must test the device. Please reference the image below. A. Plug power cords to the monitor and connect the power wires to camera (red-red, black-black). B. Loosen the screws on green adapter, then insert the red wire (copper wire) to the Positive(+) slot, and the black wire(copper wire) to the Negative(-) slot.
- Page 6 monitor screen! Once you have confirmed the monitor works, you are ready to install it. If there is no image after you have installed the unit, check your connections to the power source. PLEASE NOTE: if you reverse the positive wire and negative wire, it will damage the camera so be cautious.
-
Page 7: Wires Connection
7. Wires connection Please pay attention to the positive and negative poles of the wire. If the positive and negative poles are reversed, it may surge and cause the monitor to smoke. If the monitor is emitting smoke, please turn off the power immediately and contact customer support. - Page 8 (3) We have also provided an additional power cord that can be connected to the ACC/Fuse/Radio etc. to power the monitor Tips:Red wire to positive pole, black wire to ground. Note : 1. If you supply power to the cigarette lighter, please turn off the power through the red button of the plug when you are not use the...
- Page 9 system. Failure to do so will cause the monitor to drain the battery on the vehicle. If there is no image after your installing, please check the connections of power source. Or if you reversed the positive wire and negative wire, caused the no image. Please be cautious. If you cannot verify which wire is positive, you can connect the white/Black wire to ground (metal part on vehicle), then to test and connect the red wire to one of the back up light wire, if there is image appear on screen,it...
- Page 10 NJDAwiPhteI or Video name: AMTIFO A6 Wireless Rear View Camera System Operation Video www.youtube.com or email us for help with the link. II. Signal Pairing The system signals between the camera and the monitor arrive already paired. If the signal is good, do not not attempt to pair it again yourself.
- Page 11 10. Camera Installation The bracket of the camera is designed to attach to the license plate front or hide behind it on the back. We have included T-Taps adapters to better protect the cord of the reversing back-up light or tail light. Reference the picture below for easier installation.
- Page 12 cable) into the first hole of the clamp. Step 2 : Put the backing auxiliary wire into the second hole of the clamp (the hole is blocked to prevent the wire pushing/leaking through) Step 3 : Clamp the adapter, and clamp the iron sheet to the bottom. Step 4 :It’s done! (Note: The color of T-Taps may differ from the below image)
- Page 13 The button of the Monitor 1) (+): Touch to increase 2) Menu : Touch this to enter the menu mode ( To enter the menu page, you must switch to a single screen) 3) Down (-) : Touch to reduce 4)...
- Page 14 Guide Lines ON/OFF:...
- Page 15 5) Confirm Key and switch channels quickly. Single/Split Screen: The default is CAM1. Press the key once to switch to CAM2, and press the key twice switch to the split screen. Product function introduction: When you press the Menu button, you will enter the Menu mode and see 4 icon with functions :...
- Page 16 Note : 1. Touch + or - key can switch function icon 2. Touch OK key for enter or confirm change 3. Touch the menu button to exit the current function or menu ) 1) Signal Pairing ( All items was paired before shipping. Just need pair signal when the camera lost signal or you changed new camera) First icon Pairing : Step 1 : Make sure the camera and monitor are powered .
- Page 17 2) Second icon “Picture” For setting brightness, contrast and saturation When you choose 2nd icon “Picture” became yellow, Touch the“OK” button , you can see the brightness, contrast and saturation icon. and touch button choose icon you want to adjust and press “OK” to choose it.
- Page 18 4) Setting: Note: When you touch key enter this mode, Just touch switch different functions icon. Then touch key again to select (became icon) ,then you can touch to adjust the data. After you done, touch quit current mode. I. Switch Language II.
- Page 19 Customer service A Two Year Warranty and lifetime tech support is included with this product. (See customer service email at the front of page). Please contact us if you have ANY issues!
-
Page 20: Troubleshooting
If any problems come up, please contact us for professional help and solutions! Thank you! Troubleshooting: 1. After installation, you turn on the monitor and camera power without images, at the same time, the monitor turns on for five seconds and then goes black, which means something wrong with the camera. - Page 21 2. If you find the image flashing all the time after you install this system. Please try to turn off the engine and keep the key in ACC, if the image does not flicker and the image starts to flicker after starting the engine, you need to add relay or filter to keep signal stable.
- Page 22 FCC Caution This device complies with part 15 of the FCC Rules. Operation is subject to the following two conditions: (1) This device may not cause harmful interference, and (2) this device must accept any interference received, including interference that may cause undesired operation.
Need help?
Do you have a question about the A6 and is the answer not in the manual?
Questions and answers
The camera does not charge past 1 light with solar
The AMTIFO A6 camera does not charge past one light with solar because the LED light cannot provide a constant direct current to power the camera. A different power source is needed.
This answer is automatically generated
I have a AMTIFO with a 7" monitor, I said in my last message that I only had 10'45 volts, that only when the truck is not running, it has 13 volts when the truck is running. I have hooked the camera to other power supplies (battery on truck and camper), and it works fine. it just will not work hooked to the camper running lights. What could the problem be? look forward to hearing back from you!
The problem could be that the camper running lights supply more than 24V, which can damage the AMTIFO A6 camera. The camera supports only 9V–24V, and exceeding this range can burn it out.
This answer is automatically generated
the camera works when hooked up in the vehicle (12 volts) but when moved to the back of the RV it gives no signal. I have it wired to the running lights on the RV which has 10.45 volts. does it need 12 volts? I have also added a 10-foot extension antenna to get the camera closer to the monitor.
The AMTIFO A6 camera has a voltage input range of 9V–24V, so it can function properly at 10.45 volts. However, 12V is recommended for optimal performance.
This answer is automatically generated
Can i get a metal plate for mounting the camera on an rv that is not metal please. I purchased a camera and thought it came with one.
Yes, the AMTIFO A6 comes with an option to contact the seller to get an iron piece for mounting on non-metal RVs.
This answer is automatically generated