Table of Contents
Advertisement
Quick Links
Version 3.2
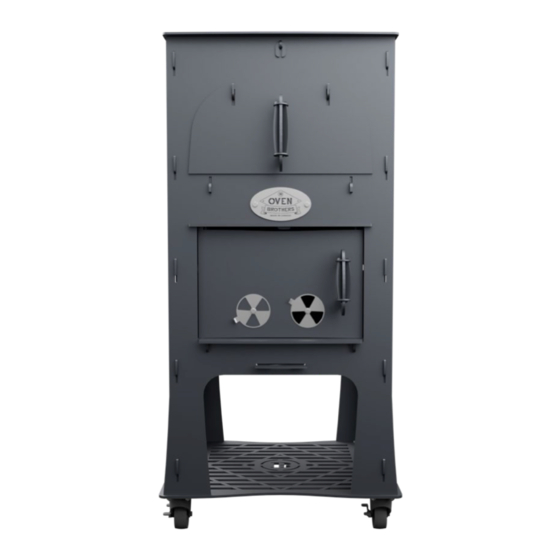
The Original Bro™
Outdoor Pizza Oven kit
*Patent Pending*
Item # OB1001
Owner's Operation and Assembly Manual
IMPORTANT:
*This instruction manual contains important information necessary for the proper assembly and safe use of
the oven. *Read and follow all warnings and instructions before assembling and using the oven. Keep this manual for
future reference.
Questions, problems, missing parts?
Customer Service Department at 1-833-OVEN-BRO (683-6276) Ext # 2, 9 a.m.-5 p.m., EST, Monday-Friday.
www.ovenbrothers.ca
Advertisement
Table of Contents

Related Manuals for Oven Brothers The Original Bro OB1001

Summary of Contents for Oven Brothers The Original Bro OB1001
- Page 1 Version 3.2 The Original Bro™ Outdoor Pizza Oven kit *Patent Pending* Item # OB1001 Owner’s Operation and Assembly Manual IMPORTANT: *This instruction manual contains important information necessary for the proper assembly and safe use of the oven. *Read and follow all warnings and instructions before assembling and using the oven. Keep this manual for future reference.
-
Page 2: Table Of Contents
TABLE OF CONTENT PAGE SAFETY INFORMATION ..........................3 ASSEMBLY INSTRUCTIONS ........................... 4 CLEANING INSTRUCTIONS ........................... 27 SEASONING INSTRUCTIONS ......................... 27 WOOD FIRE INSTRUCTIONS ......................... 27 OPERATING INSTRUCTIONS ......................... 28 COOKING PIZZA ............................28 CARE AND MAINTENANCE ........................... 29 REPLACEMENT PARTS ..........................29 LIMITED WARRANTY AND REGISTRATION .................... -
Page 3: Safety Information
SAFETY INFORMATION Installation of this appliance must conform with your local codes and bylaws. This appliance shall be used only outdoors, and shall not be used in a building, garage or any other enclosed area. Keep the oven away from windy areas but keep the oven in a well ventilated area. Do not obstruct the flow of combustion and ventilation air around the oven. -
Page 4: Assembly Instructions
ASSEMBLY INSTRUCTIONS Before beginning assembly of the oven, ensure that all parts are present by comparing the contents of the crate to the assembly parts guide list. Do not discard the packing materials before assembly is complete. If any parts are missing or damaged, do not attempt to assemble the product. Call our customer service department at 1-833-OVEN-BRO (683-6276) Ext # 2, 9 a.m.-5 p.m., EST, Monday-Friday. - Page 5 01B1 01B1 02A3 02A2 02A1 02A2 03B1 02A1...
- Page 6 02A3 02A2 02A1 03B1 03B1 04A2 04A1...
- Page 7 Note: If base plate option in step 6 is preferred, do not perform this step. Perform step 16 times... 5/16" Bolt 01B1 03B1 5/16" Lock Washer 5/16" Nut Perform step 4 times... 03B1 1/4" Bolt 01B1 1/4" Lock Washer 05B2 1/4"...
- Page 8 05A1 01B1 03B1 Note: If step 4 was not performed, a decision on where to locate the oven is recommended at this time. 01B1 03B1 06B2 06B1 06A1 06A2...
- Page 9 02A2 07A1 02A1 08B1 07A1 08B2 02A3 02A2 02A1...
- Page 10 28A1 03B1 28A1 01B1 05A1 28A1 09B1...
- Page 11 11A1 10B1 10B2 09B1 05A1 01B1 11A1 03B1 10B1 10B2...
- Page 12 09B1 05A1 01B1 11A1 10B1 03B1 10B2 09B1 12A1...
- Page 13 14A1 13B1 05A1 13B2 14A1 05A1 13B2 13B1 04A2 04A1 11A1...
- Page 14 01B1 15B1 15B1 04A2 04A2 04A1 04A1 05A1 15B1 15B2 05A1 04A2 04A1 03B1 11A1 03B1 16A1 16A1...
- Page 15 11A1 03B1 17B2 16A1 15B1 05A1 16A1 15B2 16A1 15B1 15B2 14A1...
- Page 16 02A3 08B1 02A2 02A1 07A1 07A1 15B2 15B1 02A3 08B1 02A2 02A1 07A1 15B1 15B2...
- Page 17 18B2 05A1 18B1 15B2 19A1 15B1 15B2 19A1 20B2...
- Page 18 18B1 18B2 21A1 13B1 13B2 04A2 22A1 15B1 24A1 13B1 04A2 04A2 24A2 13B2 22A1 22A1 01B1 13B1 24A2 04A1 13B2 22A1 11A1 23A1 22A1...
- Page 19 25A1 26A3 26A4 26A2 26A1 Notes: 1) Refer to seasoning instruction prior to installing the firebricks. 2) Firebricks may be laid out in multiple patterns.
- Page 20 05A1 27B1 27B2 27B1 27A1 27B2...
- Page 21 28A4 28A3 28A2 03B1 28A4 28A3 28A2 28B1 28B2 01B1...
- Page 23 29B1 11A1 29B2 01B1 30A1 31B1 29B1 31B2 29B2 01B1 30A1 32B2 03B1 33A1 33A1 31B1 31B2...
- Page 24 34A1 05A1 01B1 03B1 11A1 35A1 34A1 11A1 Note: This step requires the use of a rubber mallet or hammer. 03B1 01B1 01L1 03B1 03L1 03L2 03L1...
- Page 25 38A1 36B1 38A1 37A1 36B1 29B1 29B2 38A1...
- Page 26 Note: A decision on hinging the door on the left or right side should be made prior to assembling the handle. 41A1 39B1 41A1 40A1 39B1 16A1 41A1 14A1...
-
Page 27: Cleaning Instructions
CLEANING INSTRUCTIONS The processes involved in manufacturing carbon steel leave a small amount of residual oil in the form of a film. Before using your outdoor pizza oven for the first time, you may consider cleaning the inside of the cavity with a mix of water and mild detergent. -
Page 28: Operating Instructions
Keep the oven cavity door on for the first 20-30 minutes as to retain heat. You will get better with your oven as you use it and understand the characteristics of the hardwood you are using. Add hardwood logs as necessary to keep the desired temperature, you can open the firebox door(s) to let more air in, this will fuel the fire with more oxygen, burn faster and hotter. -
Page 29: Care And Maintenance
CARE AND MAINTENANCE Your oven is made of carbon steel and firebricks. You can keep your oven outside surfaces clean by ensuring that no foreign objects or products touch or land on your oven. Carbon steel will naturally rust over time unless you protect your oven outside panels with heat resistant paint. -
Page 30: Limited Warranty And Registration
LIMITED WARRANTY OVEN BROTHERS LTD, a producer of high quality carbon steel wood fired oven kits, warrants its ovens (herein referred to as the Product) to be free from defects in materials and workmanship on the major structural components (oven chassis, firebox), for a period of seven (7) years from the date of shipment. -
Page 31: Investigation Of Claims Against Warranty
INVESTIGATION OF CLAIMS AGAINST WARRANTY Oven Brothers Ltd. reserves the right to investigate any and all claims against this Warranty and to decide upon the method of settlement. Before any Product is returned, Oven Brothers Ltd., or its authorized representative, must provide the purchaser with a written return merchandise authorization (RMA) and instructions for preparation of the shipment. - Page 32 © 2021 Oven Brothers Ltd.
Need help?
Do you have a question about the The Original Bro OB1001 and is the answer not in the manual?
Questions and answers