Table of Contents
Advertisement
Quick Links
Dear users, functional setting of this device requires some
expertise. Therefore, please carefully read and fully
understand the instruction before use.
AI MDVR Installation
and debug manual
Applicable models:JH4AN-HD/JH8AN-HD
Thank you for choosing our product. Difference between models or product upgrading
may result in appearance or features different from those described in the instruction;
thus, it all depends on the actual product or you can contact the manufacturer.
Information contained herein is subject to irregular change without prior notice.
(APP: iCalibration)
1
AI MDVR Installation and debug manual
Advertisement
Table of Contents

Summary of Contents for ICAR VISIONS JH4AN-HD
- Page 1 AI MDVR Installation and debug manual (APP: iCalibration) Applicable models:JH4AN-HD/JH8AN-HD Thank you for choosing our product. Difference between models or product upgrading may result in appearance or features different from those described in the instruction; thus, it all depends on the actual product or you can contact the manufacturer.
-
Page 2: Table Of Contents
AI MDVR Installation and debug manual Catalog I. Overview......................5 Preparation before installation ..............5 Major equipment ..................5 Tools required for installation .............. 5 Site required for installation ............... 6 Installation steps..................6 III. Wiring ......................6 ADAS camera installation ................7 DSM camera installation ................ - Page 3 AI MDVR Installation and debug manual DSM parameter ..................23 ADAS algorithm..................24 ADAS calibration ................... 24 Correct the camera position ............24 5.1.1 Frame drawing..................26 5.1.2 Enter vehicle parameter information ..........26 5.1.3 Frame drawing..................28 5.1.4 ADAS parameters ..................29 BSD algorithm (optional) ................
- Page 4 AI MDVR Installation and debug manual SD Record ....................43 Sensor ......................44 Speed ......................45 Acceleration ..................... 46 Temperature ....................47 Alarm linkage ................... 47 Other alarms ..................... 48 Device restart..................50 Configuration management ................ 51 Device format ................... 52 Left/right turn signal test ..............
-
Page 5: Overview
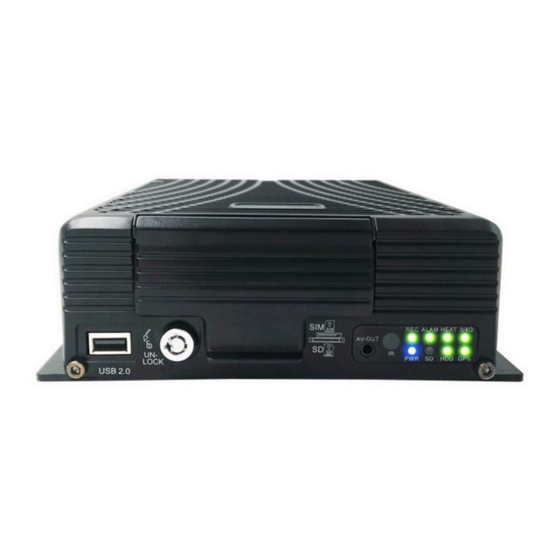
AI MDVR Installation and debug manual I. Overview The following installation instructions in this document describe in detail the installation and debugging steps of the AI MDVR all-in-one product DSM/ADAS/BSD. Please refer to the manual instructions for operation. II. Preparation before installation 1. -
Page 6: Site Required For Installation
AI MDVR Installation and debug manual special calibration tool 3. Site required for installation Make sure that the vehicle is parked stably on a flat ground. It is better to have a road convenient for testing near the installation site. III. -
Page 7: Adas Camera Installation
AI MDVR Installation and debug manual ADAS camera connected to the second channel CAM2/ADAS of the host (display the second channel) The BSD camera is connected to the third and fourth channels of the host (the third and fourth channels are displayed). The JA-MC923 is a dual camera on the right side, which needs to occupy two channels. - Page 8 AI MDVR Installation and debug manual (Note: The installation location is within the wiper area, but the camera cannot be blocked by the wiper) The front-view camera is installed on the windshield of a small car b. Installation method Use alcohol cotton to wipe clean the pre-installed area of the windshield.
- Page 9 AI MDVR Installation and debug manual Angle adjustment: After installing the camera on the glass surface of the car, you can adjust the angle of the camera by adjusting the internal screw of the ADAS camera with an inner hexagonal tool, as shown in the following figure:...
-
Page 10: Dsm Camera Installation
AI MDVR Installation and debug manual 3. DSM camera installation Before installation, the installation position can be adjusted appropriately through APP-real-time video or external display screen. a. Installation location Installed and fixed on the center console of the vehicle directly in front of the driver's main driving position or within 20cm left and right, or fixed in front of the driver to the right (or left) (10~30°) position, and the device is tilted up by 5~30°... - Page 11 AI MDVR Installation and debug manual As shown in the figure: b. Installation method Use screws to fix directly on the center console or use 3M glue to stick to the center console c. DSM screen display The best effect picture-the face is centered, and the picture of the head above the neck is seen, as shown in the figure:...
-
Page 12: Bsd Camera Installation (Optional)
AI MDVR Installation and debug manual 4. BSD camera installation (optional) Before installation, the installation position can be adjusted appropriately through APP-real-time video or external display screen. a. Installation location JA-MC923 is a dual camera on the right side. The recommended installation location is on the right side mirror of the vehicle, as shown in the figure,... - Page 13 AI MDVR Installation and debug manual Refer to the installation screen display: JA-MC922 Right rear installation method (single BSD camera):...
-
Page 14: Icalibration Calibration Operation And Parameter Setting
AI MDVR Installation and debug manual IV. ICalibration calibration operation and parameter setting Account: admin Password: MDVR login password, such as the default 888888 IP address : Choose different IP addresses according to different connection methods, such as USB connection method and WIFI connection method 1. - Page 15 AI MDVR Installation and debug manual After opening the mobile phone USB sharing network, log in to the calibration configuration software iCalibration, click on the server address, select the first USB method, and log in to the calibration configuration software, as shown in the figure:...
-
Page 16: The Second Way To Log In To Icalibration App
AI MDVR Installation and debug manual 2. The second way to log in to iCalibration APP Connect a WIFI sharing gadget through the front USB of the host (recommended for batch configuration) After the device is started, the inserted wifi widget will automatically share the hotspot with icar_IMEI and icar88168 as the SSID and password. - Page 17 AI MDVR Installation and debug manual * Open iCalibration software-login, as shown in the figure: Note: The software will be updated from time to time. Due to the different versions of the APP installed, some UI functions may be different. Account: admin Password: MDVR login password, such as the default 888888 If you cannot log in, please contact our technical staff.
-
Page 18: Simulation Speed Setting
AI MDVR Installation and debug manual 2.1 Simulation speed setting Simulation speed method(Office test): 1、Set the speed source and select the vehicle. Source:Vehicle Source:Vehicle coefficient(X100):3600 coefficient(X100):3600 2、Use the remote control to quickly press 8 + F3 + F1 + 6 The simulation speed is set successfully. -
Page 19: Streaming
AI MDVR Installation and debug manual 3. Streaming The mobile phone preview screen through iCalibration software is mainly used to adjust the installation position of the camera. 4. DSM algorithm After entering the iCalibration APP software, click [DSM algorithm], including DSM calibration and DSM parameter settings, as shown in the figure:... -
Page 20: Dsm Calibration
AI MDVR Installation and debug manual 4.1 DSM calibration 4.1.1 Correct the camera position ● After entering the calibration interface, start the first step of calibration. At this time, the voice broadcast: 【Please adjust the position of the camera and stick it near the center console so that it is within 30 degrees of the right side in front of your seat. -
Page 21: Frame Drawing
AI MDVR Installation and debug manual 4.1.2 Frame drawing 4.1.3 Start calibration ● After entering the second step of the calibration interface, the voice broadcast: 【Please look straight ahead, keep your position still, and make sure that your face is in the center of the current interface】;... -
Page 22: Frame Drawing
AI MDVR Installation and debug manual ● If the calibration fails, the user needs to calibrate again. ● According to the failure reason returned by the server, the user is prompted and the calibration is restarted: 1. The server returns 【Calibration failed, abnormal face orientation】: Voice broadcast 【Calibration failed, please adjust camera angle and restart calibration】, prompt 【Calibration failed, camera angle is too large】;... -
Page 23: Dsm Parameter
AI MDVR Installation and debug manual 4.2 DSM parameter Through the DSM parameter setting, the specified DSM alarm can be configured. Such as closed eye alarm: alarm enable open/close, alarm trigger speed, alarm high and low speed critical value, alarm duration, alarm time gap, etc. -
Page 24: Adas Algorithm
AI MDVR Installation and debug manual 5. ADAS algorithm After entering the iCalibration APP software, click [ADAS algorithm], including ADAS calibration and ADAS parameter settings, as shown in the figure: 5.1 ADAS calibration 5.1.1 Correct the camera position ● After entering the second step of the calibration page, the voice broadcast 【Move the yellow cross so that the center point of the cross is at the vanishing point of heaven and earth;... - Page 25 AI MDVR Installation and debug manual ● Click 【Next step】 to enter the next step, enter vehicle parameter information; ● You can click the 【Help】 button to pop up a prompt box 【Move the yellow cross, so that the center point of the cross is at the vanishing point of heaven and earth;...
-
Page 26: Frame Drawing
AI MDVR Installation and debug manual ⑤ Measure the horizontal distance from the camera to the front bumper and fill it (unit: mm). ⑥ Fill the height of the camera in ② (unit: mm) and select the camera resolution. ⑦ Measure the camera to the center of the vehicle and fill it. When installed to the center position, fill in 0. - Page 27 AI MDVR Installation and debug manual ► Vehicle width, in mm (Note: Take the distance from the outside of the left front wheel of the vehicle to the outside of the right front wheel of the vehicle); ► The distance from the camera to the front bumper, in mm (Note: the horizontal distance from the camera installation position to the front bumper);...
-
Page 28: Frame Drawing
AI MDVR Installation and debug manual 5.1.4 Frame drawing Click the Finish button to complete the ADAS calibration. -
Page 29: Adas Parameters
AI MDVR Installation and debug manual 5.2 ADAS parameters Through the ADAS parameter setting, the specified ADAS alarm can be configured. Such as the collision alarm of the preceding vehicle: alarm enable open/close, alarm trigger speed, alarm high and low speed critical value, alarm time gap, etc. -
Page 30: Bsd Algorithm (Optional)
AI MDVR Installation and debug manual 6. BSD algorithm (optional) After entering the iCalibration APP software, click [BSD algorithm], including BSD calibration and BSD parameter settings, as shown in the figure: Note: The customized version of the machine only supports the BSD blind spot detection function. -
Page 31: Bsd Calibration
AI MDVR Installation and debug manual 6.1 BSD calibration 6.1.1 Correct the camera position ● After acquiring the image, tap the screen to enter the calibration page. ● After entering the calibration interface, start the first step of calibration, and click Next after completing the voice prompts. ●... -
Page 32: Frame Drawing
AI MDVR Installation and debug manual 6.1.2 Frame drawing 6.2 BSD parameters Through the BSD parameter setting, the specified BSD alarm can be configured. BSD alarm: alarm enable open/close, alarm trigger speed, alarm time, alarm time interval, etc. Image detection and rendering switch(ON/OFF) :AI algorithm box is displayed on the screen(ON)... - Page 33 AI MDVR Installation and debug manual Restore default: restore all algorithm parameters to factory defaults Quick backup: back up the currently set algorithm parameters (backup to the current phone) Backup Review: view the parameter settings that have been backed up Quick config: set the backup parameters to the current device (suitable for batch setting calibration).
-
Page 34: Date/Time
AI MDVR Installation and debug manual 7. Date/time The time, time zone, automatic maintenance time, ACC delayed shutdown, etc. can be set through the iCalibration APP. 8. Vehicle Information Enter the vehicle information setting menu through iCalibration APP. Set the device number, sim card number, license plate number, license plate color, engine number, frame number, and vehicle type. -
Page 35: Network Settings
AI MDVR Installation and debug manual 9. Network settings Server IP can be set through iCalibration APP (the server IP is the manufacturer's private server, which is convenient for maintenance, upgrades, etc.), and the standard IP port (used by domestic equipment). - Page 36 AI MDVR Installation and debug manual Quick backup: back up the currently set algorithm parameters (backup to the current phone) Backup Review: view the parameter settings that have been backed up Quick configuration: set the backup parameters to the current device (suitable for batch setting calibration)
-
Page 37: Authorization
AI MDVR Installation and debug manual 10. Authorization This function is used to authorize the DSM/ADAS/BSD algorithm, you need to contact our technical staff for operation. Before the device leaves the factory, the device will be authorized, and there is no need to re-authorize under normal circumstances. - Page 38 AI MDVR Installation and debug manual alarm recording, you can set the alarm pre-recording time, alarm recording delay time, alarm continuous output time, and alarm recording protection time. When you select timing recording, you need to set the recording plan. Quick backup: back up the currently set algorithm parameters (backup to the current phone) Backup Review: view the parameter settings that have been backed up...
-
Page 39: Recording Plan (Need To Be Set In Timing Recording Mode)
AI MDVR Installation and debug manual 12. Recording plan (need to be set in timing recording mode) Enter the recording plan interface through the iCalibration APP. If the recording mode in the general recording settings selects the "timed recording" mode (not commonly used), you need to set the time period for the scheduled recording here (2 time periods can be selected). -
Page 40: Ipc
AI MDVR Installation and debug manual 13. IPC Enter the IPC interface through the iCalibration APP, you can add an IP camera, the normal device supports 1 channel 1080P IPC access, you need to add settings when you need to connect to the IPC. -
Page 41: Main Stream
AI MDVR Installation and debug manual 14. Main stream Enter the main stream interface through iCalibration APP. After entering the main stream setting interface, you can set the main stream parameters analog camera, resolution D1/HD1/CIF/960H/720P/1080P. 1) The frame rate needs to be adjusted according to the image format, the higher the video real-time performance, the better. -
Page 42: Sub-Stream
AI MDVR Installation and debug manual 15. Sub-stream Enter the main stream interface through iCalibration APP, and enter the sub stream setting interface. Its setting is related to whether the video on the IVMS platform is clear and smooth. The higher the resolution and bit rate settings, the clearer the video, and the higher the frame rate, the smoother the video, but the larger the space occupied by the video, the higher the network bandwidth requirements. -
Page 43: Sd Record
AI MDVR Installation and debug manual 16. SD Record Enter the SD Record interface through iCalibration APP. When this option is selected, if the HDD is not present due to shock and SD record feature is enabled, record files will be stored in the SD card. -
Page 44: Sensor
AI MDVR Installation and debug manual 17. Sensor Enter the sensor alarm setting interface through iCalibration APP. This product provides 8 SENOR-IN inputs, which can be set higher than 5V high/lower than 1V low alarm. In the alarm setting menu, set the alarm enable to "on", and set the sensor name according to the actual situation (such as: emergency alarm, brake, far and near light, etc.). -
Page 45: Speed
AI MDVR Installation and debug manual 18. Speed Enter the speed alarm setting interface through iCalibration APP. After the alarm function is turned on, when the vehicle speed is abnormal, the device display screen will display "Reminder: abnormal speed", and the voice broadcast "abnormal speed"... -
Page 46: Acceleration
AI MDVR Installation and debug manual Quick backup: back up the currently set algorithm parameters (backup to the current phone) Backup Review: view the parameter settings that have been backed up Quick config: set the backup parameters to the current device (suitable for batch setting calibration) 19. -
Page 47: Temperature
AI MDVR Installation and debug manual 20. Temperature Enter the temperature setting interface through the iCalibration APP. The temperature unit: C°/℉ is optional. After the alarm function is turned on, it can also be sent to the central IVMS platform to record alarm information. -
Page 48: Other Alarms
AI MDVR Installation and debug manual 22. Other alarms This product can be reported to our IVMS management platform or ministry standard platform, and the IVMS platform supports overtime parking and fatigue driving alarms, and the corresponding time can be set according to needs;... - Page 49 AI MDVR Installation and debug manual the overspeed warning difference refers to the speed difference that prompts the driver to be overspeed when the vehicle speed is about to reach the set alarm speed.
-
Page 50: Device Restart
AI MDVR Installation and debug manual 23. Device restart Enter the restart interface through iCalibration APP and click OK to restart the device. -
Page 51: Configuration Management
AI MDVR Installation and debug manual 24. Configuration management Enter the configuration management interface through iCalibration APP to restore the default settings of the device. -
Page 52: Device Format
AI MDVR Installation and debug manual 25. Device format Enter the device formatting interface through iCalibration APP, select the storage medium that needs to be formatted, and then select format. After the host is installed, the hard disk/SD card needs to be formatted. -
Page 53: Left/Right Turn Signal Test
AI MDVR Installation and debug manual 26. Left/right turn signal test Enter the Left/right turn signal test interface through iCalibration APP to perform left and right turn signal test (need to connect to the left/right turn signal function line). -
Page 54: Video Search
AI MDVR Installation and debug manual 27. Video search Enter the video interface through the iCalibration APP, and you can select the video file for playback and other operations in the search results. The calendar with a green background means that there is a log. You can search by selecting the date, time, video type and corresponding channel (the searched video file cannot be video playback temporarily). -
Page 55: System Message
AI MDVR Installation and debug manual 28. System message Enter the system information interface through the iCalibration APP, and you can check the software version, GPS status, 4G status, platform online status and other information. -
Page 56: Algorithm Information
AI MDVR Installation and debug manual 29. Algorithm information Enter the algorithm information interface through iCalibration APP, you can query and view the algorithm software version, algorithm status and other information, which is convenient for maintenance.
Need help?
Do you have a question about the JH4AN-HD and is the answer not in the manual?
Questions and answers