Advertisement
Quick Links
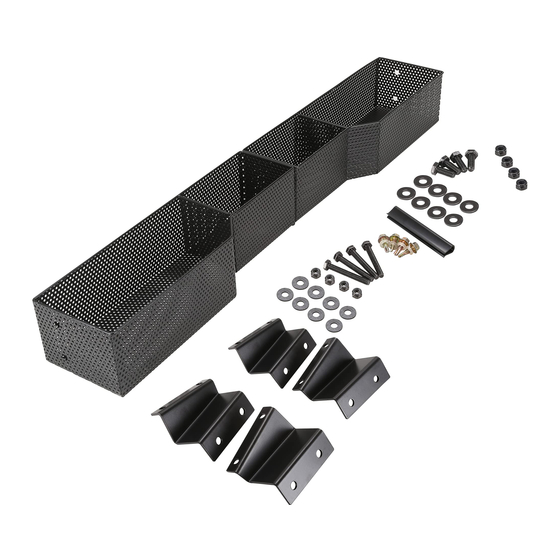
Front Inner Storage Basket for
Golf Cart Club Car DS and Precedent
We are striving to build an reliable brand of golf carts parts and accessories.
Hope this manual can assist you to easier install.
For more technical support, please reach us via
Website : www.10l0l.com
Email : sale_service@10l0l.com
Facebook : zhong zaiyang
Youtube : 10L0L
Basket...................................................1
Plastic Buckle.......................................1
Metal Buckle........................................ 4
Screw Nut............................................ 8
Screw..................................................12
Gasket.................................................16
Installation Tools
Socket
1/2 inch (13mm)
International Smart Production, Global Direct Supply
Installation Tools
Socket..................................................1
10mm Wrench......................................1
13mm Wrench......................................1
10mm Sleeve.......................................1
13mm Sleeve.......................................1
3/8 inch (10mm)
3/8 inch (10mm)
1/2 inch (13mm)
Installation Steps
1. Fasten the buckle in middle.
See figure 1
Qty
2. Prepare screws and bolts.
See figure 2
3. Tighten the screws with No.
13 sleeve & wrench.
See figure 3
4. Fix the screws well.
See figure 4
International Smart Production, Global Direct Supply
Advertisement

Summary of Contents for 10L0L Front Inner Storage Basket
- Page 1 Front Inner Storage Basket for Installation Steps Golf Cart Club Car DS and Precedent 1. Fasten the buckle in middle. We are striving to build an reliable brand of golf carts parts and accessories. Hope this manual can assist you to easier install.
- Page 2 5. Drilling on the tube. 9. Tighten the screws with No. 10 sleeve & wrench. See figure 5 See figure 9 6. As shown. 10. As shown. See figure 6 See figure 10 7. Align the holes. 11 Installation finished. See figure 7 See figure 11 8.
Need help?
Do you have a question about the Front Inner Storage Basket and is the answer not in the manual?
Questions and answers