Table of Contents
Advertisement
Quick Links
Advertisement
Table of Contents

Summary of Contents for Akeeyo AKY-610 PRO
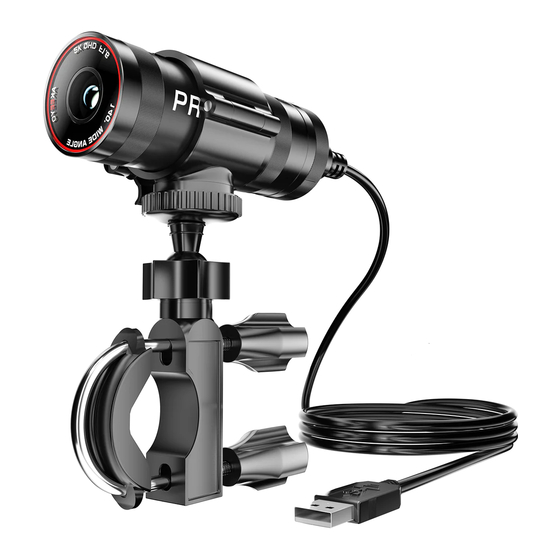
- Page 1 Bicycle/ Motorcycle recorder and sports camera AKY-610 PRO User's manual Ver 1.01 Thanks for your purchase. please confirm this manual Before use. If you have any problem, Please feel free to contact customer service, we will reply within 24h.
-
Page 2: Table Of Contents
Catalog ■ Safety instructions....................1-2 ■ Name of each part....................3 ■ Before use......................4 ■ WiFi connection......................5-7 ■ System settings......................8 ■ Installation location....................9 Handlebar.......................9 Helmet........................10 Arm.........................10 ■ About recording......................11-13 ■ About emergency recording...................14 ■ About pictures......................15 ■ Play back recorded video/image................15-16 ■ Factory settings......................16 ■... -
Page 3: Safety Instructions
Safety instructions For safe and effective use, please use this product properly after reading this manual and fully understanding the meaning. Caution Improper use may result in death or accident. Please use it properly according to this manual, otherwise it may Note cause property damage. - Page 4 Safety instructions Caution The main body is IP65 waterproof, but please do not use a pressure washer, etc. to clean the body of the recorder. When using a pressure washer to clean the motorcycle, if water enters the car recorder, it may cause a malfunction and is not covered by the warranty.
-
Page 5: Name Of Each Part
Name of each part Record/ Power button Host Red LED light Green LED light Rear cover Lens Microphone SD card slot Charging indicator light Reset button USB port 1080p/ 2k switch button Mode switch button Accessories (For flat (For curved surface) surface) Velcro... -
Page 6: Before Use
Before use (1) Charging the battery Open the back cover and use the included cable to connect to the socket for charging. Connect to an AC adapter (sold separately) or other external power source to charge. ※ The indicator lights up when charging starts. It turns off when it is finished. ※... -
Page 7: Wifi Connection
WIFI connection AKY-610 PRO with built-in Wi-Fi can be connected to a smartphone and use a dedicated player application to perform various operations on the smartphone, such as checking, playing, saving, downloading and deleting recorded videos and photos. ● Download the app [Car_dvr] App Please download in the Google Play Store / Apple Store. - Page 8 WIFI connection Select Save to phone Video Operation Interface (3) Open the [Car_DVR] app and enter the main interface. Touch the [Local File] button to check the files saved on your phone. Save videos on your phone...
- Page 9 WIFI connection (4) Open the [Car_DVR] app and enter the main interface. You can switch to recording mode by touching the [Camera] button. Photo shoot Video recording Recording mode Setting APP interface Recording mode...
-
Page 10: System Settings
System settings ● After connecting to WiFi, set up the driving recorder through the smartphone app. (1) Open the [Car-DVR] APP and enter the main interface. (2) Touch the [Settings] button to switch to settings. Select "Camera Settings" to display the setting items. -
Page 11: Installation Location
Installation Location Notice: When installing, make sure that the main body lens is not facing the ground. To prevent the device from falling, please attach the anti-drop strap to the back cover of the fuselage. ■ Install the mainframe bracket to the mainframe. C(Lock) The mainframe bracket is divided into three parts: A, B, and C. -
Page 12: Helmet
Installation Location For helmet installation 1. Stick the double-sided adhesive bracket on the helmet. Choose flat or curved according to the shape. 2. Fix the mainframe bracket to the double-sided tape bracket. For flat For curved surface surface Double-sided tape mount Helmet etc. -
Page 13: About Recording
About recording Recording start 1. Remove the back cover and select the mode. 1080P/ 2K (Image quality and recording mode) switch button 2K QHD 1080P Mode switch button Power button Caution: ※The switching of recording mode and image quality can only be carried out when the power is turned off. - Page 14 About recording Two recording modes description (1) Sports camera mode ① Press and hold the power button for 3 seconds, the host motor vibrates 3 times and the red LED lights up. Turn on the host power. ② Short press the power button, the motor automatically vibrates 1 time, the red and blue LED lights up at the same time.
- Page 15 About recording (3) Differences between the two recording modes ● Difference of function operation Action camera mode Driving camera mode Battery powered Auto-record after power on No auto-record after power on Connect power cable Auto-record after power on No auto-record after power on Connect the power cable after stops Host status unchanged Record starts automatically...
-
Page 16: About Emergency Recording
About Emergency Recording Besides continuous recording, emergency recording can also be started manually. (1) Starting Emergency Recording During continuous recording, press the power button twice in quick succession to start emergency recording. During emergency recording, the blue light flashes rapidly. (2) Stop emergency recording Automatic stop: After emergency recording is completed, continuous recording will be resumed automatically. -
Page 17: About Pictures
About pictures The driving recorder can take photos with a special app when it is connected to a phone via Wi-Fi. During the recording process, press the photo button to take a still photo. Open the "Car-DVR" app and enter the main interface. Touch the "Camera"... -
Page 18: Factory Settings
Play back recorded video/ image Playback on Mac Support OS: Mac osx10.3.6 and above ※ It is recommended to use in QQ Player. ※ Please download QQ Player from APP STORE before playing. (1) Please turn off the power of the host and take out the SD card. Use a card reader to connect the SD card to the computer. -
Page 19: Specification
※ The above values are estimates and are not guaranteed to be accurate. Recording time is for continuous recording. Recording time may change depending on specific usage conditions. Note: Performance and features are subject to improvement without notice. Please download the updated firmware. Firmware URL: https://www.akeeyo.co.jp/pages/support... -
Page 20: Troubleshooting
Troubleshooting Problem Solution Host does not Please make sure the battery charge is complete. turn on Normally, the battery should be charged for 2 hours. Please press the power button while the red LED is on, and check if the blue LED is flashing. Cannot take Make sure the SD card has enough memory remaining. -
Page 21: Warranty
Warranty ■ Disclaimer ● When this product is used on the road, please observe the regulations of each local government and road traffic laws. All legal responsibilities caused by improper use of this product shall be borne by the user, and the manufacturer, importing company and sales company of this product shall not bear all legal responsibilities.
Need help?
Do you have a question about the AKY-610 PRO and is the answer not in the manual?
Questions and answers