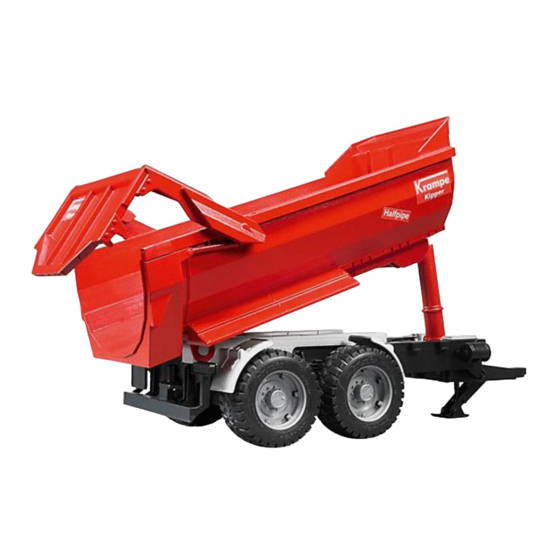
Summary of Contents for RC Tank Electronics Bruder Krampe Kipper Trailer
- Page 1 Bruder Krampe Kipper Trailer Conversion kit. Designed, Produced, and distributed by RC Tank Electronics Version 1 Page 1 20/05/21...
-
Page 2: Table Of Contents
Contents Page Cover Page Contents Skill level Caution Note Tools Required Parts required which are not included in the kit Parts List Installation Guide Version 1 Page 2 20/05/21... -
Page 3: Skill Level
Skill Level This conversion kit for the Bruder Krampe Kipper Trailer is recommended to users with medium and above competence. The following instructions are deemed a guide to “how to do the conversion” not a concise step by step procedure. -
Page 4: Parts List
Parts List Note depending on the kit purchased you may not have all the listed parts supplied. Code Description Quantity #A01 Tail Lift Arms #A02 Chassis Cross Beam #A03 Chassis Strengthen #A04 Tail Gate Pole #A05 Actuator Bracket #B01 M3 Rod eye #B02 M3 Rod (50mm) #B03... -
Page 5: Installation Guide
Instructions 1. Unpack and disassemble Bruder model. Version 1 Page 5 20/05/21... - Page 6 Version 1 Page 6 20/05/21...
- Page 7 Version 1 Page 7 20/05/21...
- Page 8 2. Cut off plastic hook. 3. Using 2.5mm drill bit drill into the front chassis. Do not drill into the support leg. Version 1 Page 8 20/05/21...
- Page 9 4. Attach one of the M3 rod eyes (part number #B01) onto the M3 x 50mm rod (part number #B02) and screw the rod into the drilled hole. 5. Attach the front part to the rest of the chassis, by clipping together. Version 1 Page 9 20/05/21...
- Page 10 6. Position M4 nut (part number #B07) as shown and mark the position and do the same on the other side. 7. Drill all the way through with 3.5mm drill bit. Version 1 Page 10 20/05/21...
- Page 11 8. Cut away chassis in locations shown below. Version 1 Page 11 20/05/21...
- Page 12 Version 1 Page 12 20/05/21...
- Page 13 9. Using M4 x 70 Rod (part number #B04) and actuator, screw into the previously drilled hole. Tip use an electric drill to screw in. Then add the M4 nuts (part number #B07) Version 1 Page 13 20/05/21...
- Page 14 10. Feed the plug and lead through the chassis. 11. Join and solder the cables together. Below gives positive to the centre of the plug pin. Version 1 Page 14 20/05/21...
- Page 15 12. Hide the cable join in the chassis under part number #A03 13. Add the part number #A03 to the other side, and part number #A02 across the chassis. Secure in place with 4 self-tapping screws after drill 2mm pilot holes. Version 1 Page 15 20/05/21...
- Page 16 14. Trim the nobbles off each side. Version 1 Page 16 20/05/21...
- Page 17 15. Trim the ridge on each side of the door arm. 16. Trim the catch on each side of the door. Version 1 Page 17 20/05/21...
- Page 18 17. Briefly reattach the door and check for smooth operation. 18. Slightly file down the internal support plastic in the arm to allow flush fitting of part number #A01. Version 1 Page 18 20/05/21...
- Page 19 19. Mark on the locations of the drill holes, and drill with 2.5mm drill bit. Attach part number #A01 into the door arm using M3 bolts. Do same for other side. Version 1 Page 19 20/05/21...
- Page 20 20. Using M3 x 70mm rod (part number #B03) screw into part number #A04 to leave 12mm exposed at one end. Tip rod can be screwed in with electric screwdriver. Build 2 number. Version 1 Page 20 20/05/21...
- Page 21 21. Using 2.5mm drill bit, drill into the side chassis between the wheels into the upper silver part. Then screw in the part from step 20, leaving the 12mm section on the outside. Again, an electric screwdriver can assist in installation. Do the same for both sides. 22.
- Page 22 23. Using M3 x 70mm rod (part number #B03) and M3 rod eye (part number #B01). Create a link arm which is 90mm centre to centre of the holes. Build 2. 24. Attach the link built in step 23 as shown using M3 nut and bolt at the top and M3 nut on the bottom.
- Page 23 25. Power the actuator to fully extend it. 26. Secure the end of the actuator to the bracket with M4 nut and bolt. Version 1 Page 23 20/05/21...
- Page 24 27. Check operation of lift and lower. Version 1 Page 24 20/05/21...

Need help?
Do you have a question about the Bruder Krampe Kipper Trailer and is the answer not in the manual?
Questions and answers