
Related Manuals for EggRider V2

Summary of Contents for EggRider V2
- Page 1 EggRider User Manual For EggRider V2 ebike display and mobile apps EggRider Team Copyright © 2019 EggRider.
-
Page 2: Table Of Contents
3.2 EggRider display specification 3.3 Pinout 3.4 EggRider display features 4. Firmware Update 4.1 EggRider Display Firmware Update 4.2 EggRider display firmware update from EggRider mobile app 5. Mobile App 5.1 EggRider mobile apps 5.2 Dashboard page 5.3 Search page 5.4 Rides... - Page 3 7.4 CYC Motor 7.5 Check compatibility 7.6 EggRider V2 Pinout 8. Troubleshooting 8.1 Solve mobile app connection problems 8.2 EggRider display speed shows --.- km/h 9. Support 10. Road map 11. EggRider Release Notes 12. Disclaimer 13. Frequently asked questions - 3/89 - Copyright ©...
-
Page 4: Eggrider User Manual
1.1 Personalize your ebike ride EggRider is the fusion of an e-bike display with a mobile app, allowing you to enhance the performance of your e-bike ride. You can get your riding statistics and customize your riding profile. - Page 5 1.2 Why EggRider Android iPhone Last update: February 17, 2021 - 5/89 - Copyright © 2019 EggRider.
-
Page 6: Eggrider Display Setup
Plug-in the connector Please make sure the diameter of the handleber is 22.2 mm and is straight in the place where you want to install EggRider display. Screws have to be driven to exactly the right depth. Too tight, and you might break the display. Please allow some movement for display to rotate. -
Page 7: Activation
Tap on the device in the search list. When the popup shows, choose option Activate now. Inserting correct information gives you instant activation. The following information is required: • Shop name - Insert the shop where you bought EggRider display from. Start typing and chose from the suggestions. Example: www.shop. eggrider .com eggrider •... - Page 8 Info These settings are used for battery measurements only, they don't influence the voltage cutoffs for example. Use the controller specific settings for protection. - 8/89 - Copyright © 2019 EggRider.
- Page 9 2.4.3 Saving settings 2.4.3 Saving settings Warning The information on EggRider display it is only saved permanently when the display it is powered off from it's own power button. This also includes the trip data. 2.4.4 Configure e-bike specific settings One more step before you're set to go! On specific models you need to configure the e-bike/controller specific settings to have full functionality.
-
Page 10: Display
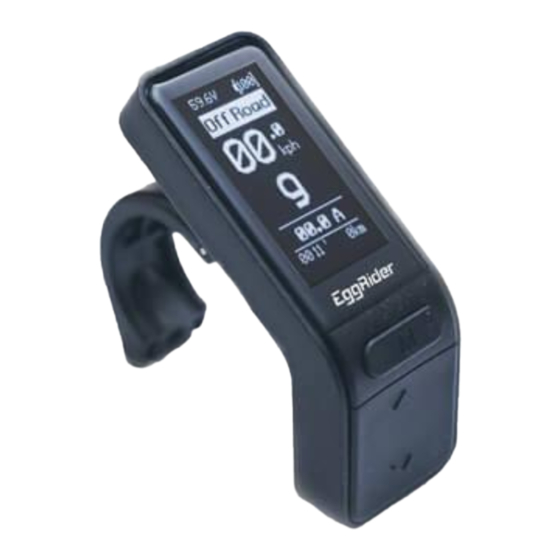
This Power resets only the display setttings. Bafang also stores settings in the controller, those will still remain. The following combinations are available from firmware version v2.6.49 - 10/89 - Copyright © 2019 EggRider. - Page 11 You can select between the Layout V1 and V2 from the display settings in the mobile app. On Layout V2 the Mode profile is embeded in the asssist level background: dark for Road mode and white for OffRoad mode. - 11/89 -...
- Page 12 Secondary Unit - It can be Power (W), Current(A), or Efficiency (watt per distance unit) • Time - It can be the hour (if the app was connected previously) or current trip time • Distance - Current trip distance - 12/89 - Copyright © 2019 EggRider.
- Page 13 • BCyc Battery cycles (calculated using the declared capacity), estimates how many times you fully charged the battery. • Range Distance to go until the battery runs out Last update: March 13, 2022 - 13/89 - Copyright © 2019 EggRider.
-
Page 14: Eggrider Display Specification
3.2 EggRider display specification 3.2 EggRider display specification SIZE 75mm x 47mm x 35mm WEIGHT CABLE LENGTH 50cm HANDLEBAR MOUNTING BRACKET Standard 22.2mm diameter CLAMP SCREW Hex bolt M3x10mm MOUNTING CLAMP PIN 2.0mm diameter and around 15mm length PHYSICAL BUTTONS... -
Page 15: Pinout
3.3 Pinout 3.3 Pinout Last update: February 22, 2021 - 15/89 - Copyright © 2019 EggRider. -
Page 16: Eggrider Display Features
Detects real battery capacity and tracking stats of up to 3 batteries. EggRider mobile app available for Android and iOS. Easy configuration from the EggRider app. Ability to use the EggRider app as a larger display. In-depth charts capability for your rides. One button switch between two profiles •... -
Page 17: Firmware Update
4.1 EggRider Display Firmware Update Attention It is highly recommended to ensure you update your firmware to the latest available when you receive your EggRider. Please make sure to put EggRider display in update mode when doing the update procedure! - Page 18 Because of the many changes in some of the core functionalities we recommend following the steps bellow for a smooth transition. We tested the update from firmware version >= v2.4.11. It should also work from older firmware versions but we recommend doing a reset to defaults afterwards.
-
Page 19: Eggrider Display Firmware Update From Eggrider Mobile App
4.2 EggRider display firmware update from EggRider mobile app 4.2 EggRider display firmware update from EggRider mobile app Attention It is highly recommended to ensure you have the latest firmware available on your EggRider display. Attention Available starting from app version 2.6.03 4.2.1 Steps to update... - Page 20 Tap on the latest sable version Update procedure will start When update is finished the EggRider display will start in normal running mode and the app will connect to Attention If the update hangs, power off from the battery or unplug the cable and restart procedure.
-
Page 21: Mobile App
5. Mobile App 5. Mobile App 5.1 EggRider mobile apps Both Android and iOS apps have the same functionalities, except for short periods of time between version releases. Although generally similar in appearance, there are some visual differences due to platform-specific components. - Page 22 5.1.3 App overview settings pages 5.1.3 App overview settings pages Last update: November 29, 2021 - 22/89 - Copyright © 2019 EggRider.
-
Page 23: Dashboard Page
To return to the settings pages, press the settings icon on the right (on android it can also be achieved using button) Back Last update: May 27, 2020 - 23/89 - Copyright © 2019 EggRider. -
Page 24: Search Page
5.3 Search page 5.3 Search page Accessible from menu Dashboard Dashboard page It shows the list of EggRider displays in range. - 24/89 - Copyright © 2019 EggRider. - Page 25 Tap on the device name in the list to connect with the app When the app starts, it scans for EggRider devices nearby and displays them in the list. You can also trigger the scan manually by pulling down on the page.
- Page 26 If your device is not showing up in the list • Make sure the app has access to bluetooth under your phone's settings • Make sure the EggRider display is plugged in and turned on • Restart the EggRider display •...
-
Page 27: Rides
Shows a list of rides recorded from the app or the display. Each ride shows its’ source label, running time, distance, and date it was recorded in the app. Rides are differentiated by the source labels. With App - Real-time information collected by the app when connected to EggRider display. (includes GPS information such as altitude). - Page 28 Ride labels -individual display trip specific values. Three individual columns for each battery's stats. To go back to Rides list select Rides on the top right corner of the screen. Last update: May 4, 2020 - 28/89 - Copyright © 2019 EggRider.
-
Page 29: Display Settings
For each protocol type there are two options, one normal and one Rx/Tx Swap. The last one is to help when the communications wires are inverted. Info When set to Auto the display will try to autodetect the protocol at the next startup. - 29/89 - Copyright © 2019 EggRider. - Page 30 If set to Yes you can only change profile from OffRoad to Road and based on the option use the mobile app for both ways or also the display when the app is connected. - 30/89 - Copyright © 2019 EggRider.
- Page 31 Attention Keep in mind that when you select lower than 9 assist levels, EggRider uses internally the levels beween () for pages like power levels or for the bafang basic assist levels. This is to allow changing the number of assist levels witouth altering the power levels.
- Page 32 This value is used to calculate the speed. Please use rim + tire value for this setting. The following links provide comprehensive resources for determining the wheel circumference Wheel size math or Cyclecomputer calibration - 32/89 - Copyright © 2019 EggRider.
- Page 33 5.5.2 BATTERY SETTINGS EggRider has up to 3 battery profiles. You can use these profiles to track stats independently if you have more than one battery. Please be sure you are setting at least the battery selected profile correctly. You can leave the other battery profiles as they are by default if not used.
- Page 34 5.5.2 BATTERY SETTINGS Capacity The capacity of the battery measured in ampere hour (Ah). This field has a resolution of 0.01 Ah. Last update: November 30, 2021 - 34/89 - Copyright © 2019 EggRider.
-
Page 35: Display Advanced Settings
Full battery (preferably just after disconnected from the plug) or a multimeter. Attention Please ensure that you have the right Voltage 0% and 100% relative to your battery which can be found in EggRider settings page. You can select from the drop down Select to auto-fill these values. - Page 36 Function used to permanently reset the ODO stats 5.6.6 ODO Offset Function used to set an offset to the ODO distance in case you want to have your old display distance in the odo total distance - 36/89 - Copyright © 2019 EggRider.
- Page 37 5.6.7 ASI password 5.6.7 ASI password In case you have an ASI controller that has been locked with a password, you can insert the password here so that EggRider can still change the settings Last update: April 26, 2021 - 37/89 -...
-
Page 38: App Settings
Retry 30 seconds • Retry 1 minute • Retry 5 minutes • Retry 10 minutes • Retry 15 minutes 5.7.2 LOCATION Use GPS data Enabling this functionality offers altitude measurements in the ride stats. - 38/89 - Copyright © 2019 EggRider. - Page 39 • Dashboard v1 • Dashboard v2 - as Dashboard v1 plus live efficiency graphs, range and current values Range adaptability factor This value decides how fast the mobile app range estimation changes. A higher value will give more steadier estimation behavior while lower values will give range estimation values closer to the actual type of riding...
-
Page 40: Power Levels
5.8 Power levels 5.8 Power levels From app >= v2.5.03 and firmware >= v2.5.17 This page offers the possibility to adjust individually each assist level power and speed limit. It is used for ASI and Lishui controllers. Please see the e-bike specific pages for more information. -
Page 41: E-Bike Settings
After a successful write, the settings are stored in the display memory as well as in the app's memory. Doing this succesfully, settings will be visible even when the app is not connected. Last update: May 4, 2020 - 41/89 - Copyright © 2019 EggRider. -
Page 42: Bafang
Pedal advanced settings. Info By using a low gear, your motor may not reach its full potential. Bafang switch mode setup Available with firmware and mobile app version > v2.2.07 - 42/89 - Copyright © 2019 EggRider. - Page 43 E14 - Temperature sensor inside the motor fault (14H) E21 - Speed sensor fault (21H) E22 - BMS communication fault (22H) E23 - Light fault (23H) E24 - Light sensor fault (24H) E25 - Torque sensor torque signal fault (25H) - 43/89 - Copyright © 2019 EggRider.
- Page 44 6.2.1 Bafang settings E26 - Torque sensor speed signal fault (26H) E30 - Communication fault (30H) BAFANG BBS01 250W DEFAULT CONFIGURATION Basic Pedal Throttle - 44/89 - Copyright © 2019 EggRider.
- Page 45 BAFANG BBSHD 1000W CONFIGURATION EXAMPLES Disclaimer The following examples are for demonstration purpose only. The EggRider V2 display does not ensure legal compliance. Please check your local laws before riding to make sure you are riding legally and safely. - 45/89 -...
- Page 46 Peak power up to 1500w (not recommended to hold the throttle at 30A current draw for more than a few seconds) • 5 assist levels (can be set to 9 in the display settings) • throttle always full power (not based on the assist level selected on the display) - 46/89 - Copyright © 2019 EggRider.
- Page 47 6.2.1 Bafang settings Basic Pedal Throttle Display settings Last update: February 19, 2021 - 47/89 - Copyright © 2019 EggRider.
- Page 48 BBS02 with a lower power level rating than 750W. If this is set lower than 25 from the factory you CANNOT RAISE it safely unless you are sure it is a 750 Watt unit & controller (it should be specified on the bottom of the unit) and your battery can handle the draw - 48/89 - Copyright © 2019 EggRider.
- Page 49 SPEED METER MODEL Options • External, Wheel Meter • Internal, Motor Meter • By Motor Meter SPEED METER SIGNAL It is set by default to the value of "1". Last update: November 5, 2020 - 49/89 - Copyright © 2019 EggRider.
- Page 50 100% Start Current will peak at well over 1000w draw. A lower value will give you a smoother acceleration. - 50/89 - Copyright © 2019 EggRider.
- Page 51 Some people report that setting this lower (as low as 5) may affect the startup delay on the throttle If you set this less than 10 on the v2 of the BBS02 controllers then your PAS will not work properly at all. On the older BBS02v1 controllers and the BBSHD controllers...
- Page 52 6.2.3 Bafang pedal settings STOP DECAY (X10MS) The amount of time the decay system takes to cut after pedaling stops. Last update: November 5, 2020 - 52/89 - Copyright © 2019 EggRider.
- Page 53 START CURRENT (%) Percentage of available current when throttle initially applied.Lower values for smoother startup: gives a much smoother startup. This can be set all the way down to - 53/89 - Copyright © 2019 EggRider.
- Page 54 You can set the max range to 42 which is the max input the controller accepts from throttle input 4.2v. If you set lower than this value your throttle response is not as linear or smooth as it could be. Last update: November 5, 2020 - 54/89 - Copyright © 2019 EggRider.
- Page 55 These settings don't change when switching modes Road/OffRoad. They are changed only when programming from the app. BASIC SETTINGS BASE VOLTAGE ERROR VOLTAGE MIN (MV) ERROR VOLTAGE MAX (MV 0 SPEED BOOST TIME (X10MS) DELTA VOLTAGE (MV) SPEEDS Last update: November 5, 2020 - 55/89 - Copyright © 2019 EggRider.
-
Page 56: Lishui Settings (Lsw)
5. Voltage cutoff base The base under-voltage protection at controller. Options are • 21V - for 24V batteries • 31.5V - for 36v batteries • 42V - for 48v batteries - 56/89 - Copyright © 2019 EggRider. - Page 57 Value to fine tune the battery voltage cutoff. If your battery shuts down before reaching 0% this should be increased. You have to sum this value to the base cutoff voltage to get the actual voltage cutoff the motor will impose. - 57/89 - Copyright © 2019 EggRider.
- Page 58 RADPOWER MODE Replicates the RadPower original display running mode. When using this option you should set to 5 assist levels. - 58/89 - Copyright © 2019 EggRider.
- Page 59 6.3.1 Settings explanation Power levels maps are not used with this option Last update: April 26, 2021 - 59/89 - Copyright © 2019 EggRider.
-
Page 60: Eggrider V2 Mate X Settings
All mate X version have Lishui controllers. For information about each setting option please consult the Lishui settings page Attention If speed shows --.- km/h on EggRider display, please reset to default factory settings with the following procedure When the display is off, press until display turns on. (You should see Load default settings) - Page 61 If speed measurements don't seem to be correct, please use wheel circumference from Display settings page to adjust. Mate X 750W Taiwan version Mate X 750W Taiwan version Last update: April 26, 2021 - 61/89 - Copyright © 2019 EggRider.
-
Page 62: Eggrider V2 Rad Power Bikes Settings
Lishui settings page. Attention If speed shows --.- km/h on EggRider display, please reset to default factory settings with the following procedure. When the display is off, press until display turns on. (You should see Load default settings) - Page 63 6.5.1 Settings example Power Levels Display Lishui - 63/89 - Copyright © 2019 EggRider.
- Page 64 This vary from controller to controller so you might have to find the limits that work for you. Also the speed limits used by the Power levels are the ones from the EggRider display settings - 64/89 -...
- Page 65 6.5.1 Settings example Power Levels Display Lishui - 65/89 - Copyright © 2019 EggRider.
- Page 66 6.5.1 Settings example Last update: July 21, 2021 - 66/89 - Copyright © 2019 EggRider.
-
Page 67: Kunteng Settings (Kt)
Accessible from menu Kunteng Consists of one common settings section shared by both profiles Road and OffRoad and profile independent settings. Speed limits are used from EggRider display settings page. - reads the settings stored on the display Read - writes the modified settings to the display. - Page 68 ABS Break (C13) Options • None • Best brake regen • General brake regen • Weaker brake regen • Poor brake regen • Bad brake green Strength PAS(C14) Options • Weaker • General • Stronger - 68/89 - Copyright © 2019 EggRider.
- Page 69 6.6.2 Kunteng Mode Specific Settings Throttle mode(P4-C4) Options • • 6km/h • 12km/h • Assist • Current Limit (%) (C5) Options are 50%, 67%, 75%, 80%, 83%, 87%, 91% and 100%. Last update: May 4, 2020 - 69/89 - Copyright © 2019 EggRider.
-
Page 70: Asi - Accelerated Systems Inc Settings
For first time use please ensure to write ASI settings and power off display from button. Power At each press on EggRider display, the relative profile settings are written to the controller but they are not permanently saved on the controller. Required Asi controller configuration •... - Page 71 6.7 ASI - Accelerated Systems Inc settings Power lock pin on the EggRider display should be left free. ASI BAC500/800 pin # ASI pin function EggRider pin function +12V Display Rx Display Tx Key out - External switch Key in - External switch...
-
Page 72: Eggrider Display Compatibility
Attention EggRider V2 is not compatible with CAN bus systems. 7.1 How to find out controller brand? Attention It is important to identify your controller brand, do not confuse this with the motor brand. - Page 73 Bafang MM G340 • Bafang M300 • Bafang M400 7.2.3 Mate bikes Compatible with all Mate X versions. Please select Mate X EggRider version. Attention Mate classic bikes are not compatible with EggRider display. Bike compatibility list: • MATE X 250 •...
- Page 74 If you can't find your model in the list below or you want to be sure about compatibility, please provide the information required here Attention Versions Rad Rover 6 and Rad Rover 6 Plus are not compatible with EggRider display. Compatible RadPower bikes have the following 5 pin screw connector for display - 74/89 - Copyright ©...
- Page 75 Lishui has different models of controllers. Some of them are compatible, some are not. It is important to provide us with the code on the controller so we can make a list of compatible controllers. - 75/89 - Copyright © 2019 EggRider.
-
Page 76: Accelerated Systems Controllers
Lishui LSW1155-37M 7.3 Accelerated Systems Controllers ASI controllers are compatible with EggRider V2 display if you have access to Bacdoor app. Please provide us picture with your display cable, battery voltage and controller model. Please read our dedicated page for more information •... -
Page 77: Cyc Motor
• picture of display connector - controller side • picture of display Attention For display connector pictures please specify which connector goes to controller and which to display See the example pictures below. - 77/89 - Copyright © 2019 EggRider. -
Page 78: Eggrider V2 Pinout
7.6 EggRider V2 Pinout Controller label Display connector Display 7.6 EggRider V2 Pinout Last update: March 13, 2022 - 78/89 - Copyright © 2019 EggRider. -
Page 79: Troubleshooting
8. Troubleshooting 8.1 Solve mobile app connection problems 8.1.1 My phone doesn't connect to EggRider V2 If the display appears on the Search Device page but doesn't connect when tapping or doesn't appear at all please follow the instructions below: Info Sometimes the mobile app fails to connect because of corrupted Bluetooth cache of the phone. - Page 80 8.1.3 Android Devices 8.1.3 Android Devices Turning off battery optimization for the app: You have the ability to be redirected to System app setting directly from the EggRider app. Follow these steps below: Open App Settings page in the EggRider App...
- Page 81 8.1.3 Android Devices Samsung(S10, S20, Note, ...) Click to see the steps Step 1 Step 2 Step 3 Step 5 Step 5 - 81/89 - Copyright © 2019 EggRider.
- Page 82 For slightly lower versions of MIUI the same principles apply but may vary a little. 8.2 EggRider display speed shows --.- km/h EggRider display showing speed as --.-km/h can be caused by the following reasons Protocol is not correctly setup.
- Page 83 If none of the above options works it is most likely because of the reasons 2) or 3). In this case please contact over email. 8.2.2 Communication port is issue This is usually the case when EggRider was showing correctly the speed. The issue can be either on EggRider display or on the controller side. How to identify where the issue is? •...
-
Page 84: Support
You can use our EggRider users Facebook group for your generic questions or feedback. In this way everyone can see the response and benefit from it. It's really important that you check out EggRider issues page first. If you can't find your problem in the list above then you can Create a new issue (requires login). -
Page 85: Road Map
Improving background stability • Predefined settings and settings sharing • Raising issues from the app • App multilingual support • Human power information for systems with torque sensor Last update: December 6, 2020 - 85/89 - Copyright © 2019 EggRider. -
Page 86: Eggrider Release Notes
Latest stable releases: Please follow carefully the update instructions: Update instructions • EggRider Firmware v2.6.49 -> Release notes • EggRider App Android v2.6.03 -> Release notes • EggRider App iOS v2.6.04 -> Release notes Some known issues: • Accelerating while display is powering on results in wrong battery measurement •... -
Page 87: Disclaimer
Disclaimer The EggRider V2 display does not ensure legal compliance. It does provide all the flexibility that the motor or controller can offer. The Road/Eco and OffRoad/Sport are merely 2 independently configured profiles. Please check your local laws before riding to make sure you are riding legally and safely. -
Page 88: Frequently Asked Questions
EggRider can support virtually any power. You have to keep in mind that the maximum power it is given by your motor controller and that it can't be bypassed. Why do I get an alert even if I updated my EggRider: "Your EggRider display version (Unknown/v2.x.x) is lower than the supported version by the app (v2.x.x)?"... - Page 89 What happens If I connect my display wrongly? If your display comes with adapters (Lishui/Xmate/Rad) Please make sure it is connected correctly. Wrong connection can damage the display or the bike and void your warranty. Last update: July 17, 2020 - 89/89 - Copyright © 2019 EggRider.
Need help?
Do you have a question about the V2 and is the answer not in the manual?
Questions and answers