Table of Contents
Advertisement
Quick Links
Advertisement
Table of Contents

Summary of Contents for Arconas Place
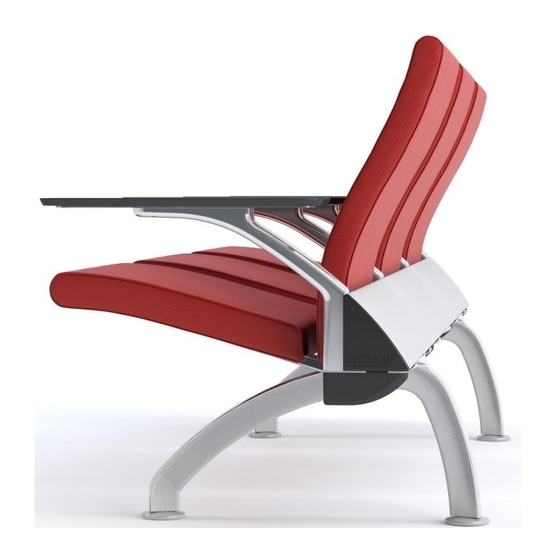
- Page 2 General This process describes how to assemble a linear Place unit. The process can be performed safely by two people of normal strength. Fully Assembled Views 3 Seat Unit with Armrest Shown Oct 2021 (rev 14) arconas.com...
-
Page 3: Tools Required
5. Awl for positioning holes if necessary 6. 5/32 Hex Key 7. 3/16 Hex Key 8. 1/4 Hex Key 9. 7/64 Hex Key 10. 3/32 Hex Key Part List Part Description Part Picture Beam Leg Casting Arm Casting Oct 2021 (rev 14) arconas.com... - Page 4 Bushing Back to Back Connector Armrest Tablet Drink Holder Oct 2021 (rev 14) arconas.com...
- Page 5 Hanger Casting Cover Plate (for no Power) Power Pod Seat Cushion Oct 2021 (rev 14) arconas.com...
- Page 6 Back Cushion Cast Clip Glide Retention Clip (For 2 Seater ONLY) Oct 2021 (rev 14) arconas.com...
-
Page 7: Hardware List
#10-24 x 3/4 in Flat Head Socket Cap Screw BLK Tablet to arm casting; 1/4-20 x 3/4 in Flat Head Socket Cap H088 Screw BLK 5/16in Countersunk External Tooth Power cover plate to beam; Lock Washer H117 Oct 2021 (rev 14) arconas.com... -
Page 8: Assembly Process
Layout all parts ahead of time to ensure you have everything Assembly Process 1. The Main Place beams will be shipped partially assembled. They will include the nuts used to connect the arms, legs and seat brackets (within the mounting grooves), groove fillers, end caps and power pods. - Page 9 Use H560 5/16-18 x3/4” button head socket screw with Loctite attached to the nuts in the bottom grooves of the beam. Loosely attach cast clips on to respective nuts under the beam. Step 2.1 - Installation of Leg Oct 2021 (rev 14) arconas.com...
- Page 10 Press the hooks into the grooves and pull down to engage the hooks in the beam. Step 4 - Install the Assembled Seat to the Beam Oct 2021 (rev 14) arconas.com...
- Page 11 Then tighten the H507 5/16-18 x 1” socket button head screw with Loctite and H128 5/16-18 x 1/2” socket button head screw stainless steel for cast clip and retention clip, respectively (see 5.5). Oct 2021 (rev 14) arconas.com...
- Page 12 Oct 2021 (rev 14) arconas.com...
- Page 13 RMREST NSTALLATION OF ABLET A place arm can be replaced with an arm cover plate using H124 5/16-18 x 1 1/4” socket head cap screw. A power pod can be replaced with a power cover plate. 7.3 - I &...
- Page 14 8. POWERED PLACE – Verify that the nuts for the arms are correctly positioned in the front grooves of the beam. Loosen the screw at the back of the power pod that mates to the beam, do not remove the pod. Align the arm’s bushings to the key slots on the top face of the power pod.
- Page 15 9. NON-POWERED PLACE – Lay the beam on the floor so that the bottom edge faces upward. A soft cloth sheet should rest underneath the unit to protect it from scratches and dents. If no power is to be installed, attach power cover plates to each arm by removing and re-using two H142 #8-32 x 3/4in flat head socket screws (see 9.2) and...
- Page 16 C13 connector into the inlet on adjacent unit). Once the units are connected, turn the circuit breaker (switch) to the “ON” position. Ensure the blue lights are lit on each pod. If the pod fails to light up, contact Arconas for support.
-
Page 17: Cable Management
SCREW WITH LOCTITE to fasten the legs and connectors to the beam. Repeat process on the opposite end. 2.2 - I NSTALLATION OF BACK BACK Cable Management Use cord springs to dress any excess cords. Insert cord spring into beam then twist clockwise to engage prongs. Oct 2021 (rev 14) arconas.com... -
Page 18: Ground Mounting
Ground Mounting Please Note: Arconas does not provide floor mounting hardware. Arconas recommends consulting with building owner before installing any anchors to the floor. Ensure ground mounting hole glides are opposite from each other. See picture. Oct 2021 (rev 14)
Need help?
Do you have a question about the Place and is the answer not in the manual?
Questions and answers