Advertisement
Advertisement

Summary of Contents for FREUCAMP 3J-RW-2
- Page 1 Roof Windows User & Installation Manuals Model:3J-RW-2...
-
Page 3: Table Of Contents
Contents Main components Security considerations Roof window use Installation Product size Packing List Install Instructions Others Warranty regulations Warranty card Thank you for purchasing our products! Please read this manual carefully before you use the product save it for future reference . -
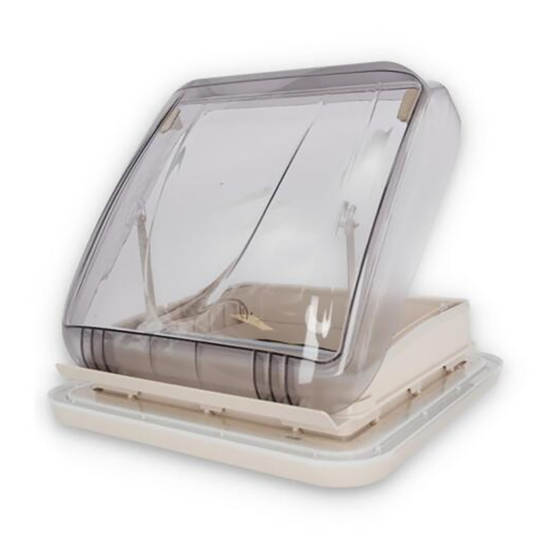
Page 4: Main Components
Main Components Roof window Dome (acrylic) Push rod arm Push rod Upper frame Ambient Light Curtain frame Installation frame Latch hook Damping block Power button Pleated Blind Pleated flyscreen Note:The version without ambient lights has no power button. -
Page 5: Security Considerations
Security considerations Please read this manual carefully before installation, and first use ,and store it in a safe place.If you pass on the product to another person ,hand over this instruction manual along with it. In order to avoid property damage to users and others, please strictly follow the safety warnings and precautions. -
Page 6: Roof Window Use
Roof window use Ambient Light Number of Four Three Five touches Corresponding st gear nd gear rd gear st gear Standby function Power button Please turn off the power when leaving the car for a long time! - Page 7 Roof window use Open the Dome Push the push rod up to unlock and continue to slide toward the front of the car to fix the push rod at 5° semi-ventilated gear or 50° fully-ventilated gear Hold the middle position of the push rod when opening the roof window, this position is more conducive to unlocking.
- Page 8 Roof window use Close the Dome Warning sign Slide the push rod along the track to the end of the track (the red position in the picture) and make a click sound, which means that the push rod is locked Warning sign Make sure both sides are locked before driving!
-
Page 9: Product Size
Product size Unit :mm Roof mounting surface 511.5 534.5 (503) 4-R13 Hole size (485) -
Page 10: Packing List
Packing list ST4.0×16 Phillips pan Roof window head screws ST3.9×32 Phillips U-shaped clip pan head screws 4mm nylon cable tie Plugs... -
Page 11: Install Instructions
Install Instructions According to the hole size drawing on the product size page, cut the installation hole on the 1、 roof (a solid wall ≥ 30mm wide is required around the opening so that the screw can be firmly nailed into the wall), and you can choose to install it on the left or right( reserve a room for a power cord ≥50mm in the side hole). - Page 12 Install Roof window Connect the reserved cord to the touch panel power cord and wrap it with electrical tape, 3、 and use a 4mm wide cable tie to tie the excess power cord to the fixed point of the light guide (there are fixed points on the left and right sides), and check whether the light strip works normally after power on.
- Page 13 Install Roof window Clean the oil and dust on the roof mounting surface, and then install the upper part of the 5、 skylight into the hole. Use 12 ST3.9×32 self-tapping screws to fix the upper part of the roof window from inside 6、...
- Page 14 Install Roof window Clamp the 16 U-shaped clips onto the fins of the curtain frame and then clamp them upward into the 7、 installation frame, and pat the curtain with your hand or a rubber hammer to make it fully clamped, and check the curtain frame is tightly attached to the Installation frame.
-
Page 15: Warranty Regulations
Warranty regulations This product is guaranteed free of charge for one year. 、 During the warranty period, the fault caused by normal use in accordance with the 、 instructions (determined by the official staff of the company) will be repaired free of charge. During the warranty period, in case of any of the following circumstances, a charge repair 、... -
Page 16: Warranty Card
arranty card roduct name :__________________ Product model :__________________ Serial number :__________________ Date of manufacture :__________________ ustomer name :__________________ Contact number :____________________ ustomer address :__________________________________________________ Warranty content :___________________________________________________ After sales : ___________________________________________________ Customer signature :__________________ Dissatisfied Satisfied Warranty content :___________________________________________________ After sales : ___________________________________________________ Customer signature :__________________ Satisfied Dissatisfied...
Need help?
Do you have a question about the 3J-RW-2 and is the answer not in the manual?
Questions and answers
powerbutton 3j-rw-2 gives no reaction.
If the power button on the FREUCAMP 3J-RW-2 is unresponsive, first check if your version includes ambient lights, as versions without them do not have a power button. If your model does include a power button and it's unresponsive, it may indicate a performance failure. In that case, you may be eligible for repair, exchange, or return:
- Within 7 days from the date of sale: you can return, exchange, or repair the product.
- Within 15 days from the date of sale: you can choose to replace or repair it.
Contact after-sales service using the warranty card information.
This answer is automatically generated