
Related Manuals for GeoSmartPro AirGo

Summary of Contents for GeoSmartPro AirGo
- Page 1 AirGo Smart Fan User Manual Carefully read this instruction manual before switching on your AirGo Smart Fan for your utmost safety.
- Page 2 CONTENTS Page 3-4 - Warnings and Cautions Page 5-6 - AirGo Smart Fan Assembly Page 7-8 - Operating Instructions Page 9 - Cleaning, Maintenance and Specifications Page 10 Cleaning, Maintenance and Storage Page 11 - Warranty Page 12-13 - Connect to the GeoSmartPro App What’s in the box...
- Page 3 WARNINGS CAUTIONS WARNINGS - This appliance can be used by children aged from 8 years and above and persons with reduced physical, sensory or mental capabilities or lack of experience and knowl- edge if they have been given supervision or instruction concerning use of the appliance in a safe way and understand the hazards involved.
- Page 4 WARNINGS CAUTIONS CAUTIONS - Be sure the fan is placed on a stable surface when operating to avoid overturning. - The fan must not be used if the guards are not fastened according to instructions. - The appliance is for indoor use only. - Do not plug into the power socket before installation is complete.
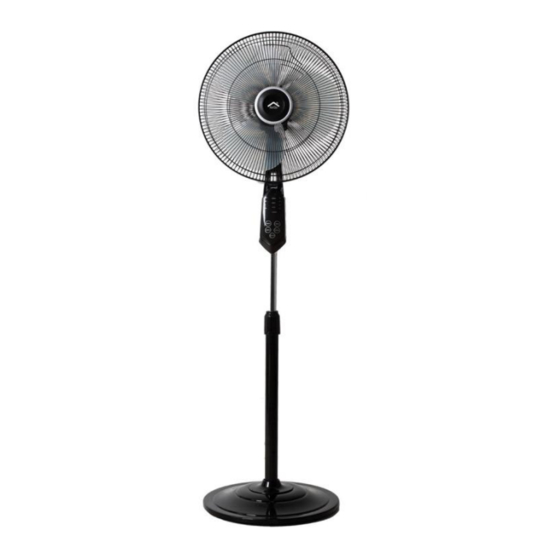
- Page 5 AIRGO SMART FAN ASSEMBLY Assemble the tube on The height of the fan Insert the fan body the base by tightening can be adjusted by in the main tube the four screws and loosening the height and tighten the inserting the base ring adjustment ring.
- Page 6 AIRGO SMART FAN ASSEMBLY Loosen the nut (5) of the motor (8). Firmly mount the rear grille (6) on the motor by matching 3 mounting pads. Tighten the nut (5) on the back grid so as to block the grille against the motor.
- Page 7 OPERATING INSTRUCTIONS Warning: Make sure the fan is fully assembled (and the grilles are in place and locked) before switching Place your fan on a level and dry surface. Plug the fan into a mains socket of suitable voltage and frequency (see Technical Specifications for details) Touch ON/OFF button to turn on the fan.
- Page 8 OPERATING INSTRUCTIONS Swing: Press the Swing button to turn on oscillation. The swing indicator turns on. Press again to turn off oscillation. Speed: Press the Speed button to change fan speed. There are 3 possible speeds: Low/Medium/High. The corresponding indicator turns on. Mode: NORM mode: The fan operates in the constant speed set using the Speed button.
- Page 9 CLEANING, MAINTENANCE AND SPECIFICATIONS Warning : Always unplug the appliance before cleaning. 1. Always disconnect the appliance from the mains by switching it off and removing the plug from the power outlet before cleaning. 2. To clean the outer surface of the appliance, use a lightly damp cloth.
- Page 10 Fan Storage Your AirGo Smart Fan can be stored in the off season, either partially disassembled or assembled. It is important to keep it in a safe and dry location. • If stored disassembled, we recommend using the original (or appropriately sized) box.
- Page 11 WARRANTY Please keep your receipt as this will be required for any claims under this warranty. AirGo Smart Fan’s warranty is for 2 years from the date of purchase as described in this document. During this warranty period, if in the unlikely event the AirGo Smart Fan no longer functions due to a design or manufacturing fault, please take it back to the place of purchase, with your till receipt and a copy of this warranty.
- Page 12 CONNECT TO THE GEOSMARTPRO Registration: Download the GeoSmartPro app Enter the register/login interface, from the App Store input the phone number to or Google Play. receive a verification code to register by inputting your email address.
- Page 13 CONNECT TO THE GEOSMARTPRO Connection: 1. Preparation: Connect your AirGo fan to your electricity outlet, press the “on/off “ button and then the “mode” button for 5 seconds until the indicator rapidly blinks, then click on the confirm button. 2. You will then need to enter your wifi password to connect your phone the the wifi router and connect to the internet.
- Page 14 ADDRESS GeoSmartPro Ltd, 1.70 Watford Croxley, 1st Floor, Building 2, Croxley Business Park, Watford, Hertfordshire, WD18 8YA. ONLINE www.geosmartpro.com support@geosmartpro.com...
- Page 15 Manuel de l'utilisateur du ventilateur intelligent AirGo Lisez attentivement ce manuel d’instruction avant d’allumer votre ventilateur intelligent AirGo pour une sécurité maximale.
- Page 16 CONTENTS Page 3-4 - Avertissements et précautions Page 5-6 - Ensemble ventilateur AirGo Smart Page 7-8 - Manuel d'utilisation Page 9 - Nettoyage, maintenance et spécifications Page 10 - Nettoyage, maintenance et stockage Page 11 - Garantie Page 12-13 - Connexion à l'application...
- Page 17 AVERTISSEMENTS ET Précautions AVERTISSEMENTS - Cet appareil peut être utilisé par des enfants âgés de 8 ans et plus et des personnes ayant des capacités physiques, sensorielles ou mentales réduites ou qui manquent d'expérience et de connaissances si elles ont reçu une surveillance ou des instructions concernant l'utilisation de l'appareil de manière sûre et comprendre les risques encourus.
- Page 18 AVERTISSEMENTS ET Précautions Précautions - Assurez-vous que le ventilateur est placé sur une surface stable lors de son utilisation pour éviter tout renversement. - Le ventilateur ne doit pas être utilisé si les protections ne sont pas fixées conformément aux instructions. - Cet appareil est destiné...
- Page 19 AIRGO SMART FAN ASSEMBLAGE Assemblez le tube La hauteur du Insérer le corps du ventilateur peut être sur la base en ventilateur dans le tube serrant ajustée par principal les quatre vis et desserrer la bague de et serrez la vis pour fixer l'insertion de la réglage en hauteur.
- Page 20 AIRGO SMART FAN ASSEMBLAGE Desserrer l'écrou (5) du moteur (8). Fixez fermement la grille arrière (6) sur le moteur en faisant correspondre 3 patins de fixation. Serrer le écrou (5) sur la grille arrière pour bloquer la grille contre le moteur.
- Page 21 EN FONCTIONNEMENT INSTRUCTIONS Avertissement: Assurez-vous que le ventilateur est complètement assemblé (et que les grilles sont en place et verrouillées) avant de démarrer. 1. Placez votre ventilateur sur une surface plane et sèche. 2. Branchez le ventilateur sur une prise secteur de tension et de fréquence appropriées (voir Spécifications techniques pour plus de détails).
- Page 22 EN FONCTIONNEMENT INSTRUCTIONS Balançoire: Appuyez sur le bouton Swing pour activer l’oscillation. L'indicateur de swing s'allume. Appuyez à nouveau pour désactiver l'oscillation. La vitesse: Appuyez sur le bouton Vitesse pour changer la vitesse du ventilateur. Il y a 3 vitesses possibles: Basse / Moyenne / Haute.
- Page 23 NETTOYAGE, ENTRETIEN ET CARACTÉRISTIQUES Avertissement: débranchez toujours l’appareil avant de le nettoyer. 1. Débranchez toujours l'appareil du secteur en l'éteignant et en débranchant la fiche de la prise de courant avant de le nettoyer. 2. Pour nettoyer la surface extérieure de l'appareil, utilisez un chiffon légèrement humide.
- Page 24 à l’eau. Stockage des ventilateurs Votre ventilateur intelligent AirGo peut être stocké hors saison, partiellement démonté ou assemblé. Il est important de le conserver dans un endroit sûr et sec. • S'il est conservé démonté, nous vous recommandons d'utiliser la boîte d'origine (ou de taille appropriée).
- Page 25 GARANTIE Veuillez conserver votre reçu car cela sera nécessaire pour toute réclamation dans le cadre de cette garantie. La garantie du ventilateur AirGo Smart est de 2 ans à compter de la date d’achat, comme indiqué dans ce document. Au cours de cette période de garantie, si, dans l'éventualité peu probable, le ventilateur...
- Page 26 CONNEXION À L'APPLI GEOSMARTPRO Enregistrement: Téléchargez Entrez l'interface l'application d'enregistrement / connexion, GeoSmartPro entrez le numéro de téléphone depuis l'App Store pour recevoir un code de ou Google Play. vérification pour vous inscrire en entrant votre adresse email.
- Page 27 3. Une fois que vous avez entré tous les détails, vous devriez voir un Page "Connexion", où votre téléphone essaiera de se connecter à votre Ventilateur intelligent AirGo via le réseau wifi. 4. Attendez que votre configuration réussisse, puis appuyez sur «Terminer» et profitez de votre ventilateur intelligent...
- Page 28 ADRESSE GeoSmartPro Ltd, 1.70 Watford Croxley, 1st Floor, Building 2, Croxley Business Park, Watford, Hertfordshire, WD18 8YA. EN LIGNE www.geosmartpro.com support@geosmartpro.com...
- Page 29 AirGo Smart Fan Benutzerhandbuch Lesen Sie diese Bedienungsanleitung sorgfältig durch, bevor Sie Ihren AirGo Smart Fan zu Ihrer größtmöglichen Sicherheit einschalte...
- Page 30 INHALT Seite 3-4 - Warnungen und Vorsichtsmaßnahmen Seite 5-6 - AirGo Smart Fan Montage Seite 7-8 - Bedienungsanleitung Seite 9 - Reinigung, Wartung und technische Daten Seite 10 Reinigung, Wartung und Lagerung Seite 11 - Gewährleistung Seite 12-13 - Stellen Sie eine Verbindung zur...
- Page 31 Warnhinweise Vorsichtsmaßnahmen WARNUNGEN - Dieses Gerät darf von Kindern ab 8 Jahren und von Personen mit eingeschränkten körperlichen, sensorischen oder geistigen Fähigkeiten oder mangelnder Erfahrung und Kenntnis verwendet werden, wenn sie über die sichere Verwendung des Geräts unterwiesen oder unterwiesen wurden die damit verbundenen Gefahren verstehen. - Stellen Sie sicher, dass der Lüfter vom Stromnetz getrennt ist, bevor Sie die Schutzvorrichtung entfernen.
- Page 32 Warnhinweise Vorsichtsmaßnahmen VORSICHTSMASSNAHMEN - Stellen Sie sicher, dass der Lüfter während des Betriebs auf einer stabilen Oberfläche steht, um ein Umkippen zu vermeiden. - Der Lüfter darf nicht verwendet werden, wenn die Schutzvorrichtungen nicht vorschriftsmäßig befestigt sind. - Das Gerät ist nur für den Gebrauch in Innenräumen bestimmt. - Stecken Sie den Stecker erst in die Steckdose, wenn die Installation abgeschlossen ist.
- Page 33 AIRGO SMART FAN VERSAMMLUNG Montieren Sie das Rohr Die Höhe des Lüfters Setzen Sie den auf der Basis durch kann mit eingestellt werden Ventilatorkörper in das Anziehen Die vier Lösen des Hauptrohr ein Schrauben und den Höhenverstellrings. und ziehen Sie die Schraube Sockelring nach unten über...
- Page 34 AIRGO SMART FAN VERSAMMLUNG Lösen Sie die Mutter (5) des Motors (8). Montieren Sie das Heckgitter fest (6) am Motor durch passende 3 Montagepads. Ziehen Sie die fest Mutter (5) auf dem hinteren Gitter, um das Gitter gegen den Motor zu blockieren.
- Page 35 BEDIENUNGSANLEITUNG Warnung: Vergewissern Sie sich vor dem Einschalten, dass der Lüfter vollständig zusammengebaut ist (und die Gitter angebracht und verriegelt sind). Stellen Sie Ihren Ventilator auf eine ebene und trockene Oberfläche. Schließen Sie den Lüfter an eine Steckdose mit geeigneter Spannung und Frequenz an (Einzelheiten siehe Technische Daten).
- Page 36 BEDIENUNGSANLEITUNG Schwingen: Drücken Sie die Swing-Taste, um die Oszillation einzuschalten. Die Swing-Anzeige leuchtet auf. Drücken Sie erneut, um die Oszillation auszuschalten. Geschwindigkeit: Drücken Sie die Geschwindigkeitstaste, um die Lüftergeschwindigkeit zu ändern. Es gibt 3 mögliche Geschwindigkeiten: Niedrig / Mittel / Hoch. Die entsprechende Anzeige leuchtet auf.
- Page 37 REINIGUNG, WARTUNG UND TECHNISCHE DATEN Warnung: Ziehen Sie vor dem Reinigen immer den Netzstecker aus der Steckdose. 1. Trennen Sie das Gerät immer vom Stromnetz, indem Sie es ausschalten und den Stecker aus der Steckdose ziehen, bevor Sie es reinigen. 2.
- Page 38 REINIGUNG, WARTUNG UND Idee Ihr AirGo Smart Fan kann auch während der kalten LAGERUNG Wintersaison verwendet werden, um warme Luft in Ihrem Haus zu zirkulieren. Warnung: Ziehen Sie vor dem Reinigen immer den Netzstecker aus der Steckdose. Lüfterflügelreinigung 1. Um auf die Lüfterflügel zuzugreifen, entfernen Sie den Frontgrill und die Flügelkappe.
- Page 39 WARTUNG UND LAGERUNG Lüfter Lagerung Ihr AirGo Smart Fan kann in der Nebensaison entweder teilweise zerlegt oder zusammengebaut gelagert werden. Es ist wichtig, es an einem sicheren und trockenen Ort aufzubewahren. • Bei zerlegter Lagerung empfehlen wir die Verwendung des Originalkartons (oder eines Kartons mit entsprechender Größe).
- Page 40 GARANTIE Bitte bewahren Sie Ihre Quittung auf, da dies für Ansprüche im Rahmen dieser Garantie erforderlich ist. Auf AirGo Smart Fan wird eine Garantie von 2 Jahren ab Kaufdatum gewährt, wie in diesem Dokument beschrieben. Wenn in diesem Garantiezeitraum der AirGo Smart Fan in dem unwahrscheinlichen Fall aufgrund eines Konstruktions- oder Herstellungsfehlers nicht mehr funktioniert, bringen Sie ihn bitte mit Ihrem Kassenbon und einer Kopie dieser Garantie zum Kaufort zurück.
- Page 41 VERBINDEN SIE SICH MIT DER GEOSMARTPRO APP Anmeldung: Laden Sie die Rufen Sie die Registrierungs- / GeoSmartPro-App herunter Anmeldeschnittstelle auf und geben Sie aus dem App Store oder die Telefonnummer ein, um durch von Google Play. Eingabe Ihrer E-Mail-Adresse einen Bestätigungscode für die Registrierung...
- Page 42 3. Nachdem Sie alle Details eingegeben haben, sollte a Seite "Verbinden", auf der Ihr Telefon versucht, eine Verbindung zu Ihrem herzustellen AirGo Smart Fan über das WLAN-Netzwerk. 4. Warten Sie, bis Ihre Konfiguration erfolgreich ist, und tippen Sie dann auf „Complete“.
- Page 43 ADRESSE GeoSmartPro Ltd, 1.70 Watford Croxley, 1st Floor, Building 2, Croxley Business Park, Watford, Hertfordshire, WD18 8YA. ONLINE www.geosmartpro.com info@geosmartpro.com...
- Page 44 CONTENIDO AirGo Ventilador Inteligente Manual de Instrucciones Lea atentamente este manual de instrucciones antes de encender su ventilador inteligente AirGo para su máxima seguridad.
-
Page 45: Table Of Contents
Página 10 Limpieza, mantenimiento y especificaciones. Página 11 - Garantía Página 12-13 - Conéctese a la aplicación GeoSmartPro Que contiene la caja 1. Motor con panel de control 6. Tapas de aspa 2. Rejilla delantera 7. Base pedestal 3. Rejilla trasera 8. -
Page 46: Advertencias Yprecauciones
ADVERTENCIAS Y PRECAUCIONES ADVERTENCIAS - Este aparato puede ser utilizado por niños a partir de 8 años y personas con capacidades físicas, sensoriales o mentales reducidas o falta de experiencia y conocimiento si se les ha dado supervisión o instrucciones sobre el uso del aparato de manera segura y comprender los riesgos involucrados. - Page 47 ADVERTENCIAS Y PRECAUCIONES PRECAUCIONES - Asegúrese de colocar el ventilador en una superficie estable cuando esté funcionando para evitar que se vuelque. - El ventilador no debe usarse si los protectores no están sujetos de acuerdo con las instrucciones. - El aparato es solo para uso en interiores. - No lo conecte a la toma de corriente antes de completar la instalación.
- Page 48 AIRGO VENTILADOR INTELIGENTE MONTAJE Ensamble el tubo en La altura del Inserte el cuerpo la base apretando ventilador se puede del ventilador en ajustar aflojando el los cuatro tornillos e el tubo principal anillo de ajuste de insertando el anillo de y apriete el altura.
- Page 49 AIRGO VENTILADOR INTELIGENTE MONTAJE Afloje la tuerca (5) del motor. (8) Monte firmemente la rejilla trasera (6) en el motor haciendo coincidir 3 almohadillas de montaje. Apretar la tuerca (5) en la rejilla posterior para bloquear la rejilla contra el motor.
-
Page 50: Instrucciones De
INSTRUCCIONES DE MANEJO Advertencia: Asegúrese de que el ventilador esté completamente ensamblado (y las rejillas estén en su lugar y bloqueadas) antes de encenderlo. 1. Coloque su ventilador en una superficie nivelada y seca. 2. Enchufe el ventilador en una toma de corriente de voltaje y frecuencia adecuados (consulte las especificaciones técnicas para más detalles) 3. - Page 51 INSTRUCCIONES DE MANEJO Oscilación: Presione el botón ‘Swing’ para activar la oscilación. El indicador de oscilación se enciende. Presione nuevamente para apagar la oscilación. Velocidad: Presione el botón ‘Speed’ para cambiar la velocidad del ventilador. Hay 3 velocidades posibles: baja / media / alta.
-
Page 52: Limpieza, Mantenimiento Y
LIMPIEZA, MANTENIMIENTO Y ESPECIFICACIONES Advertencia: desenchufe siempre el aparato antes de limpiarlo. 1. Siempre desconecte el aparato de la red eléctrica apagándolo y desenchufando el tomacorriente antes de limpiarlo. 2. Para limpiar la superficie exterior del aparato, use un paño ligeramente humedecido. -
Page 53: Limpieza, Mantenimiento
Almacenamiento del Ventilador Su AirGo Smart Fan puede almacenarse fuera de temporada, ya sea parcialmente desmontado o ensamblado. Es importante mantenerlo en un lugar seguro y seco. • Si se almacena desmontado, recomendamos utilizar la caja original (o del tamaño adecuado). -
Page 54: Garantía
Durante este período de garantía, si en el improbable caso de que el AirGo Smart Fan ya no funcione debido a una falla de diseño o fabricación, llévelo de vuelta al lugar de compra, con su recibo de compra y una copia de esta garantía. -
Page 55: Conéctese A La Aplicación Geosmartpro
CONECTESE A LA APLICACIÓN GEOSMARTPRO Registro: Descargue la Ingrese a la interfaz de registro / aplicación inicio de sesión, ingrese el GeoSmartPro número de teléfono para recibir desde la App Store un código de verificación para o Google Play registrarse o ingrese su... - Page 56 CONECTESE A LA APLICACIÓN GEOSMARTPRO Conexión: Preparación: conecte su ventilador AirGo a su toma de corriente, presione el botón "encendido / apagado" (on/off) y luego el botón "modo" (mode) durante 5 segundos hasta que el indicador parpadee rápidamente, luego haga clic en el botón confirmar.
- Page 57 DIRECCION GeoSmartPro Ltd, 1.70 Watford Croxley, 1st Floor, Building 2, Croxley Business Park, Watford, Hertfordshire, WD18 8YA. ONLINE www.geosmartpro.com support@geosmartpro.com...
Need help?
Do you have a question about the AirGo and is the answer not in the manual?
Questions and answers