Table of Contents
Advertisement
Advertisement
Table of Contents

Related Manuals for SuperSnow KX-350K


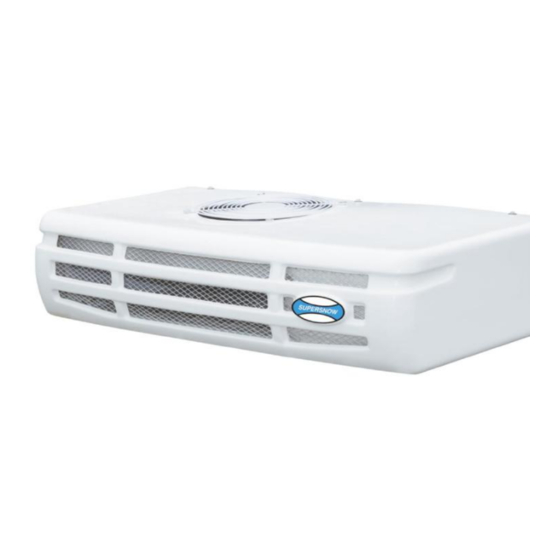
Summary of Contents for SuperSnow KX-350K
- Page 1 Installation Manual KX-350K 1 / 40 Super Snow...
-
Page 2: Table Of Contents
Table of contents 1.Installation Instruction ....................2.Check fitting kit to make sure all parts and drawing are present ............3.Preparation before condenser and evaporator installation .............. 3.1 Condenser installation ..................... Evaporator installation ..................... 4.Hose and clamp installation ..................5.Refrigeration line, defrost drain hoses and electrical cables installation .......... - Page 3 1.Installation Instruction Protective Equipment ■ Always use adequate personal protective equipment before doing anything on this unit. ■Technicians must wear the proper PPE in right way, including full body harness with two hooks in the waist, safety cap, safety glasses and safety shoes. ■Disconnect the vehicle battery:--Remove the battery ground(-);Then disconnect the positive battery(+).
- Page 4 1.Installation Instruction Installation steps ■Technicians must wear the proper PPE in right way, including full body harness with two hooks in the waist, safety cap, safety glasses and safety shoes. ■ Check the grip brake of truck to ensure it being launched in safe.
-
Page 5: Check Fitting Kit To Make Sure All Parts And Drawing Are Present
2.Check fitting kit to make sure all parts and drawing are present Before installation Unpack the box contents in your warehouse. KEEP THE DOCUMENT DELIVERED WITH THE UNIT 2. Unpack the box Check the box content corresponds to the bill of material on the packaging. - Page 6 □ Take care not to obstruct the air intakes on the evaporator section and the ventilation ducts. □ For any mobile partition installation, contact our Technical Department or refer to the attached chart. Model KX-350K 1000mm 150mm 6 / 40 Super Snow...
- Page 7 3.Preparation before condenser and evaporator installation Recommendations 3.Install 4 shock absorber pad Put silicone to waterproof on the spacer inside the box. ■ Before box preparation and unit installation start, Put silicon to waterproof on the 4 screws outside the ■...
- Page 8 3.Preparation before condenser and evaporator installation 3.From the outside of the box, punch the countersunk hole with a φ22 mm round slot saw 1.Present the drilling template – not supplied - (refer to the Attention:Never broken the φ12.5mm hole outside the box bodybuilder drawing).
- Page 9 3.Preparation before condenser and evaporator installation 5.Adjust the bolts suitable length(L=top thickness(E) - box inside cover thickness(E’)), means L=E-E’ L:Bolts length ■ E:Top thickness ■ Bolts assemble E':Box inside cover thickness ■ 1.Put silicone inside the bolts Bolts preparation 2.Put the bolts into the drilling hole 1、Bolts 2、Silicon sealing 3.Gently press the silicone seal with a wooden hammer...
- Page 10 3.Preparation before condenser and evaporator installation Condenser installation drawing 350K 10 / 40 Super Snow...
- Page 11 3.Preparation before condenser and evaporator installation Evaporator installation drawing 350K 11 / 40 Super Snow...
-
Page 12: Condenser Installation
3.1 Units installation Condenser installation: 1.The edge of the template should be aligned with the edge of the unit to ensure the accuracy. 2.The hole position must be clearly delineated(enter position), ensures the accuracy of the template. 3.Find the center line immediately after the template is removed from the unit, never make template rotate. -
Page 13: Evaporator Installation
3.1 Units installation Evaporator installation: 1.Remove the evaporator cover: ■ Remove the fixing screws ■ Remove the cover 2.Fix the evaporator in the middle of front wall panel, tie the nuts when make sure it won’t be inclined. 3.Tighten the screws. 13 / 40 Super Snow... -
Page 14: Hose And Clamp Installation
4.Hoses and clamp installation Hoses: Stocking Recommendations ■ For a good functioning of refrigeration circuit, refrigeration hoses must be clean and dry. ■ Hoses must be stocked in a dry area, with less variation in temperature as possible and sheltered from moisture. - Page 15 4.Hoses and clamp installation Hose: Preparation Shall use professional tool to cut pipe to make sure the flatness Knife cutting can’t make sure the pipe flat, second operation will make inside dirty, also danger to hurt Must check the O-ring if match with the hose fittings before installation ...
- Page 16 4.Hoses and clamp installation Note: after the clamp is installed, both sides should be symmetrical.(the pipe is pressed evenly and beautiful on the hose fitting) Should put POE oil on the fittings: 1、Can improve the sealing effect of O - ring 2、Can prevent the O-ring from being broken when installation ...
-
Page 17: Refrigeration Line, Defrost Drain Hoses And Electrical Cables Installation
5.Refrigeration line, defrost drain hoses and electrical cables installation Hoses: Mounting 1.Do not twist or curve the hose. 2.Keep enough length to avoid length variation when the pipes are under pressure. 3.Pipes length can vary between -2% to +4%. 4.Using elbows and fittings make easier installations, assist accessibility and increase hoses/pipes life. - Page 18 5.Refrigeration line, defrost drain hoses and electrical cables installation Unit: Refrigeration line Recommendation Check O-ring if good, if not please replace with new one ■ Liquid Five ports in condenser, 2 connected to compressor, 3 connected to evaporator 1.HP 2.Oil return 3.Liquid 4.Hot gas return...
- Page 19 5.Refrigeration line, defrost drain hoses and electrical cables installation Unit: Refrigeration line 3 Pipes to condenser 1.Liquid 2.Suction 3.Hot gas defrost Recommendation ■ Marks shall be made on the hot gas pipe line (at Hot gas defrost both ends of the pipe) to avoid confusion with the liquid Liquid Suction pipe...
- Page 20 5.Refrigeration line, defrost drain hoses and electrical cables installation 1.Connect the condenser, evaporator, compressor and Unit: Refrigeration line stand-by compressor to the corresponding ports as the drawing. 2.The pipeline can’t be twined, use the strapping tape to fix it tightly. 3.Use hose clamps to fix the pipes on the front wall to avoid shaking.
- Page 21 5.Refrigeration line, defrost drain hoses and electrical cables installation Unit: Cables connection 1.Run the electrical cables inside the vehicle body. 2.Connect the plug connectors in evaporator. 3.Attach all harness with plastic tie-wraps. 21 / 40 Super Snow...
- Page 22 5.Refrigeration line, defrost drain hoses and electrical cables installation Evaporator: Drain pan 1.Put the drain water pipe in place. RECOMMENDATIONS ■A descent of MINIMUM 100 mm must be applied between the drain water hoses pipe and the hoses inside the body to help to drain water out. Connect the drain water hoses between drain water pipes and evaporator water tubes.
-
Page 23: Charge Compressor Oil
POE oil instead of the oil come together with compressor. □ Charging □ Choose one way to charge the excess oil into system: Model KX-350K 1.Suck the oil into low pressure side during vacuum Refrigerant R404A 2.Charge the high pressure pipe before the oil... -
Page 24: Mount Compressormounting Kit & Compressor(Optional)
7.Mount compressor mounting kit & compressor(optional) MANDATORY BEFORE ANY ELECTRICAL Compressor: Connection OPERATION: ■ DISCONNECT THE VEHICLE BATTERY: Remove the battery ground (-), the positive battery (+) and lock-out. Compressor is separate from evaporator and condenser, need connect it use a hose 1.Move along hoses and battery harness to the compressor and vehicle battery. - Page 25 7.Mount compressor mounting kit & compressor(optional) Compressor: Connection Compressor is separate from evaporator and condenser, connect to the vehicle engine with belt, connect the evaporator and condenser with hose Connect the EXHAUST HOSE. Connect the SUCTION PRESSURE HOSE. Connect the OIL RETURN HOSE if available (under the compressor).
- Page 26 7.Mount compressor mounting kit & compressor(optional) Compressor: Connection RECOMMENDATIONS ■ Make sure right thermo switch to good connection with the exhaust pipe, and wrap it well with insulated materials. 1.Fix the thermo switch on the compressor exhaust pipe with clamp 2.Wrap with insulated material and fix with tie-wraps 26 / 40 Super Snow...
- Page 27 7.Mount compressor mounting kit & compressor(optional) Compressor: Connection Fix all hoses and harness with plastic tie-wraps.. 2.Ensure the suction pipe go smooth to prevent oil bay. 27 / 40 Super Snow...
-
Page 28: Check Leak And Evacuate System
8.Check leak and evacuate system Leak checking □ Requirements ■ 1 Vacuum pump ■ 1 Manifold gauges (4 connections) ■ 1 Vacuumeter □ Check gas leak 1.Install manifold gauges on the compressor side. 2.Connect the vacuum pump to the manifold gauges. 3.Start the vacuum pump and vacuum for 15 min: to remove the air in the circuit. - Page 29 8.Check leak and evacuate system Unit vacuum □ System vacuum Remove the nitrogen. Start the vacuum pump. Apply "Triple evacuation" process (refer to refrigeration training module) Stop the vacuum pump. Check if vacuum is complete with vacuumeter. (refer to refrigeration training module) 29 / 40 Super Snow...
-
Page 30: Check And Charge Refrigerant
Model KX-350K 6.When refrigerant cylinder weight (scale) indicates that the correct charge has been added, close the manifold valves R404A 1.2kg... -
Page 31: Install Cab Control And Connect Electricals
10.Install cab control and connect electrical Driver cab: Preparation RECOMMENDATIONS ■ Before drilling the floor, check the location of fuel tank, harness and/or tubes. 1.Drill a hole in the cab floor (behind driver or passenger seat – depends on battery location). RECOMMENDATIONS ■... - Page 32 10.Install cab control and connect electrical Cab ignition connection NOTE: For cab IGNITION KEY harness fitting, refer to the vehicle mounting kit instructions. Connect the ignition switch line to the vehicle □ dashboard □ Connect the white wires to fuse(1A) Refer to the corresponding mounting kit instruction to □...
- Page 33 10.Install cab control and connect electrical Cab ignition connection Fit the cab command (in specified location) □ RECOMMENDATIONS ■ Take care not to pierce any harness or hoses within the dashboard. ■ If the cab command is built into the dashboard, fit it as far as possible from the heating ducts.
- Page 34 10.Install cab control and connect electrical Battery harness: Connection 1.Clean the terminals firstly before main circuit connecting 2、Connect the main circuit as First picture 3、Paint grease on the terminals to prevent corrosion Note: Second picture is wrong(the wires installation is not stable) □...
- Page 35 10.Install cab control and connect electrical Battery harness: Connection 1.Install right fuse in the fuse holder 2.Install protection cap on the fuse 3.Connect (+) to one end of the fuse holder 4.The shorter battery(50cm) wire connected to one end of fuse, the other to (+) 5.Connect the units (-) wire to battery(-) Remark:All wires must be pressed tightly...
-
Page 36: Check And Adjust Cpr(Only Suitable For Unit With R404A)
11.Check and adjust CPR(only suitable for unit with CPR) Commissioning: CPR adjust □ The CPR (Compressor Regulation) valve is a device designed to regulate the flow of refrigerant returning to the compressor from the evaporator, this ensures correct capacity for the unit. □... - Page 37 ■ counter clockwise. When the setting has been adjusted, tighten the jam nut securely against the setting screw to prevent any movement of the setting screw due to vibrations in the KX-350K unit. Replace the cap. R404A 2.1bar 37 / 40...
-
Page 38: Check And Adjust Expansion Valve Superheat
4. Correct superheat: Turn anti-clockwise to increase flow & decrease superheat Turn clockwise to decrease flow and increase superheat. KX-350K 8°C at box temp. 0°C (14.4°F at box T° : 32°F) 4°C at box temp. -20°C (7.2°F at box T° : -4°F) -
Page 39: Installation Overview
13.Installation overview a-Unit b-Pipes and harness c-Controller d-Compressor 39 / 40 Super Snow... - Page 40 Zhengzhou Kaixue Cold Chain Co., Ltd. Address: Zhongmu Auto Industry Park, Zhengzhou 451450, Henan, China. Tel.:0371-56701069 Fax.:0371-60862175 Website: www.supersnowcold.com 40 / 40 Super Snow...
Need help?
Do you have a question about the KX-350K and is the answer not in the manual?
Questions and answers