Table of Contents
Advertisement
Advertisement
Table of Contents

Summary of Contents for AQS Inverboost Premium 18kW
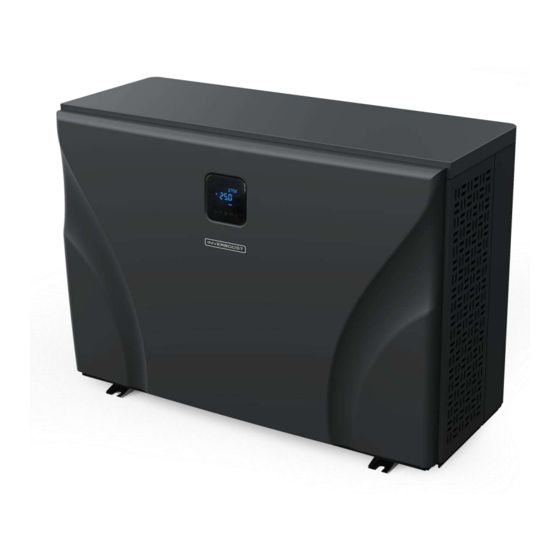
- Page 1 Swimming Pool Heat Pump User and Service Manual...
- Page 3 Swimming Pool Heat Pump User and Service Manual INDEX 1. Specifications 2. Dimensions 3. Installation and connection 4. Accessories 5. Electrical wiring 6. Display controller operation 7. Troubleshooting 8. Exploded diagram 9. Maintenance 10. Wifi instruction Thank you for using INVERBOOST UX swimming pool heat pump for your pool heating, it will heat your pool water and keep the constant temperature when the air ambient temperature is at -20 to 43℃...
- Page 4 Regulation (EU) n° 517/2014 of 16/04/14 on fluorinated greenhouse gases and repealing Regulation (EC) n° 842/2006 Leak checks 1. Operators of equipment that contains fluorinated greenhouses gases in quantities of 5 tons of CO , equivalent or more and not contained in foams shall ensure that the equipment is checked forleaks. For equipment that contains fluorinated greenhouse gases in quantities of 5 tons of equivalent or more, but of less than 50 tons of...
-
Page 5: Specifications
1. Specifications 1.1 Technical data UX11Csi32 UX14Csi32 UX17Csi32 Model * Performance at Air 28℃, Water 28℃, Humidity 80% 11.0 14.0 17.0 Turbo Heating Capacity 10.0 11.0 14.0 Smart Heating Capacity 1.55-0.17 1.97-0.22 2.39-0.27 Power consumption 16-7.4 16-7.1 16-7.2 C.O.P. C.O.P. in Turbo Mode 11.8 11.0 11.8... - Page 6 UX21Csi32 UX30Csi32T UX35Csi32T Model * Performance at Air 28℃, Water 28℃, Humidity 80% 21.0 30.0 35.0 Turbo Heating Capacity 18.0 25.0 30.0 Smart Heating Capacity 2.96-0.33 4.17-0.47 4.93-0.55 Power consumption 16-7.1 16-7.1 16-7.1 C.O.P. C.O.P. in Turbo Mode 11.2 11.2 11.2 C.O.P.
- Page 7 2. Dimension (mm) Model : UX11Csi32/UX14Csi32...
- Page 8 Model : UX17Csi32/UX21Csi32...
- Page 9 Model : UX30Csi32T/UX35Csi32T...
-
Page 10: Installation And Connection
3. Installation and connection 3.1 Notes Factory supplies only the heat pump itself. All other components, including a bypass if necessary, must be provided by the user or the installer. Attention: Please observe the following rules when installing the heat pump: 1. - Page 11 difference between the water temperature in the pool and the temperature of the soil surrounding the pipe. This increases the operating time by 3% to 5%. 3.4 Check-valve installation Note: If automatic dosing equipment for chlorine and acidity (pH) is used, it is essential to protect the heat pump against excessively high chemical concentrations which may corrode the heat exchanger.
-
Page 12: Electrical Connection
3.6 Adjusting the bypass Use the following procedure to adjust the bypass: 1. Open Valve 1 & 2 half way. 2. Close valve 2 until controlshows To pool From pool NO Or EE3 screen. 3. Slowly open Valve 2 until pool Temp shows on screen. - Page 13 4. When the filter pump is turned off, the unit should also turn off automatically, if not, then adjust the flow switch. Depending on the initial temperature of the water in the swimming pool and the air temperature, it may take several days to heat the water to the desired temperature.
-
Page 14: Accessories List
4. Accessories 4.1 Accessories list Anti-vibration base, 4 pcs Draining jet, 2 pcs Winter Cover, 1 pc Water drainage pipes, 2 pcs 4.2 Accessories Installation Anti-vibration bases 1. Take out 4 Anti-vibration bases 2. Put them one by one on the bottom of machine like the picture. - Page 15 Water Inlet & outlet junction 1. Use the pipe tape to connect thewater Inlet & outlet junction onto the heat pump 2. Install the two joints like thepicture shows 3. Screw them onto the water Inlet & outlet junction Mains Cable wiring 1.
- Page 16 Dry contact timer connection Timer Dry contact pump connection...
-
Page 17: Electrical Wiring
5. Electrical Wiring 5.1 SWIMMING POOL HEAT PUMP WIRING DIADRAM UX11Csi32/UX14Csi32/UX17Csi32/UX21Csi32... - Page 18 UX30Csi32T/UX35Csi32T NOTE: Above electrical wiring diagram for your reference. The swimming pool heat pump must be connected earthed, although the unit heat exchanger is electrically isolated from the rest of the unit. Grounding the unit is still required to protect against short circuits inside the unit. Bonding is also required.
-
Page 19: Installation Of The Display
5.2 Installation of the display Photo(1) Photo(2) Photo(3) Photo(4) - The side with plug connects with the control panel (photo 1) - The other side of the signal wire. (photo 2) - Open the wiring panel and put the side without plug through the electrical box. (photo 3) - Insert the wiring into the designated position (code:COM 1 or COM-L) on the PC board. -
Page 20: Display Controller Operation
6.Display Controller Operation 6.1 Guide for operation When the heat pump connects to the power, the display shows a code for 3 seconds which indicates the heat pump model. 6.2 The keys and their operations 6.2.1 button Press to start the heat pump unit, the display shows the desired water temperature for 5 seconds, then shows the inlet water temperature and the operation mode. - Page 21 6.2.3 button Press to change the working mode, Turbo, Smart and silent .The default mode is smart mode. While you choose the Turbo, the word “Turbo” will be lit, the heat pump will operate in ‘Full output’ only. Choose the Smart, the word “Smart” will be lit, the heat pump will operate in ‘Medium and Full output’. Choose the Silent, the word “Silent”...
-
Page 22: Parameter Setting
Frequency limitation code 0,1,2,4,8,16 Real testing value Piping temp. flash if Real value<-9 -30℃~70℃ Gas exhaust temperature Real testing value 0℃~C5℃ (125℃) Step of EEV 0~99 Compressor running frequency Real testing value 0~99Hz Compressor current Real testing value 0~30A Current fan speed 0-1200 (rpm) Real testing value Error code for last time... - Page 23 1). Long press for 20s to set P14, P16, P18. 2). P8,P9,P10,P11,P19,P20 parameter is only for factory setting. 6.2.7 Water pump logic: Parameter setting : P3=0 : Water pump is related to compressor’s operation to start orstop. When heat pump turns on, filtration pump will start first and then fan motor and compressor. Condition Example Water pump working logic...
-
Page 24: Troubleshooting
7.Troubleshooting 7.1 Error code display on wire controller Error Malfunction Reason Solution code Inlet water temperature 1. The sensor in open or short circuit 1. Check or change the sensor PP01 sensor failure d1-TH6 2. The wiring of sensor is loose 2.Re-fix the wiring of the sensors Outlet water temperature 1. - Page 25 Error Malfunction Reason Solution code Check the EEV and piping system 1. EEV has blocked or pipe system is Check the fan motor under heating jammed mode, replace a new one if it is abnormal 2. Fan motor speed is abnormal or fan Low pressure failure Check refrigeration system or check the EE02...
- Page 26 Error Malfunction Reason Solution code 1. The compressor current is too large instantaneously Check if the power in the normal range 2. Wrong connection for compressor Check the compressor phase sequence Check the compressor phase Compressor current 3. Compressor accumulations of liquid EE07 Check the phase sequence connection protection...
- Page 27 Error Malfunction Reason Solution code 1. The compressor current is too 1. Check the compressor if it works large momentary normally Input current over 2. The water flow is abnormal EE13 2. Check the waterway system high protection. 3. Power fluctuations within a short 3.
- Page 28 Malfunction Error Reason Solution code 1. Check the main board or replace the 1. PFC module thermal circuit output driver board abnormal 2. Check if the motor speed is too low PFC module high 2. Fan motor is abnormal or damaged EE19 or fan motor is damaged, replace it by a temperature protection...
- Page 29 Remarks: 1. In heating mode, if the water out temperature is higher than the set temperature over 7℃, LED controller displays EE04 for water over-heating protection. 2. In cooling mode, if the water out temperature is lower than the set temperature over 7℃, LED controller displays PP11 for water over-cooling protection.
- Page 30 7.2 Other Malfunctions and Solutions (No display on LED wire controller) Malfunctions Observing Reasons Solution LED wire controller Check cable and circuit breaker if No power supply no display. it is connected LED wire controller. Heat pump under standby Startup heat pump to run. Displays the actual time.
- Page 31 8.Exploded Diagram Model :UX11Csi32/UX14Csi32...
- Page 32 UX11Csi32/UX14Csi32 Spare parts list Spare parts list Top cover Cable passing hole Service panel Back grill Evaporator Top frame Pillar Fan panel Ambient temp. sensor T5-TH1 4 way valve coil Fan blade 4 way valve Fan motor Evaporator temperature sensor T3-TH2 Fan motor bracket 4-way valve to evaporator piping Left panel...
- Page 33 Model :UX17Csi32/UX21Csi32...
- Page 34 UX17Csi32 Spare parts list Spare parts list Top cover Cable connector Top frame Service panel Back grill Fan panel 4 way valve coil Clip 4 way valve Power terminal 4-way valve to evaporator piping Pillar Discharge pipe Reactor Evaporator temperature sensor T3-TH2 Fan blade High pressure switch Fan motor...
- Page 35 UX21Csi32 Spare parts list Spare parts list Top cover Cable connector Top frame Service panel Back grill 4 way valve Fan panel 4 way valve coil Clip Power terminal EEV to distribution piping Pillar 4-way valve to evaporator piping Reactor High pressure switch Fan blade Evaporator temperature sensor T3-TH2...
- Page 36 Model :UX30Csi32T/UX35Csi32T...
- Page 37 Spare parts list Spare parts list Top cover Electric box Service panel Top frame Wifi module Evaporator Relay Reactor Fan panel Magnet ring Isolation panel Magnet ring Left panel Power terminal Fan blade Power terminal Fan motor assemble Clip Fan motor Terminal board Fan motor bracket Discharge pipe...
-
Page 38: Maintenance
9. Maintenance (1) You should check the water supply system regularly to avoid the air entering the system and occurrence of low water flow, because it would reduce the performance and reliability of HP unit. (2) Clean your pools and filtrationsystem regularly to avoid the damage of the unit as a result of the dirty of clogged filter. - Page 39 10. Wifi instruction 1. Heat-Pump with WIFI function Thank you for using our heat pump with WIFI function, you can remote control your pool heat pump from your smart phone. The controller information could syncs to “Alsavo Pro” APP via an internet connection (WIFI or 3G/4G). For the first time connection, your smart phone and the WIFI controller must be under the same WIFI network.
- Page 41 2.3 The main interface 1) Turn ON/OFF Click “ ” to turn on or off heat pump. 2) Switch mode There are there modes (Auto mode, cooling or heating) for the inverter unit. Click its icons to switch (Auto mode , heating cooling 3) Timer setting...
- Page 42 4) Parameter checking and setting Click Parameter , then enter the password “0757”.
- Page 43 5)Parameter setting: There are 2 modes optional for water pump operation (1: Always running, 0: Depends on the running of compressor) Inlet water temperature calibration. (-9.0 to 9.0℃) Temperature unit: ℃ or ℉. When you want to reset to factory default setting, tips as below pop up .
- Page 44 6) Switch running modes In heating or cooling mode, there are 3 running modes(Silent, Smart, Powerful/TURBO) for options (TURBO) While in Auto mode, its default running mode is Smart. 7) Malfunction If error occurs, the malfunction icon turns red . Click it to check the error.
- Page 45 8) Temperature setting You can set the target water temperature by adjusting the slider orpress “ ” or ” ”. The setting water temperature on the controller display correspondingly changes after letting go. When the setting water temperature on the display changes, it will be synchronously updated to the APP. 9) Check device information In the main interface, click the upper right “Alsavo Pro”.
- Page 49 A0201UX01...
Need help?
Do you have a question about the Inverboost Premium 18kW and is the answer not in the manual?
Questions and answers