Table of Contents
Advertisement
Quick Links
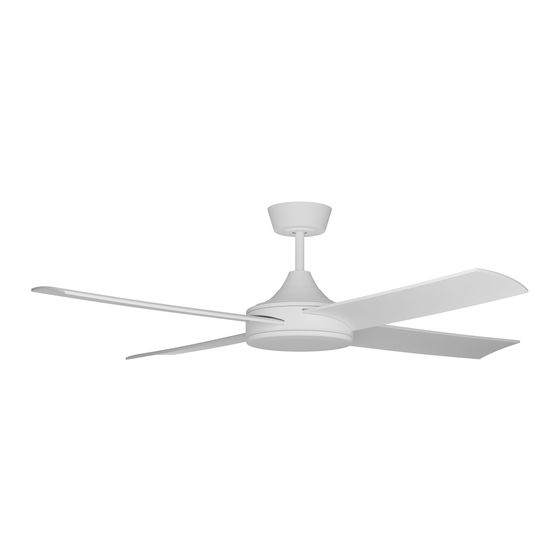
Breeze Silent DC
PLEASE NOTE: THE REMOTE CONTROL COMES PRE-PROGRAMMED TO THE FAN
REPROGRAMMING IS ONLY REQUIRED WHEN REPLACING THE REMOTE CONTROL
ATTENTION ELECTRICIANS:
ANY PROBLEMS FOUND DURING INSTALLATION OF THE FAN PLEASE CONTACT THE NATIONAL
WARRANTY NUMBER PRIOR TO LEAVING SITE. DO NOT REMOVE THE FAN FROM THE CEILING
UNLESS INSTRUCTED TO DO SO.
National Warranty Number | 1300 116 305
g
NOTE: THIS FAN MUST BE INSTALLED BY A LICENSED AND QUALIFIED
ELECTRICIAN IN ACCORDANCE WITH LOCAL AUTHORITY REGULATIONS
Installation & User Manual
Optional Light Kit
Monday to Friday 9am to 5pm AEST
Australian Edition Version 1.4 August 2020
Advertisement
Table of Contents
Troubleshooting

Summary of Contents for AeroDC Breeze Silent
- Page 1 Breeze Silent DC Installation & User Manual Optional Light Kit PLEASE NOTE: THE REMOTE CONTROL COMES PRE-PROGRAMMED TO THE FAN REPROGRAMMING IS ONLY REQUIRED WHEN REPLACING THE REMOTE CONTROL ATTENTION ELECTRICIANS: ANY PROBLEMS FOUND DURING INSTALLATION OF THE FAN PLEASE CONTACT THE NATIONAL WARRANTY NUMBER PRIOR TO LEAVING SITE.
- Page 2 IMPORTANT INFORMATION - PLEASE READ BEFORE ATTEMPTING INSTALLATION Please read these instructions carefully, be mindful of all warnings and safety information shown throughout this manual. Should you have any questions, please contact 1300 116 305. Please review the accompanying assembly diagrams before attempting installation. This fan MUST be installed by a licensed &...
-
Page 3: Table Of Contents
LOCATION AND INSTALLATION REQUIREMENTS Provide adequate clearance from the floor. The lowest point on the fan blades must be at least 2.1m (7 feet) from floor level in Australia Ceiling and at least 2.3m from floor level in the European Union and affiliated countries. -
Page 4: Fan Assembly & Parts List
FAN ASSEMBLY & PARTS LIST - BREEZE SILENT DC Unpacking your Fan Unpack your fan and check the contents. Please check each item prior to installation, should you find any issues please contact the Warranty Helpline on 1300 116 305 for assistance. To reduce the chance of marks or possible damage please only remove the parts when required for installation. -
Page 5: Installing Hanger Bracket
INSTALLING HANGER BRACKET - ENSURE CAN TAKE 10KG LOAD In accordance with Australian Standards, the fan blades must be at least 2.1 metres above floor level and the blades require at least 300mm clearance to the nearest object. Secure the hanger bracket to ceiling beam or a suitable piece of timber inserted between the ceiling beams. -
Page 6: Installing Fan Blades
INSTALLING BLADES TO FAN MOTOR We recommend to install the blades before hanging the fan on the ceiling. The fan includes a removable top motor cover to give easy access to the blade holders - Turn Clockwise to unlock and remove. STEP 1: Unlock and remove the top motor cover by turning it clockwise to give access to the blade holders Top Motor Cover Ceiling Canopy... -
Page 7: Installing Fan Receiver
REMOVE OR MODIFY THE FAN OR BRACKET WIRING INCLUDING CONNECTORS, THIS WILL VOID THE WARRANTY. The fan receiver is only designed and certified with the fan and Airborne Breeze Silent optional light kit (sold separately) NOTE: Any modification to the wiring will void the fans warranty and no longer conform to Australian Standards. -
Page 8: Installing The Optional Light Kit & Canopy
REMOVING FAN BASE PLATE (FOR INSTALLATION OF OPTIONAL LIGHT KIT ONLY) The optional light kit (sold separately) can be installed at any time, including once the fan is installed and tested. The installation of the light kit does not require any tools and can be done by the home owner. PLEASE ENSURE POWER IS TURNED OFF BEFORE INSTALLING OPTIONAL LIGHT KIT. -
Page 9: Operating The Fan From The Remote Control
FAN REMOTE CONTROL PROGRAMMING & OPERATION NOTE: The Fan itself has NO DIP switches. Each individual fan must be set-up and programmed to the corresponding remote control where multiple fans are installed. If there is more than one fan please ensure the other fans remain powered off while programming. INSTALL BATTERIES: Locate and install the batteries, observe polarity and make sure the batteries sits properly in recess. -
Page 10: Summer And Winter Mode Explained
SUMMER AND WINTER MODE EXPLAINED FORWARD (Summer) Mode Ceiling fans are an environmentally smart choice to assist with cooling and warming your home. In FORWARD (Summer) mode your ceiling fan will spin to push air down the centre of the fan producing a cooling breeze. -
Page 11: Wiring Diagram
WIRING DIAGRAM 240vac Supply NOTE: Any modification to the wiring will void the fans warranty and no longer conform to Australian Standards. AC POWER TO RECEIVER Brown Blue Green/Yellow AC POWER INPUT To Fan wires Motor Black Blue Brown Black To the Light Kit To the Fan Motor Fan Motor... -
Page 12: Balancing Troubleshooting & Safety Guidelines
BALANCING / FAN WOBBLE TROUBLE SHOOTING A small amount of movement/wobble in a fan is normal and environmental factors such as open windows, exposed beams and even the shape of the room can contribute to wobble. Fans are designed to operate with wobble and will not interfere with its operation. -
Page 13: Troubleshooting
TROUBLESHOOTING PROBLEM POSSIBLE CAUSES PROBABLE SOLUTIONS Fan does not power Check the dwelling’s fuse/box circuit breakers has not No mains voltage going to fan. failed / tripped and check that 240V is available at the Terminal Block (Warning: The ceiling Isolation switch turned off. -
Page 14: General Maintenance & Cleaning
GENERAL INFORMATION 1. All electrical motors, including fan motors make some noise, and may feel hot to the touch. This is NOT a fault. 2. Ceiling fans tend to move during operation due to the fact that they are not rigidly mounted. (Rigid mountings can generate excessive vibration and stress on the mountings). -
Page 15: Ceiling Fan Warranty Information
Please note carefully - If the product is found to be free of defects or the product is not functioning properly as a result of faulty installation or lack of maintenance then AeroDC or its service agent reserve the right to charge a service fee to rectify the reported problem. -
Page 16: Not Covered By Warranty
A service call fee will be charged where; there is nothing wrong with the ceiling fan or; the defective operation of the ceiling fan is due to failure of electricity or; the installation is not in accordance with AeroDC instructions and/ or applicable local regulations or;... -
Page 17: Electrician Checklist
Electricians make sure everything on this checklist is ticked off before you leave the installation site. If you have trouble installing our product please refer to the trouble shooting section on page 11 first, then phone the AeroDC Warranty Hotline on 1300 116 305 (open 9am to 5pm EST). DO NOT uninstall the fan unless asked to do so. -
Page 18: Documents To Retain For Future Warranty Claims
DOCUMENTS TO RETAIN FOR FUTURE WARRANTY CLAIMS TO ASSIST WITH ANY WARRANTY CLAIMS ATTACH THE FOLLOWING DOCUMENTS FOR FUTURE REFERENCE. Copy of the Purchasing Receipt. NOTE: THIS FAN MUST BE INSTALLED BY A LICENSED AND QUALIFIED ELECTRICIAN IN ACCORDANCE WITH LOCAL AUTHORITY REGULATIONS... - Page 19 DOCUMENTS TO RETAIN FOR FUTURE WARRANTY CLAIMS TO ASSIST WITH ANY WARRANTY CLAIMS ATTACH THE FOLLOWING DOCUMENTS FOR Proof of Professional Installation - in-accordance with local authority Regulations (copy of installation Invoice, Safety Certificate or letter on Letter head including licence details) National Warranty Hotline|1300 116 305 Monday to Friday 9am to 5pm AEST...
- Page 20 Thank you for your purchase! Imported by EM Imports Pty Ltd 10 Overlord Place Acacia Ridge Queensland Australia 4110 Distributed by AeroDC Warranty & Support: AeroDC Ph: 1300 116 305 customerservice@aerodc.com.au www.aerodc.com.au National Warranty Hotline|1300 116 305 Monday to Friday 9am to 5pm AEST...
Need help?
Do you have a question about the Breeze Silent and is the answer not in the manual?
Questions and answers