Table of Contents
Advertisement
Quick Links
Advertisement
Table of Contents

Summary of Contents for Derandi SKA-PRS-301-SMT
- Page 1 Electric Pressure Cooker SKA-PRS-301-SMT 120V 60Hz 1000W...
-
Page 2: Important Safeguards
IMPORTANT SAFEGUARDS The product you have purchased is a state of the art appliance. It adheres to all of the latest safety and technology standards; however, as with any electric appliance, there are some potential risks. Only operate this cooker following the instructions provided and only for its intended household use. - Page 3 10. There is a non-stick layer in the pot, so please use a wood or plastic spoon to avoid scratches. 11. Keep children away from the electric pressure cooker. 12. DO NOT put your hands or face close to the working pressure limiting exhaust valve. DO NOT touch the lid during the cooking process to avoid burns.
- Page 4 23. Using accessories not recommended by the manufacturer may cause injury. 24. DO NOT use outdoors . 25. DO NOT let cord hang over the edge of the table or counter, or touch hot surfaces. 26. DO NOT place electric pressure cooker on or near the hot gas, electric burner, or in a heated oven.
- Page 5 However, there is no guarantee that interference will not occur in a particular installation. If this equipment does cause harmful interference to radio or television reception, which can be determined by turning the equipment off and on, the user is encouraged to try to correct the interference by one or more of the following measures: ...
- Page 6 Thank you for choosing our product! Congratulations on the purchase of your Smart Pressure Cooker. It has been designed to help you quickly prepare and cook delicious meals. To make sure you get the most out of this multi-functional cooker, we recommend you read all the instructions, including the safety warnings, before using the product.
- Page 7 Pressure Cooker Safety Features The pressure cooker has several built-in safety features. If the pot's temperature or pressure exceeds the safety parameters, then the automatic protection system will stop the cooking process. Cooking will only resume when the pressure and temperature have returned to normal levels. 1.
- Page 8 9. Extreme temperature and power protection: if the cooker’s internal temperature exceeds safety limits, the power will automatically turn off. 10. High temperature warning: if the temperature is too high, the power will automatically be turned off and an error code will display.
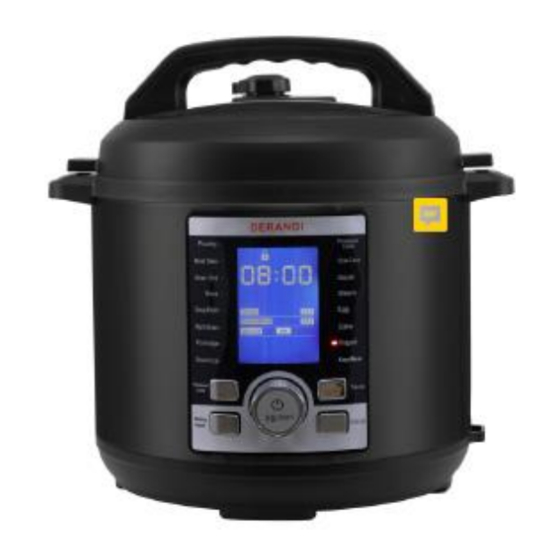
- Page 10 2. Overview Anti-block shield Soup ladle Rice spoon Measuring cup Inner pot Outer pot with heating plate Condensation collector Cool-touch handle with hole for storing the lid Power cord with plug Spoon holder Base TIME / TEMP button CANCEL button START / PAUSE button and SETTING dial DELAY START / KEEP WARM button...
-
Page 11: Screen Display
3. Screen display Lid unlocked Lid locked Heating in progress Pressure cooker is in use Time or temp displays in celsius or fahrenheit Manual Change the timer or temperature manually Pressure Pressure cooker is set to a low or high level Delay Delay start function is on or off Keep Warm... -
Page 12: Functions In An Overview
4. Functions in an overview Button / Component Function Notes - Select 1 of the 16 SETTING dial 23 The indicator light appears next available modes to the selected option - Adjust the time or temperature START / PAUSE button 23 Press to start or pause the Always make sure the lid is cooking process... -
Page 13: Items Supplied
6. Items supplied 1 pressure cooker base 1 inner pot 1 pressure cooker lid with float valve 1 steam release vent 1 anti-block shield 1 sealing ring 1 steamer, comprising - steaming basket - steaming lid 30 - rack 1 rice spoon 31 1 soup ladle 32 1 measuring cup 1 power cord and plug... - Page 14 • Pull the steam release vent upwards to remove it. WARNING! • Risk of scalding. When removing the steam release vent , always make sure the appliance is cool and that there is no hot or pressurized food in the cooker. Anti-block shield •...
-
Page 15: Initial Test Run
• To remove the sealing ring , simply pull it out. NOTE: • Always check the sealing ring is correctly installed before each use. Remove and clean the sealing ring after each use. • Sealing rings stretch over time and should be replaced every 12-18 months or sooner if they become loose or deformed. - Page 16 1. Fill the inner pot with 3 cups of water. 2. Close and lock the lid: put the lid on the cooker making sure you line up the unlock symbol on the base with the arrow on the lid . 3.
-
Page 17: Operating The Appliance
8. Operating the appliance For safety reasons, the settings described in this chapter, can only be selected when the appliance has been assembled completely. 8.1 Turning the appliance on and off • Plug the power cord 8 into the back of the pressure cooker and insert the plug into a suitable wall socket. -
Page 18: Setting The Time
Closing the lid 1. Put the lid on the cooker, make sure you line up the unlock symbol on the base with the arrow on the lid . The unlock symbol will display on the screen. 2. Holding the handle, turn the lid clockwise in the direction of the arrow pointing to CLOSE. When the lid is firmly closed the lock symbol will display on the screen. -
Page 19: Progress Indicator
8.6 Changing the temperature scale – ° C or ° F • When you are in a mode that allows the temperature to be changed, such as manual mode, and the temperature is displayed, press and hold the TEMP button for 5 seconds to switch between C (Celsius) and F (Fahrenheit). -
Page 20: Setting The Keep Warm Function
WARNING! • Do not allow perishables such as meat, poultry, fish or dairy products to sit at room temperature for more than 2 hours or more than 1 hour in high room temperatures. • Do not use the delay start function for foods such as oatmeal, porridge, or other thick liquids because they may clog the steam valves. -
Page 21: Pressure Cooker
9. Pressure cooker The pressure cooker can be used with the following programs: Meat/Stew, Bean/Chili, Soup/Broth, Rice, Multigrain, Porridge/Oats, Steam, Egg, Cake, Sterilize, and Pressure Cook. NOTE: These user instructions describe the basic functions such as using a preset program for cooking certain types of food, using the pressure cooker and steaming foods. - Page 22 WARNING! Never try to open the lid when the float valve is still up or try to force the lid open. The cooker is under an immense amount of pressure that must be released in a controlled manner to avoid injury.
-
Page 23: Steam Mode
• Keep warm mode on / off 11. When cooking has finished, you will hear a beep, and the cooker will enter keep warm mode if that function has been turned on. The cooker will automatically turn itself off and enter standby mode after 24 hours. - Page 24 1. Fill the inner pot with approximately 1 inch / 2.5 cm of water into the inner pot. The water should not be touching the food otherwise the food will be boiled. 2. Put the steam rack in the inner pot. 3.
- Page 25 10.3 Yogurt mode 1. Place the inner pot into the outer pot . 2. Add the milk to the inner pot . 3. Put the lid on the cooker and turn the steam release vent to the Venting position. 4. To pasteurize the milk, turn the SETTING dial until the indicator light turns on next YOGURT. 5.
- Page 26 13 Settings for pressure cooking modes NOTE: The cooking times specified in the chart do not include the amount of time it takes for the cooker to reach the desired temperature and amount of pressure, nor the amount of time that it takes for the pressure to release after cooking is complete.
- Page 27 15 Cleaning WARNING! Risk of electric shock! • Always disconnect the power cord from the appliance and the wall socket and allow to cool before cleaning. • Never immerse the base in water. • Make sure everything is completely dry before use and storage. WARNING! Never use any abrasive, corrosive or scratchy cleaning agents as they might damage the appliance.
-
Page 28: Troubleshooting
14. Troubleshooting If your appliance fails to function as required, please try this checklist first. Perhaps there is only a minor problem, and you can solve it yourself. WARNING! Risk of electric shock! • Do not attempt to repair the appliance yourself under any circumstances. 14.1 Malfunctions during operation Malfunction Cause... - Page 29 Discontinue use and unplug the appliance. Err 2 The thermostat is malfunctioning. Contact customer service. The temperature is too high, the inner Discontinue use and unplug the appliance. pot is incorrectly positioned, or the Remove and reinstall the inner pot . inner pot is not inside the base.
Need help?
Do you have a question about the SKA-PRS-301-SMT and is the answer not in the manual?
Questions and answers