
Related Manuals for anago KST Series

Summary of Contents for anago KST Series
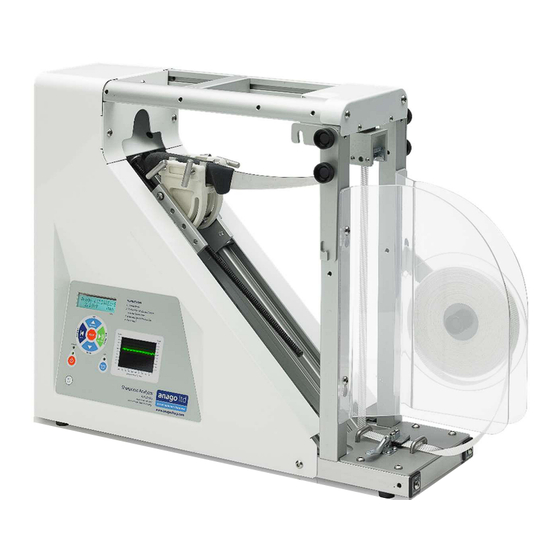
- Page 1 OPERATING MANUAL ANAGO Knife Sharpness Tester (KST) Series KST200e Standard KST300e Standard Version 5.0 April 2021...
- Page 2 WARRANTY INFORMATION Anago warrants that the products supplied are fit for purpose and free from defects for a period of twelve (12) months from the date of delivery. All other guarantees, warranties and representations in relation to the products or their supply implied by law or otherwise are excluded except to the extent that Anago cannot lawfully exclude them.
-
Page 3: Table Of Contents
CONTENTS Frequently Asked Questions ........................3 Introduction ............................ 5 Anago Limited ......................... 5 Safety ............................6 Initial setup ............................. 6 Software Installation ....................... 6 Test Media ..........................7 Connecting to a PC or Laptop ....................8 Operating Modes ........................8 Calibration .......................... -
Page 4: Frequently Asked Questions
1-year warranty against any manufacturing defects. What are the ongoing operational costs? Anago Test Media consumable is required to run tests. One box of Test Media (5 rolls) will run approximately 625 tests, depending on knife length (approx. 125 tests per roll). ... - Page 5 Can I get a Technician to visit? Please contact our support team at support@anago.co.nz to see if there is an available technician in your area. ©2003-2021 Anago Ltd...
-
Page 6: Introduction
(including the medical industry), processors and researchers. Anago knife and blade sharpness testing technology is represented and serviced globally by Anago direct and through a distributor and service agent network. Please contact Anago to find your nearest representative. -
Page 7: Safety
Ensure you are logged on with a username that has administrator privileges. This must be done before new programs can be installed Plug the provided Anago USB flash drive into a USB port on the PC / Laptop The setup program should run automatically. If it doesn’t, navigate to the Anago KST Setup.exe file. -
Page 8: Test Media
Test Media The Anago KST comes with ST-TM-5 Sharpness Test Media already loaded. To ensure the best results, always operate your KST with genuine Anago test media. Other counterfeit brands have been shown to cause inconsistencies and errors while tensioning, leading to less accurate results. -
Page 9: Connecting To A Pc Or Laptop
USB (Type B) male into the USB port on the side of the KST Operating Modes The Anago KST has two operating modes: PC-Control mode and Local mode. These modes have different functions to fulfil different requirements. Switching between PC-Control and Local Modes Press the PC CONTROL button on the keypad to switch between operating modes. -
Page 10: Calibration
The LCD display will show “PC-Ctrl” at the bottom right hand corner Calibration Load Cell Calibration The calibration process requires the use of the standard 2kg calibration mass shipped with the Anago KST. Calibration Calibration is performed by Anago prior to shipment; however, we recommend recalibrating: ... - Page 11 Clamp the blade to be tested into the Anago KST. Doing this will give you an indication of where the initial and final positions of the blade clamp should be relative to the length of the blade which is to be tested ...
- Page 12 Press the Run button to save the current top limit position Press the Retract button to return to the main setup menu Note: as a minimum, Bottom Limit 1 and Top Limit 1 should be set. ©2003-2021 Anago Ltd...
-
Page 13: Operation
To pause or resume a test at any point, you can press the Run/Pause button on the keypad To stop a test at any point, you may press the Stop button on the keypad ©2003-2021 Anago Ltd... -
Page 14: Keypad Functions
3.2.4. Running a test Press the Run button The test will run automatically, stop and then calculate and display the resulting score on both the LCD (text) display and the LED (lights) display. ©2003-2021 Anago Ltd... -
Page 15: Rapid Clamp
Note: For safety reasons, knives should always be loaded holding the knife's handle from the top. Rapid Clamp Ensure the blade is firmly clamped, by choosing the correct hook If you require a custom clamp for specialist blades, contact us at support@anago.co.nz additional clamping options. ©2003-2021 Anago Ltd... - Page 16 The recommended method for testing blades with intentionally blunt tips is to clamp the blade, then manually cut the portion of the test media which will be struck by the tip. This will allow the knife to travel through and perform a test as usual. ©2003-2021 Anago Ltd...
-
Page 17: Running A Test
Press the Run button on the keypad The results will be displayed on the Anago KST. Unclamp the test media before retracting the knife. 3.4.2. Running a Sharpness Test with a PC / Laptop Running a sharpness test with a PC / laptop allows you to save, view and analyse data. In addition, it allows you to run multiple tests on the same blade or to use the accept / reject mode. - Page 18 The test can be stopped at any time by clicking the “Stop test” button. A screen will pop up asking you if you wish to save the test. Click “Yes” to save the test. Unclamp the test media before retracting the knife. ©2003-2021 Anago Ltd...
-
Page 19: Test Results
The table below shows the change in effort required to use a knife/blade relative to a knife that scores 8.0 on the Anago Sharpness Score. As can be seen, a small change in Anago Score means a large change in cutting effort. In this table, a score of 8.0 has been compared to higher and lower scores. - Page 20 Raw Test Data shows the data as it was recorded by the KST. It shows the actual forces measured by the Anago KST. Clean Test Data presents the analysed forces after normalization, i.e. a peak analysis of the data with the initial flat (prior to the blade hitting the media) removed.
- Page 21 Note: the tip of the blade is on the right-hand side of the graph. This can be changed in the software settings. Raw Test Data The "Raw" graph displays the actual forces and distances measured during the test. It is useful for showing dull or damaged portions of the blade, and for troubleshooting test issues. ©2003-2021 Anago Ltd...
-
Page 22: Stand-Alone Mode
All scores in each block are averaged and the corresponding LED is lit. Calculated sharpness score Green Zone - Sharp Red Zone - Dull Distance from the blade tip A score of 8.0 or above is the recommended minimum score for a blade used for professional food processing. ©2003-2021 Anago Ltd... -
Page 23: Data Management
The list can be ordered by clicking on the title of any of the columns Tick the tests that you would like to see graphed The selected test results will be shown. ©2003-2021 Anago Ltd... - Page 24 If the test is already saved, and you would like to change whether the tip force is included in the score calculation: Select “Settings” and tick “Allow editing of test result field values Right click on the test you wish to change and click “edit” ©2003-2021 Anago Ltd...
-
Page 25: Editing Test Information
Right click on the test you wish to change and click edit Select “Edit” From this menu, any saved test data (such as custom fields) can be edited Make the required changes Click “Save Test”. ©2003-2021 Anago Ltd... -
Page 26: Backing Up, Restoring And Importing Data
Backup: Navigate to the desired folder location and name the file Restore: Navigate to the backup location and select the file Backup: Click “Save” Restore: Click “Open” 5.3.2. Importing Data Click on “Import from Legacy Database” under “Tools” on the menu bar ©2003-2021 Anago Ltd... -
Page 27: Troubleshooting And Maintenance
The fuse may be loose or require replacement. The battery will degrade over time and may need replacing if it cannot hold charge or a ‘Low Battery’ error appears. The KST switches itself off after a few minutes of inactivity to minimize the risk of the battery discharging fully. ©2003-2021 Anago Ltd... -
Page 28: Spare Parts
The same goes for the top self-locking clamp. 6.3. Spare Parts Spare parts can be ordered from Anago via email (sales@anago.co.nz). You can also request a price list. Below is the spare parts diagram for KST Auto 6.4. -
Page 29: Machine Components
6.5. Machine Components 6.5.1. Side Connections Reset Switch 6.5.2. Blade Clamp and Linear Slide. Rapid Clamp Laser Button Potentiometer (underneath) Drive Screw ©2003-2021 Anago Ltd... - Page 30 ©2003-2021 Anago Ltd...
-
Page 31: Specifications
KST 200e KST 300e 100-240Vac, 50/60 Hz 100-240Vac, 50/60 Hz AC Line Voltage 1.8A 1.8A 79cm(L) x 26cm(W) x 95cm(L) x 26cm(W) x Dimensions 49cm(H) 49cm(H) Weight 20kg 24kg Fuse 5A, M205, Fast Blow 5A, M205, Fast Blow ©2003-2021 Anago Ltd...
Need help?
Do you have a question about the KST Series and is the answer not in the manual?
Questions and answers