
Related Manuals for re3D GIGABOT 3+

Summary of Contents for re3D GIGABOT 3+
- Page 1 GIGABOT 3+ Quick Start Guide (110VAC) IMAGE BOX: Option A. 1. Place Image 2. Sent to Back Option B. 1. Click on “background” 2. Choose image Revision: 12 Revision date: Jan 24, 2022...
- Page 2 ® This guide will help get your Gigabot 3+ set up and ready to print. Should you have any questions, please reach out to support@re3d.org. HELPFUL LINKS Here are some additional links to help you along the way: KNOWLEDGE BASE | https://re3d.zendesk.com...
- Page 3 Safety Instructions READ INSTRUCTIONS All the safety and operating instructions must be read before the printer is operated. RETAIN INSTRUCTIONS The safety and operating instructions should be retained for future reference or accessed on our Knowledge Base here: https://bit.ly/gigabotguides HEED WARNINGS All warnings on the product and in the operating instructions should be adhered to.
- Page 4 Safety Instructions POWER SOURCES This product should be operated only from the type of power source indicated on the marking label. If you are not sure of the type of power supply to your home consult your appliance dealer or local power company. For products intended to operate from battery power, or other sources, refer to the operating instructions.
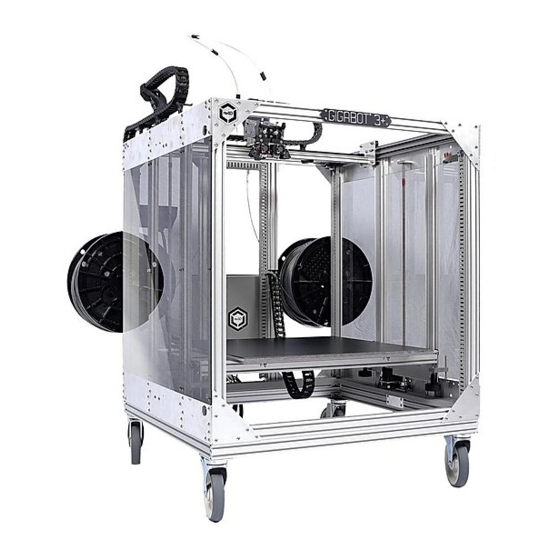
- Page 5 Gigabot 3+ Regular Dimensions...
- Page 6 Gigabot 3+ XLT Dimensions...
-
Page 7: Table Of Contents
Table of Contents Receiving and Uncrating Bed Leveling and Z Home Loading Printing Material Printing on Gigabot® 3+ Software Setup Preparing a Print Next Steps... -
Page 8: A Receiving And Uncrating
3+, inspect all packages for damage prior to signing for the delivery. If there is any damage, record it and report to our shipping manager within 24 hours at shipping@re3d.org. For a video demonstration similar to the following instructions, feel free to watch our video titled “GB3+ Uncrating”... - Page 9 Check the crate for damage. If any damage is observed, or the indicators are Option A. tripped, record and report to shipping@re3d.org within 24 hours. 1. Place Image 2. Sent to Back Using a Phillips head screwdriver, remove the wood lid and panels of the crate.
- Page 10 ® Remove the plastic wrap covering Gigabot IMAGE BOX: Option A. 1. Place Image 2. Sent to Back Remove all zip ties, foam blocks, bubble wrap, ® bed locks, etc. from Gigabot IMAGE BOX: Option A. 1. Place Image 2. Sent to Back ®...
- Page 11 ® Locate the Viki at the back of the Gigabot near the electrical box and remove all IMAGE BOX: packaging from the Viki. With a 4mm Allen wrench, unscrew the three screw in the back Option A. upright rail and use the screws to attach the Viki to the rail.
- Page 12 Insert the plug end of the power cable into an outlet. IMAGE BOX: Option A. 1. Place Image 2. Sent to Back If you are looking at the front of your ® ® Gigabot 3+ (you should see the Gigabot IMAGE BOX: nameplate) the power switch is located on the right side of your bot closer to the front.
-
Page 13: B Bed Leveling And Z Home
B | Bed Leveling and Z-Home ® Before shipment, all Gigabot 3+ printers are calibrated to have a leveled bed and correctly gapped nozzle Z heights (the distance between the nozzle and the bed). The following instructions outline the steps to level the bed of your GB3+ and recalibrate the Z height in case of movement during shipping. - Page 14 Using the Viki LCD controller, move the bed down 150mm. Press the button to see the IMAGE BOX: main menu, then select “Prepare, ” scroll down to “Move Axis, ” then “Move 1mm, ” then “Move Option A. Z, ” and finally turn the wheel clockwise until it reaches 150mm.
- Page 15 Adjust the leveling knobs until there is about a 1/8” gap (3mm) between the top of the rail IMAGE BOX: and the top of the side plate at each corner. A ruler or a shim can be used to measure this Option A.
- Page 16 Using the Viki, select “Home Z, ” in the “Prepare” menu. IMAGE BOX: Option A. 1. Place Image 2. Sent to Back There should now be a widened gap between your nozzle(s) and the surface of the bed. Push IMAGE BOX: the trolley to one corner of the bed, near one of the leveling knobs.
- Page 17 When viewed from below, turning the knob clockwise will raise that corner. Turn the IMAGE BOX: leveling knob to raise the bed until the nozzle is close but not touching the shim stock. This Option A. gap is needed because when raising the other corners of the bed, this corner will also raise 1.
- Page 18 IMAGE BOX: need to re-level unless some external factor throws it out of level. If you have any Option A. questions or concerns, please do not hesitate to contact our support at support@re3d.org. 1. Place Image 2. Sent to Back...
-
Page 19: C Loading Printing Material
For a video demonstration of changing filament, please read our article “Changing the Filament Spool” on our Knowledge Base here:https://bit.ly/ChangingFilament For updates on the full range of materials we’re testing, see our website at: https://re3d.org/materials/ ® With your Gigabot , we have provided PLA filament. We recommend using this material for your first test print since it prints consistently, and we have developed optimized print... - Page 20 Install the [10864] spool holders to the back ® Gigabot with 2x M5 magic t-nuts, 2x M5 IMAGE BOX: flat washers, and 2x SHCS M5x16 each using a 4mm Allen key to fasten the hardware. For Option A. ® Gigabot Regular, the spool holders should be on the far left and far right vertical rails.
- Page 21 To manually load the filament, set the filament temperature using the Viki controls (Prepare IMAGE BOX: > Preheat PLA/PC, or Control > Temperature > set custom temperature). (1) Push down on Option A. the collar to (2) pull the filament tube free. After heating is complete, (3) hold open the 1.
-
Page 22: D Printing On Gigabot
Note that at the start of each print, Gigabot will heat the bed and nozzle(s), and then home each axis. Be sure to share what you print in the "Show and Tell" section of our forum, at https://re3d.zendesk.com/hc/en-us/community/topics/200275793-Show-Tell. Should you have any questions, please reach out to support@re3d.org. - Page 23 Insert the provided microSD card into the Viki ® controller until it clicks. Your Gigabot 3+ will IMAGE BOX: come pre-loaded with a gcode file. This file is preconfigured for you to immediately print. Option A. 1. Place Image 2. Sent to Back Select "Init.
-
Page 24: E Software Setup
E | Software Setup To achieve the best 3D prints, it will take a combination of your skills, a properly ® maintained Gigabot , and a well sliced 3D model. Simplify3D is our preferred slicing and printer hosting program. Not only does it lead the market in parameter customization and features like customizable support generation, but Simplify3D best handles the large print ®... - Page 25 Our newest profiles are readily available on our Zendesk page at “Gigabot Printing IMAGE BOX: Profiles”. Be sure to select the appropriate profile for your GB3+ model, firmware, and Option A. nozzle size. 1. Place Image 2. Sent to Back In Simplify3D, import the profile you just downloaded.
-
Page 26: F Preparing A Print
F | Preparing a Print ® With your Gigabot profile imported into Simplify3D, you now have the power to create ® .gcode from which Gigabot will print your sliced 3D models. For those who have used open source slicing programs, you may notice one of the best features of Simplify3D; it slices objects much faster--especially when it comes to large and/or multiple objects. - Page 27 Import your .STL file into Simplify3D. Orient the part as desired in the workspace. In the IMAGE BOX: process settings, select the profile for your ® Gigabot , then choose the material, Option A. resolution, and extruder you are printing. When you are satisfied, click the "Prepare to 1.
-
Page 28: Next Steps
Below are a series of helpful articles from our knowledge base that will help you as you explore different 3D models and materials: Filament selection: ● https://re3d.org/materials/ https://bit.ly/KnowledgeBaseMaterials How to dry filament: ● https://bit.ly/DryingFilament Material Printing Guide - Steps for Success: ●... - Page 29 Feedback on instructions, support, and other aspects of your experience are welcome. Reach out to us at: FORUM | https://bit.ly/re3DForum KNOWLEDGE BASE | https://re3d.zendesk.com/ EMAIL | support@re3d.org PHONE | 512.730.0033...
- Page 30 In the Applications section of our website (https://re3d.org/applications/) you can find videos featuring owners just like you who are taking 3D printing to the next level.
- Page 31 Notes...
- Page 32 | support@re3d.org...
Need help?
Do you have a question about the GIGABOT 3+ and is the answer not in the manual?
Questions and answers