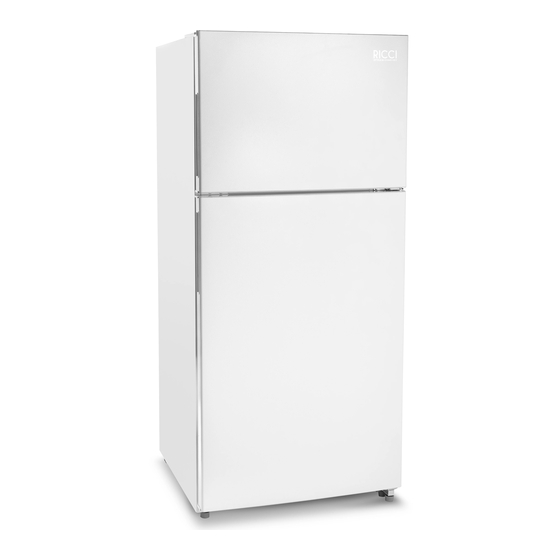
Summary of Contents for Ricci RRTM180MWW
- Page 1 USER MANUAL 18 Cu. Ft. Top Freezer Refrigerator MODEL: RRTM180MWW Before use, Please read this manual carefully and keep it for future reference. Phone number: (718) 489-1561 Email: info@ricciappliances.com...
-
Page 2: Table Of Contents
CONTENTS 1 Safety warnings 1.1 Warning ......................3 1.2 Meaning of safety warning symbols ..............4 1.3 Electricity related warnings ................4 1.4 Warnings for use ..................... 5 1.5 Warnings for placement ................5-6 1.6 Warnings for disposal..................6 2 Proper use of the refrigerator 2.1 Placement ...................... -
Page 3: Warning
1.1 Warning Warning: Risk of fire/flammable materials RECOMMENDATIONS: This appliance is intended to be used in households and similar environments. If the electrical cord is damaged, it must be replaced by the manufacturer, its service agent or similarly qualified persons in order to avoid a hazard. Do not store explosive substances such as aerosol cans with a flammable propellant in this appliance. -
Page 4: Meaning Of Safety Warning Symbols
Meaning of safety warning symbols Any incompliance with instructions marked with this symbol may result in damage to the product or endanger the personal safety of the user. Prohibition symbol It is required to strictly observe instructions marked with this symbol. Otherwise, damage to the product or personal injury Warning symbol may occur. -
Page 5: Warnings For Use
1.4 War nings for use 1.5 War nings for placement... -
Page 6: Warnings For Disposal
Do not store beer, beverages or other fluids contained in bottles or Freezing chamber enclosed containers in the freezer; as they may crack due to freezing and cause damages. 1.6 War nings for disposal Refrigerant and cyclopentane foaming material used for the refrigerator are flammable. -
Page 7: Placement
2.1 Placement... -
Page 8: Leveling Feet
2.2 Levelling feet It is very important to ensure that the refrigerator is leveled. otherwise the doors may not close or seal properly, causing cooling, frost, or moisture problems. To adjust the leveling feet: turn clockwise to raise them or counterclockwise to lower them. -
Page 9: Door Right-Left Change
2.3 Door Right-Left Change List of tools to be provided by the user Putty knife or a Flat Phillips Screwdriver screwdriver 5/16 Masking tape socket and ratchet 1. Unplug your refrigerator and remove all food from the door shelves. Fix the door with tape. Left cover plate 2. - Page 10 7. Remove the sleeves from the top right of doors and hole cap from top left of doors, and put them on the other side. 8. Remove the refrigerator door stopper and install it on the other side of the door. Remove the freezer door self-locking block and stopper, save them to reuse, take out the left self-locking block and stopper from the accessory bag in the refrigerator and install it on the left of door.
- Page 11 10. Put down the freezer door on the center hinge vertically, then take out the top hinge and cover for the left side from the accessory bag, assemble the top hinge, hinge cover and hole cover. top hinge hole cover...
-
Page 12: Changing The Light
2.4 Changing the Light Any replacement or maintenance of the LED lamps are intended to be made by the manufacturer, its service agent or similar qualified person. 2.5 Starting Before using the refrigerator for the first time wait for an hour before connecting it to the power supply. -
Page 13: Key Components
3.1 Key components Shelf Air duct button Door tray Display control panel Storage box LED lighting Shelf Door tray Fruits and vegetables box Refrigerating chamber The Refrigerating Chamber is suitable for the storage of a variety of fruits, vegetables, beverages and other food consumed in the short term. Hot foods should not be put in the refrigerating chamber until cooled to room temperature. -
Page 14: Functions
3.2 Functions STANDBY Temperature Hold SET-button for 3-sec Control for standby COLD COLDEST SET button: Press to change the refrigerator setting from 1 (cold) to 5 (coldest). Hold for 3 seconds to set the refrigerator to standby. LED indicators: These lights show the current refrigerator setting (from 1 (cold) to 5 (coldest); these lights are also used to relay any error codes, {see more in the troubleshooting section of this manual}) STANDBY LED... -
Page 15: Overall Cleaning
4.1 Overall cleaning Dust behind the refrigerator and on the ground should be cleaned to improve the cooling effect and energy saving. Check the door gasket regularly to make sure there is no debris. Clean the door gasket with a soft cloth dampened with soapy water or diluted detergent. -
Page 16: Common Problems And Solutions
5.1 Common problems and solutions Below are some common problems, and the simple solutions that you can do to solve them yourself. If the problem persists, contact the manufacturer. Check whether the appliance is connected to power or whether the plug is not in well. -
Page 17: Error Codes
5.2 Error codes The error codes appear on the Temperature Control panel. Code Fault Description Indicator lights 1 and 2 Refrigerator temperature sensor circuit Indicator lights 1 and 3 Freezer defrost sensor Indicator lights 1 and 4 Ambient temperature sensor 5.3 Specifications Dimensions (WxDxH) 29.5 x 30.9 x 66.6 in. -
Page 18: Appliance Warranty
Your appliance is covered by a one year limited warranty. For one year from your original date of purchase, Ricci appliances will pay all costs for repairing or replacing any parts of this appliance that prove to be defective in materials or workmanship when such appliance is installed, used and maintained in accordance with the provided instructions.


Need help?
Do you have a question about the RRTM180MWW and is the answer not in the manual?
Questions and answers