Table of Contents
Advertisement
Quick Links
QuickWash Plus
INSTRUCTION MANUAL
www.sdlatlas.com
Vortex M6
Version 2
SDL Atlas USA
3934 Airway Drive,
Rock Hill, SC 29732, USA
P: +1 803.329.2110
F: +1 803.329.2133
E:
info@sdlatlas.com
service-usa@sdlatlas.com
M6
SDL Atlas Hong Kong
3J,Garment Centre, 576
Castle Peak Road, Kowloon,
Hong Kong
P:: +852 3443 4888
F: +852 3443 4999
E:
info@sdlatlas.com.cn
SDL Atlas China
1B, Building B, Junxiang Da
Mansion,
No. 9 Zhongshan Yuan
Road, Nanshan,
Shenzhen, 518052, China
P: +86 (755)26711168
F: +86 (755)26711337
E:
info@sdlatlas.com.cn
Advertisement
Table of Contents

Related Manuals for SDL Atlas QuickWash Plus

Summary of Contents for SDL Atlas QuickWash Plus
- Page 1 QuickWash Plus Vortex M6 INSTRUCTION MANUAL Version 2 SDL Atlas USA SDL Atlas Hong Kong SDL Atlas China 3934 Airway Drive, 3J,Garment Centre, 576 1B, Building B, Junxiang Da Rock Hill, SC 29732, USA Castle Peak Road, Kowloon, Mansion, Hong Kong No.
- Page 2 GENERAL EQUIPMENT SPECIFICATIONS This page is a record of the equipment specifications. This information may be found on the stamped nameplate of the instrument. Please fill in the blanks below once the SDL Atlas instrument has been received. When contacting the sales or service department to order parts or obtain information, refer to this page.
- Page 3 This instrument is intended for use in a residential, commercial, and light industrial environment as detailed in EN 50081-1. SDL Atlas cannot be held responsible for any unauthorized modifications to the Vortex M6. WARNING This instrument contains moving parts and hazardous live voltages. Under no circumstance should the user try to prevent or restrict the movement of parts or gain access to the internal circuitry.
- Page 4 SDL Atlas specifications if installed and operated according to our instructions. This warranty is in lieu of any other warranty expressed or implied. In no event will SDL Atlas be liable for special or consequential damages due to of any alleged breach of this warranty provision.
- Page 5 Plus PARTS WARRANTY Parts and material supplied by SDL Atlas are inspected and tested to ensure that they are free from defects and will operate properly when correctly installed and operated in equipment produced by SDL Atlas. Parts (excluding consumable components such as light sources, optical components, crock cloth, etc.) are under warranty for a period of six (6) months from date of...
-
Page 6: Table Of Contents
__________________ Quickwash Plus CONTENTS INTRODUCTION ............... 1 SPECIFICATION ................ 2 INSTALLATION ................. 4 3.1 Uncrating the Instrument ......... 4 3.2 Standard Accessories ..........4 3.3 Optional Accessories ..........4 3.4 Setup ............... 5 OPERATION ................15 Loading Program ............15 Testing Process .............. -
Page 7: Introduction
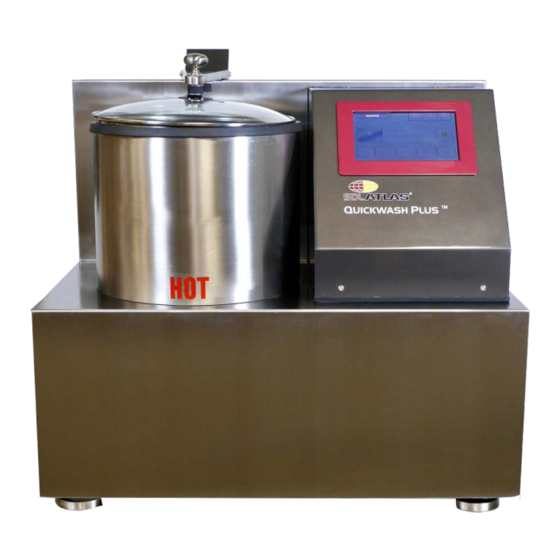
Traditionally, dimensional stability has taken approximately 4 hours using standard washers and dryers for testing. However, by using the SDL Atlas QuickWash, users can reproduce the results in 12 to 15 minutes. The QuickWash system is a compact, robust table top device that resembles a miniature top loading washing machine. -
Page 8: Specification
__________________ Quickwash Plus 2.0 SPECIFICATIONS Physical: 700 mm / 27.5 in Width 635 mm / 25 in Depth 610 mm / 24 in Height 110 kg / 243 lbs Weight Electrical: 700 mm / 27.5 in Width Depth 635 mm / 25 in... - Page 9 __________________ Quickwash Plus Water Medium Environmental: Indoor Use Altitude: up to 2000 m Ambient Temperature: 5 to 55°C (41 to 131°F) Relative Humidity: 80% maximum Main Supply Voltage Flucturations: ±10% of the nominal voltage Over voltage Category: II Pollution Degree: 2 Meets EU (European Union) requirements for safety.
-
Page 10: Installation
Carefully unpack the instrument and thoroughly inspect the instrument components for any damage or shortages. Report any instrument damage to the carrier and/or shortages to SDL Atlas Customer Service. 3.2 List of Materias (Standard Accessories) The Quickwash Plus is shipped with the following items: •... -
Page 11: Setup
__________________ Quickwash Plus 3.4 Setup... -
Page 12: Operation
__________________ Quickwash Plus 4.0 OPERATION This file include 6 parts to show the user how the control panel runs • 4.1: Loading Program • 4.2: Testing Process • 4.3: Editing Program • 4.4: Manual Mode • 4.5: Calibration • 4.6: Backup Sensor Datas. - Page 13 __________________ Quickwash Plus 4.1: Loading Program 3. Press the “Program” key, a program list will prompt, the user can choose or edit among 10 implanted programs Press “Load” to go back to main page and start a test with the program chosen.
- Page 14 __________________ Quickwash Plus 5. The QuickWash will start draining . Press “Pause” to pause the draining process. Press “Drain” to skip this step if necessary. 6. Pause - press “pause” will pause the current motion of the instrument.
- Page 15 __________________ Quickwash Plus 7. Wash Cycles- After draining, the instrument will enter Wash cycles, which has 5 steps: • Fill • Dispenser • Agitate • Drain • Spin These steps will go one by one in the sequence. Dispenser- as per...
- Page 16 __________________ Quickwash Plus This 5 steps may repeat for several times if you set many wash cycles. • Press "Wash Cycles" to skip the wash cycles • Press "Fill", " Dispenser", "Agitate", "Drain" or "Spin" to skip the process. 8. Rinse Cycles-...
- Page 17 __________________ Quickwash Plus These 5 steps may repeat for several times if you set many wash cycles. 9. Dry Cycles- After finishing all the rinse cycles, , the instrument will enter Dry cycles. 10. Rinse & Dry Cycles-If the user set more than 1 Rinse &...
- Page 18 __________________ Quickwash Plus 11. Complete Cycles-If the user set more than 1 Complete Cycles, for example, 2 , after finishing the dry cycle of the 1/2 Complete Cycles, it will go back to repeat all steps in Item7, 8 & 9. .
- Page 19 __________________ Quickwash Plus 4.3: Editing Program 13. Before editing, please enter the password. Password is 1234 14. What can be edited - All the parameters lay in this page can be set. • The Common Setting: Water Level, Spin Time.
- Page 20 __________________ Quickwash Plus to main screen. 15. How to edit - Press the number to edit. For example, if you want to change "Wash Cycles" , click "1", a keypad will show. • Enter the cycle qty you want. Please...
- Page 21 __________________ Quickwash Plus 16. Reset- You can go back to the default setting by pressing "Reset". • Press "Back" to go back to previous page and save the setting. • Press "Home" to go back to the main page and save all the setting.
- Page 22 __________________ Quickwash Plus Pressing "1 of 9 cycles" goes to the dispenser setting page. The user can adding the dispenser in the sequence of :Manual, bottle 1, bottle 2, bottle 3, bottle 4" one by one. Click the text box and the keypad will show.
- Page 23 __________________ Quickwash Plus 18. "Copy" & "Paste" For many different cycles, entering one by one by keypad is exhausting. Press " Copy" to copy all data in rinse cycle 1 and then the user can paste it in rinse cycle 2 and make some small modifications.
- Page 24 __________________ Quickwash Plus 4.4: Manual Mode 20. Manual Mode- Press "Manual Mode" icon in main page to enter. 21. Manual Mode- There are 5 manual modes: Fill Drain Agitate Spin Dry...
- Page 25 __________________ Quickwash Plus 22. Press "Fill" to enter filling water page. *Press "Start" to begin. The real time water volume shows and the user can press "Stop" to stop filling. Note: "Drain", "Agitate", "Spin" and "Dry" 's operation is totally the same with "Fill".
- Page 26 __________________ Quickwash Plus 24. We can calibrate : • Water Temp Calibration • Pressure Calibration • Dispenser Calibration • Air Temp Calibration • Water Volume calibration. 25. Password- Enter "6789" to continue.
- Page 27 __________________ Quickwash Plus 26. Water Volume Calibration- Follow the indications to complete the calibration. Enter the actual water volume to finish the calibration. Note: Pressure Calibration’s operation is similar like this one.
- Page 28 __________________ Quickwash Plus 27. Water Temp Calibration-this page has 2 options: Temp Calibration and offset setting. "Water Temp" shows the current water temperature in the basket tub. Press the text box to enter into the temperature measured by the keypad prompted.
- Page 29 __________________ Quickwash Plus Key in the Actual Temp by the prompted keypad and press "End & Save" to finish the calibration of water temp. 28. Offset Setting- the user can set offset by pressing :"+" and "-" NOTE: Air Temp Calibration's...
- Page 30 __________________ Quickwash Plus Enter the water temp by keypad. 30. Press "Fill" to start filling water. The water volume will be shown automatically. Press "Stop Filling" to stop the filling process.
- Page 31 __________________ Quickwash Plus 31. Press "Drain" to start draining water. The drained time will be recorded automatically. Press "Stop Draining" to stop the draining process. 32. Press "Agitate" to start agitating. The agitating time will be recorded automatically. Press "Stop Draining"...
- Page 32 __________________ Quickwash Plus Input the password “9898” It allows the users to "Reset Sensor of Water Level", "Reset Sensor of Water Temp", "Reset Sensor of Air Temp", "Reset Sensor of Air Pressure", "Reset Sensor of Dispenser", "Sensor Data Backup" Press "Reset to Default"...
- Page 33 __________________ Quickwash Plus 1. "Setting"-Press "Setting" to enter. 2. Other Setting- The user can set "Drain Time" & "Cooling Time" 3. Language Setting-It has 2 language options, English & Chinese. 4. Other Setting-it can set : "Drain Time", "Cooling Time" and "Max...
- Page 34 __________________ Quickwash Plus 5. Help: Check SDL Atlas information and software version in this page.
-
Page 35: Maintenance
__________________ Quickwash Plus 5.0 MAINTENANCE • Check and Clean Fan Filter on back of unit-It is important that this filter be kept free from dirt. Heat build-up could affect the unit over time. • Check and Clean Air Vents on the left side of the Basket Compartment- These holes vent the air during the drying cycle. - Page 36 __________________ Quickwash Plus Quickwash Plus System Programs Program Purpose of test Complies with AATCC 187-2000 Correlation with ISO 6330 Correlation with AATCC 135 Five or Four Chamber Basket Five or Four Chamber Basket Fabric Type Knitted and Woven Knitted Woven...
- Page 37 __________________ Quickwash Plus The table shows the programs that are in the machine when it is delivered on site. All these programs can be edited as desired. The programs have been developed over a period of time and can be approximated to the following...
- Page 38 __________________ Quickwash Plus Any of the above programs may be edited but the following should be noted: Spin Time : Increasing spin time has little effect on the amount of water removed from fabric specimen recommended. Drying Time :This is related to the temperature shown on the air temperature controller.
- Page 39 __________________ Quickwash Plus Water Temperature Water temperature for the washing can be set to reflect any specified washing temperature Results Check list for result variation: - Check water supply is at 2 to 2.5 bar and the correct temperature Check the compressed air is a clean dry supply and maintains the requested pressures The programs entered match the table above - look in the edit part If the Quickwash is cold the preheat program is run before testing is...
- Page 40 __________________ Quickwash Plus If the results are not within an acceptable correlation band then changes to the Quickwash programs are necessary: If the QuickWash result is too high:- a.) Reduce washing time by 50% in wash cycle Re-test and compare results to see if correlation is now achieved: b.) Set the number of wash cycles to zero If the QuickWash result is too low:- a.) Increase the number of rinse dry cycles.
-
Page 41: Measurement Guide
__________________ Quickwash Plus 6.0 MEASUREMENT GUIDE We have included a 7-1/2 inch square and 10-inch square plastic template for you to use as a guide for cutting and marking your samples. The 7-1/2 inch template has 5-inch holes for easy marking of the fabric. The 10-inch square template can be used to cut 10-inch samples on the bios and marked with 10 inch marks from point to point.
Need help?
Do you have a question about the QuickWash Plus and is the answer not in the manual?
Questions and answers