Table of Contents
Advertisement
Quick Links
A3 Electric
SprayPump
Operating Instructions
&
Service Manual
Important Safety Instructions
Read all warnings and instructions in this manual.
Do not proceed until you fully understand its contents
These WARNINGS are included for the health and safety of
the operator and those in the immediate vicinity.
Save these instructions.
Storm Machinery
www.stormmachinery.co.za
sales@stormmachinery.co.za
Advertisement
Table of Contents

Summary of Contents for Storm Machinery A3
- Page 1 A3 Electric SprayPump Operating Instructions & Service Manual Important Safety Instructions Read all warnings and instructions in this manual. Do not proceed until you fully understand its contents These WARNINGS are included for the health and safety of the operator and those in the immediate vicinity.
- Page 2 Warnings Warnings The following are general warnings related to the setup, use, grounding, maintenance, and repair of this equipment. Additional, more specific warnings may be found throughout the body of this manual where applicable. Symbols appearing in the body of the manual refer to these general warnings. When these symbols appear throughout the manual, refer back to these pages for a description of the specific hazard.
- Page 3 Warnings EQUIPMENT MISUSE HAZARD Misuse can cause death or serious injury. • Do not exceed the maximum working pressure or temperature rating of the lowest rated system component. Read Technical Data in all equipment manuals. • Use fluids and solvents that are compatible with equipment wetted parts. Read Technical Data in all equipment manuals.
-
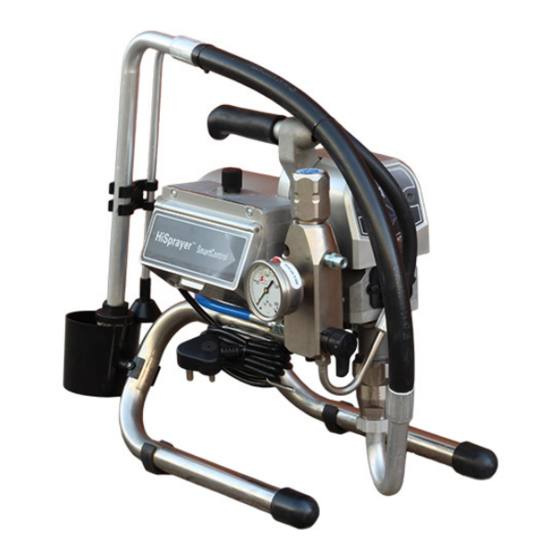
Page 4: Component Identification
Component Identification Component Identification Component ON/OFF switch Prime tube Suction tube Pressure control Filter Trigger lock Pump Fluid outlet Prime/Spray valve... -
Page 5: Setup / Installation
Setup / Installation] Setup / Installation 1 Connect HVBAN airless hose Connect other end of hose Tighten securely. Remove tip guard. to sprayer. Tighten securely. to gun. Check inlet strainer for clogs Fill throat packing nut with Turn power OFF. Plug power supply cord and debris. -
Page 6: Pressure Relief Procedure
Startup Pressure relief Startu [ p Turn pressure control to Turn power ON. Increase pressure 1/2 to Turn prime valve horizon- lowest pressure. start motor and allow fluid tal.Take spray gun trigger to circulate through drain safety OFF. tube for 15 seconds; turn pressure down. - Page 7 Startup Tip and Tip Guard Tip and Tip Guard Insert SwitchTip. Insert metal seal and Screw assembly onto gun. OneSeal. Tighten. Spray 2 Hold gun perpendicular, 1 Spray test pattern. Adjust pres- 10-12 in. from surface. Spray sure to eliminate heavy edges. back and forth.
- Page 8 Cleanup Cleanup Do Pressure Relief, steps 1 NOTE: Use water for water base Increase pressure to 1/2. Move gun to wastepail, hold - 4. Remove siphon tube set paint and mineral spirits for oil Hold gun against paint pail. gun against pail, trigger gun from paint and place in flush- base paint.
-
Page 9: General Repair Information
General Repair Information General Repair Information Flammable materials spilled on hot, bare motor could To reduce risk of serious injury, including electric shock: cause fire or explosion. To reduce risk of burns, fire or explosion, do not operate sprayer with cover removed. •... -
Page 10: Troubleshooting
Troubleshooting Troubleshooting What to Do What to Check (When check is not OK, refer to this Type of Problem (if check is OK, go to next) column) Basic fluid pressure problems Pressure control knob setting. Motor Slowly increase pressure to see if will not run if at minimum setting (fully motor starts. - Page 11 Troubleshooting What to Do What to Check (When check is not OK, refer to this Type of Problem (if check is OK, go to next) column) Relieve pressure, page 5. Then For worn spray tip. replace tip. See your separate gun manual for additional instruction.
- Page 12 Troubleshooting What to Do What to Check (When check is not OK, refer to this Type of Problem (if check is OK, go to next) column) Motor runs but pump does not stroke Displacement pump pin damaged or Replace pump pin if missing. Be sure missing.
- Page 13 Displacement Pump Replacement Displacement Pump Replacement Removal 4.Cycle motor until pump pin (32)is in position to be See manual for pump repair instructions. removed. 1. Flush pump (13). 1. Relieve pressure, page 5. 2. Loosen screws (10) and rotate cover (70). 5.
- Page 14 Displacement Pump Replacement 5. Screw in pump until threads are flush with top of Installation drive housing opening. WARNING If pump pin works loose, parts could break off due to force of pumping action. Parts could project through air and result in serious injury or property damage. 6.
- Page 15 Drive Housing Replacement Drive Housing Replacement 3. Remove screws (73) and pump rod cover (70). CAUTION 4. Remove pump (41), Displacement Pump Replace- Do not drop gear cluster (44) and (40) when removing ment, page 15 from drive housing (42). Gear cluster may stay engaged in motor front end bell or drive housing.
-
Page 16: Motor Replacement
Motor Replacement Motor Replacement 6. Remove screws (47) and control box (48). CAUTION 7. Remove screws (47) and manifold (15). Do not drop gear cluster (44) and (40) when removing from drive housing (42). Gear cluster may stay 8. Remove screws (47) and motor (54) from frame (59). engaged in motor front end bell or drive housing. - Page 17 Digital Display (only for EP230/495/310S/795S) Operation Press and hold display Plug sprayer in to The pressure is displayed Pressure Relief Follow button to change pressure grounded outlet. Dashed indicate pressure Proceduer, page 5. units(psi,bar or Mpa) Turn power ON is less than 200 psi (14bar, 1.4MPa) Operation Main Menu Turn pwern ON.
- Page 18 Motor Control Board Diagnostics DISPLAYLED BLINKS SPRAYER OPERATION INDICATES WHAT TO DO No Display Never blinks Sprayer stops. Power is not Loss of power. Check power source. Relieve pressure applied. Sprayer must be pres- before repair or disassembly. surized. psi/bar/MPa Once Sprayer is pressurized.
-
Page 19: Pressure Control Transducer
Pressure Control Repair Pressure Control Transducer Pressure Adjust Potentiometer Removal Removal 1. Relieve pressure, page 5. 1. Relieve pressure, page 5. 2. Remove screws and cover. 2. Remove screws from cover. 3. Disconnect transducer lead from motor control 3. Disconnect potentiometer lead from motor control board board. - Page 20 Storm Machinery’s written recommendations. This warranty does not cover, and Storm Machinery shall not be liable for general wear and tear, or any malfunction, damage or wear caused by faulty installation, misapplication, abrasion, corrosion, inadequate or improper maintenance, negligence, accident, tampering, or substitution of non-Storm Machinery component parts.
Need help?
Do you have a question about the A3 and is the answer not in the manual?
Questions and answers