
Summary of Contents for CLIMET INSTRUMENTS CI-90A
- Page 1 CI-90A MICROBIAL SAMPLER OPERATOR’S MANUAL Manual P/N 03090005 Revision 2.10 – January 23, 2019 CLIMET INSTRUMENTS 1320 West Colton Avenue, Redlands, CA 92374 PHONE: (909) 793-2788 FAX: (909) 793-1738 www.climet.com...
- Page 2 CI-90A User’s Manual Page ii...
-
Page 3: Table Of Contents
Interpreting the Results _______________________________________________ 4 Specifications ________________________________________________________ 9 Section 2: Operation ______________________________________________________ 11 Basic operation of the CI-90A _________________________________________ 11 2.1.1 How to take a sample _______________________________________________ 11 Setup menu options __________________________________________________ 12 2.2.1 Sample volume ____________________________________________________ 12 2.2.2 Sample Delay _____________________________________________________ 13 2.2.3 # Labels to print ___________________________________________________ 13... - Page 4 CI-90A User’s Manual Setting the SITE ID __________________________________________________ 18 2.4.1 Creating an ID _____________________________________________________ 18 2.4.2 Selecting an ID ____________________________________________________ 18 2.4.3 Deleting an ID _____________________________________________________ 19 Setting the UNIT ID _________________________________________________ 19 Printing Labels _____________________________________________________ 19 2.6.1 The paper ________________________________________________________ 19 2.6.2 Loading paper _____________________________________________________ 20...
-
Page 5: Firmware Revision History
CI-90A User’s Manual Firmware Revision History Revision 1.00 – May 26, 2005 Initial Release Revision 2.00 – January 29, 2008 Introduction of Sample Volume linked to Site ID. Revision 2.05 – October 8, 2008 Added automatic retry for printer errors. - Page 6 CI-90A User’s Manual Page vi...
-
Page 7: Introduction
Service by qualified personnel only. 1.2 Notes 1.2.1 Notice The CI-90A should never be operated with the transit lid installed. This may result in damage to the blower or other internal components. 1.2.2 Battery life Batteries offer portability, but all batteries have limited life. The choice of Nickel... -
Page 8: Power Requirements
1.3.5 Storage If the CI-90A is to be stored for three months or longer without use, the battery should be disconnected to prevent damage to the battery from a deep discharge. To gain access to the battery, unscrew the two thumbscrews on the battery cover on the bottom of the unit. -
Page 9: Packing For Shipment
CI-90A User’s Manual 1.3.6 Packing for shipment The packing container used for shipping the CI-90A has been tested according to the standards of the National Safe Transit Association. For this reason, it is recommended that the original packing container be saved for reuse if it has no obvious damage. The packing container consists of an outer double-walled cardboard box, two foam inserts, and an internal cardboard box used to hold accessories. -
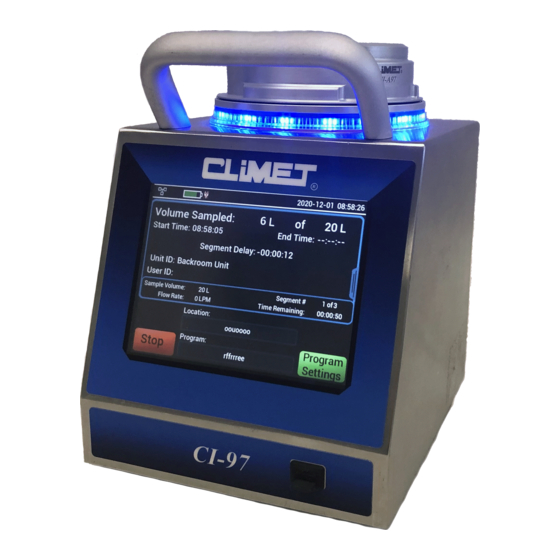
Page 10: Overview Of Ci-90A Features
The CI-90A has menu options that allow the user to set up a UNIT ID name to identify the CI-90A used, a USER ID name to identify the user who took the sample, and a SITE (LOCATION) ID to identify where the sample was taken. - Page 11 CI-90A User’s Manual observed approaches the number of perforations, the greater the undercount. The easiest way to correct the observed values into Probable Statistical Totals is to use the table in the appendix. Look up the observed value in column A, and find the Probable Total in the adjacent column B to the right.
- Page 12 CI-90A User’s Manual Page 6...
- Page 13 CI-90A User’s Manual Page 7...
- Page 14 CI-90A User’s Manual Page 8...
-
Page 15: Specifications
CI-90A User’s Manual 1.6 Specifications Clear Anodized Aluminum with 333 0.0225” holes, Sample Lid: OR (depending on model ordered) Passivated 316 Stainless steel with 333 0.0225” holes. Autoclavable @ 134C for 20 minutes Enclosure: 304L Stainless Steel Sample flow rate: 100 liters per minute (0.10 cubic meter or 3.53 cubic feet per minute) - Page 16 CI-90A User’s Manual Page 10...
-
Page 17: Operation
CI-90A User’s Manual Section 2: Operation 2.1 Basic operation of the CI-90A 2.1.1 How to take a sample Before taking a sample, first make sure the aluminum transit cover is removed. This will prevent possible damage to the internal blower or other electronics. -
Page 18: Setup Menu Options
EXIT 2.2.1 Sample volume The CI-90A has a number of preset sample volumes from which the user can choose. The minimum sample volume is 5 liters, which equates to a 3 second long sample time. The maximum sample volume is 1100 liters, which is 1.1 cubic meters and takes 11 minutes to complete. -
Page 19: Sample Delay
The CI-90A will start the pump 2 seconds before the end of the sample delay to get the flow up to speed for the start of the actual sample. The CI-90A has a range of sample delays from which the user can choose. -
Page 20: Beep On Complete
The user can opt to have 0, 1, 2, or 3 labels printed after the sample. If the CI-90A should run out of paper during the printing of a label, the user can add more label paper and reprint the particular label. -
Page 21: Secure Setup
(ERRLBS) of labels with Sample Status marked INVALID will be printed. Furthermore, the red alarm LED will continue flashing. After the user has recorded any relevant information, the CI-90A must be turned off and then back on to resume normal operation. ENABLE FLOW ALARM? Y... -
Page 22: Secure Sample
MM/DD/YY or DD/MM/YY by using the left/right arrows. 2.2.9 Date/time The CI-90A allows the user to set the current date and time. Once set, the CI-90A’s internal real time clock will continue to keep the date and time. The real time clock is powered off the internal battery, but a backup capacitor provides enough power (over 30 minutes) to allow the battery to be changed without losing the date/time setting. -
Page 23: Setting The User Id
2.3.1 Creating an ID The CI-90A User ID’s can be assigned a 1 to 9 character identification which will appear on all label printouts. The operator can enter up to 10 ID names. To create a User ID, press [... -
Page 24: Setting The Site Id
2.4.1 Creating an ID The CI-90A location (Site) ID’s can be assigned a 1 to 15 character identification which will appear on all label printouts. The user can enter up to 100 ID names. To create a Site ID, press ] from the main screen and observe the Site screen appears. -
Page 25: Deleting An Id
ID and return to the site screen. 2.5 Setting the UNIT ID The CI-90A Unit ID can be assigned a 1 to 6 character identification which will appear on all label printouts. To create the Unit ID, press [... -
Page 26: Loading Paper
The loose end of the label roll then needs to be hand-fed forward into the printer. This must be done with the CI-90A powered on so that the user can press the [TOF] button then feed the labels into the printer. The printer is equipped with an optical sensor that detects when paper is being loaded. -
Page 27: Print Options At The End Of A Sample
CI-90A User’s Manual 2.6.4 Print options at the end of a sample At the end of a sample a menu screen will appear which provides the user with some print related options. The menu screen is illustrated below. SAMPLE COMPLETE... -
Page 28: Handling A Printer Error Condition
CI-90A User’s Manual SAMPLE COMPLETE PRINT EXTRA LABEL? FEED If you would like to print another label for your last sample you can by pressing the [YES] button. Note that pressing the [YES] button will only print one label if you want more just press [YES] again until you have the desired amount of labels. - Page 29 CI-90A User’s Manual PRINTER ERROR CODE TABLE BIT FUNCTION Head temperature Too high or too low Head lever up Paper out Power supply Too high or too low Printer in use On / Off line Hole/Mark detection error No Too short or long, or not found...
- Page 30 CI-90A User’s Manual Page 24...
-
Page 31: Rs-232 Interface
Auxiliary connections 3.1 RS-232 interface The CI-90A has an RS-232 interface that allows the CI-90A to communicate with the serial port of a PC. There are two commands that are primarily used for maintenance, and two others that provide the ability to rapidly enter Site and User ID’s into the unit. The Site and User ID names are created in the separately purchased program named CI-9x Loader (see next page), then downloaded serially into the CI-90. -
Page 32: Rs-232 Commands
ID’s are sent, and it routinely does it in about half the timer duration. When the k command is received the CI-90A responds by first starting a 4 second timer, then storing the next 90 characters it receives into non-volatile memory and setting the current user ID to the blank (00). -
Page 33: Accessories
PC, the site and user ID’s are entered into the program’s site and user lists, and then the lists are separately downloaded into the CI-90A (the 90A must be on and not sampling). The list of site and user ID’s can also be saved as a named file for use at a later time. For detailed instructions on how to use CI-9x Loader, please consult the manual that comes with the software. - Page 34 CI-90A User’s Manual Page 28...
-
Page 35: Tripod
4.2 Tripod 4.2.1 Recommended Tripod / Tripod head The CI-90A microbial sampler has two locations where a tripod can be attached as shown earlier on page 7. CLiMET Instruments recommends that the Manfrotto #3001N basic tripod without head and the Manfrotto #488RC2 midi ball head with RC2 rapid connect system be used. -
Page 36: Service And Maintenance
5.1.2 Long term storage If the CI-90A is to be stored for three months or longer without use, the battery should be disconnected to prevent damage to the battery from a deep discharge. To gain access to the battery, unscrew the two thumbscrews on the battery door. -
Page 37: Calibration Service
The purpose of the calibration is to establish that the unit is in tolerance, and that sample volume is therefore accurate. The accuracy and consistency of your CI-90A can be degraded by unqualified and marginally experienced calibration services. To insure that the flow rate of the instrument is maintained to factory specifications, you may ship your unit to either our Eastern or Western service facility, or arrange for on-site service. -
Page 38: Appendix - Feller Correction
CI-90A User’s Manual Appendix — Feller Correction There is a statistical analysis that corrects the observation to a probable statistical total. This compensates for the fact that the probability of a colony forming unit (CFU) passing through a given perforation increases with the actual concentration of microbes per cubic meter. - Page 39 CI-90A User’s Manual Feller table for CI-90A and CI-95A 32.5 67.3 106.1 33.6 68.5 107.5 34.7 69.7 108.9 35.8 71.0 110.3 36.9 72.2 111.6 38.0 73.4 113.0 39.2 74.7 114.5 40.3 75.9 115.9 41.4 77.2 117.3 10.1 42.5 78.5 118.7 11.2...
- Page 40 CI-90A User’s Manual Feller table for CI-90A and CI-95A (Cont.) 150.1 200.8 260.6 333.5 151.7 202.6 262.8 336.2 153.2 204.4 265.0 339.0 154.8 206.3 267.2 341.8 156.4 208.1 269.4 344.6 158.0 210.0 271.7 347.4 159.6 211.9 273.9 350.2 161.2 213.8 276.2...
- Page 41 CI-90A User’s Manual Feller table for CI-90A and CI-95A (Cont.) 427.0 557.6 775.3 1627.3 430.7 563.0 785.8 1793.8 434.3 568.4 796.5 2126.8 438.0 574.0 807.6 441.8 579.6 819.1 445.6 585.4 831.0 449.4 591.2 843.3 453.3 597.2 856.1 457.2 603.2 869.4 461.1...
- Page 42 CI-90A User’s Manual Page 36...
-
Page 43: Eu Declaration Of Conformity
CI-90A User’s Manual EU Declaration of Conformity EU Directives covered by this declaration: EMCD 2014/30/EU Standards Which Product Conforms To: EN61326-1:2013 Class A Manufacturer’s Name: Climet Instruments Company Manufacturer’s Address: 1320 West Colton Avenue Redlands CA 92374 909-793-2788 Equipment Description:... - Page 44 CI-90A User’s Manual Page 38...
Need help?
Do you have a question about the CI-90A and is the answer not in the manual?
Questions and answers