Table of Contents
Advertisement
Quick Links
Advertisement
Table of Contents

Summary of Contents for ASTROS AS-201
- Page 1 ASTROS Station AS-201 User manual ASTROGATE INC.
-
Page 2: Table Of Contents
Index Introduction ............................. 4 ASTROS Station 201 (AS-201) Key features highlight ..............4 About ASTROS Station 201 ......................5 Package contents ..........................5 Interface ............................5 Others .............................. 6 ASTROS Station Installation ......................7 3.1. Mounting..........................7 Wall mounting ..........................7 3.2. - Page 3 Windows install-free version ......................24 4.4. Operating ASTROS App for Android or Chrome OS devices ..........24 Screen sharing ..........................24 4.5. Mirroring with native protocols ................... 25 Support AirPlay and Google Cast ....................25 Operating the Standby Screen ...................... 25 5.1.
-
Page 4: Introduction
1 Introduction ASTROS wireless presentation solution enables users to experience modern ways of communication with Astrogate’s advanced network-based wireless AV distribution technology. Cross-platform ASTROS Apps and our native mirroring protocol supported allow users to present contents from various devices with existing network infrastructure. -
Page 5: About Astros Station 201
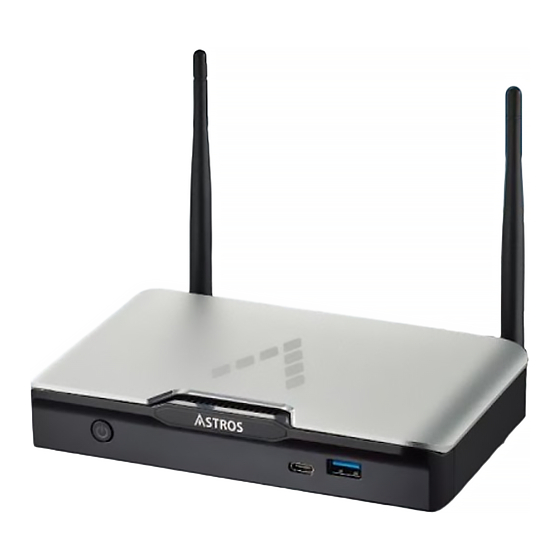
Network Up to 20 users can connect to AS-201 simultaneously Wireless access point supporting 802.11ac Security: 4-digit Login code / data encryption 2 About ASTROS Station 201 Package contents ASTROS Station (AS-201) x1 Antennas x2 Quick Start Guide x1 Power adaptor (12V 2A) x1... -
Page 6: Others
6. Height of wall mounting: lower than 3 meters (suggested) 7. Warning: The RTC battery inside of the ASTROS Station is forbidden to charge, decompose, heat or throw into fire. Do not ingest or swallow the RTC battery, or it can cause severe internal burns in just 2 hours and can lead to death. -
Page 7: Astros Station Installation
The screw rod diameter must be smaller than 3.3 mm. Do not drive in the screws completely. 3. Hang the ASTROS Station to both screw heads and slide downwards until it’s fixed. 3.2. ASTROS Station Configuration Access ASTROS configuration page 1. -
Page 8: The Landing Page
! It is strongly suggested to change the administrator password the first time you configure your AS-201. ! “https://” in IP address is necessary for the browser to direct to the ASTROS configuration page correctly. ! You will be automatically logged out to the Landing Page if idle for 15 minutes. - Page 9 Station name input The displayed name for this ASTROS Station. The name will be displayed on the Standby Screen and ASTROS App’s Station list. It will also be the SSID (WiFi name) for ASTROS Station wireless access point. Default name: AS201-xxxx Format: A to Z, a to z, 0 to 9 and “-“...
- Page 10 Reboot button Click this button to reboot ASTROS Station. Log out button Log out to the landing page. Resolution HDMI only (default) Maximum resolution is up to 4K resolution. HDMI and VGA Enable dual-display output. In this mode, the maximum duplicate resolution is up to 1080p.
-
Page 11: Network Integration
Please ensure the date and time is set correctly. Network integration There are three types of setup to integrate the ASTROS Station to your organization network (LAN). How an administrator or a user access the ASTROS Station depends on which type of setup you choose. - Page 12 Wi-Fi setting page- 1 Wi-Fi setting page- 2 ASTROGATE INC.
- Page 13 Type 1: ASTROS Station standalone network (recommended) ASTROS Station standalone network This is the default network state when you first time turn on an ASTROS Station, without an Ethernet cable connected. ASTROS Station will become a wireless access point with default SSID AS201-xxxx.
- Page 14 Type 2: ASTROS Station join another LAN via Ethernet cable (recommended) ASTROS Station join another LAN via Ethernet Same as Type 1, but Type 2 has a Ethernet cable connected to ASTROS Station. ASTROS Station will be a wireless access point with default SSID AS201-xxxx and default wireless IP address 192.168.120.11.
-
Page 15: Administration
Wi-Fi. With this setup, users or administrators must connect their device to the organization LAN to access ASTROS Station. ASTROS Station will obtain IP address from the DHCP server, and display it on the Standby Screen. With the following steps, you may set an ASTROS Station to Type 3 mode: 1. - Page 16 2. Update ASTROS Station by uploading firmware manually Download the latest ASTROS Station firmware from https://www.Astrogate.com/support Click on the “Browse” button to upload the latest ASTROS Station firmware, then click on the “Upgrade” button to start the upgrade process. Password & configuration This page allows you to change configuration page password and perform system settings.
-
Page 17: Power Setting
This page allows you to choose ASTROS Station power button behavior when you press Sleep mode In Sleep mode, ASTROS Station turn off only the video and audio output. Users can still discover this ASTROS Station and connect. ASTROGATE INC. -
Page 18: Start Screen Sharing
To quit Sleep mode: short press the power button for 1 second or any connection attempt. Enter Sleep mode automatically When you set power button behavior to Sleep mode, you may set ASTROS Station to automatically enter Sleep mode if no operation is made for a certain period. Suspend mode In Suspend mode, ASTROS Station will shut down all functions to decrease power consumption to minimum. -
Page 19: Station List (Nearby Stations)
You can use Search bar to: (1) Type in key characters to quickly find the ASTROS Station you are looking for. (2) Type in IP address to connect to a specific ASTROS Station on the same network as your device 4.3. - Page 20 When clicking the Stop button, the ASTROS App will instantly stop projecting your screen. Window Sharing button You can choose to project only a specific application window or the entire screen. Click Window Sharing button to make your selection then click on the Play button to project.
-
Page 21: Other Features
! Enable or disable Remote View on the Control Panel or in the ASTROS configuration page. One-to-many ASTROS App for Windows and macOS allows users to connect and project to up to 4 ASTROS Stations simultaneously. Users can choose to project different contents to different ASTROS Stations. - Page 22 Favorite Stations Users can mark frequently used ASTROS Stations as favorites by clicking the star- shaped button next to the Station name. The marked ASTROS Station will always be prioritized on the Station list. ASTROS Quick Join ASTROS Quick Join allows users to quickly connect to a pre-determined ASTROS Station.
-
Page 23: Configure Astros App
Version and update See current app version and check for update here. ASTROS App will check for update automatically every time you launch the app. If an update is available, a yellow exclamation mark will appear on top of the Setting button. -
Page 24: Enable Sound For Macos Projection
Enable sound for macOS projection Audio driver is required for ASTROS App to project audio in the macOS environment. A yellow dot will appear on top of the Mute button if audio driver is not installed. To install the driver: (1) Install the audio driver during ASTROS App installation, or (2) Click the Mute button to trigger the audio driver installation process. -
Page 25: Mirroring With Native Protocols
4.5. Mirroring with native protocols Support AirPlay and Google Cast If you device supports AirPlay or Google Cast, you can connect to ASTROS Station and share the screen via it. ! If login code is required, please input the login code to start sharing. -
Page 26: B Background Image
Control Panel will be automatically enabled if a touch display or a mouse is connected to the ASTROS Station. C1 Touch Back When Touch Back function is enabled and a touch display is connected to the ASTROS, a user can operate a touch-supported device remotely from a touch display. ASTROGATE INC. -
Page 27: C2 User List
ASTROS App. (2) Enabling the Moderation Mode will cause all current projection to stop. (3) When Moderation Mode is enabled, users can still connect to the ASTROS Station, but they cannot project any content to the main screen freely. Window Sharing selection and Remote View are still allowed. -
Page 28: D2 Annotation
D3 Screen Capture The users can capture the display screen anytime they want. Access saved image You can save the Whiteboard, Annotation or Screen Capture as PDF or image to the ASTROS internal memory or a plugged-in USB drive. ASTROGATE INC. -
Page 29: Content Arrangement
The projected contents will be automatically arranged by join order. Change position When Touch Back function is disabled and a touch display is connected to the ASTROS, users can drag (press and hold) a projected content to re-assign position. Federal Communications Commission (FCC) Statement 15.21... - Page 30 -Increase the separation between the equipment and receiver. -Connect the equipment into an outlet on a circuit different from that to which the receiver is connected. -Consult the dealer or an experienced radio/TV technician for help. This device complies with Part 15 of the FCC Rules. Operation is subject to the following two conditions: 1) This device may not cause harmful interference and 2) This device must accept any interference received, including interference that may cause...
Need help?
Do you have a question about the AS-201 and is the answer not in the manual?
Questions and answers