Table of Contents
Advertisement
Quick Links
Advertisement
Table of Contents

Summary of Contents for Amil Care MEDIBIOS bsc
- Page 2 © 2016 Amil Care Corp – All rights reserved Mod. 044 EN bsc - User manual MEDIBIOS basic ref. bsc - Rev. 3 - 08/03/2018...
- Page 3 Manufacturer Company. The machine described in the present manual is a diffuser of ready-made liquid solutions such as: ▪ Medical devices ▪ Biocides ▪ Sanitizers MANUFACTURER: Amil Care Corp. Web site: www.amilcarecorp.com For information about MEDIBIOS: info@amilcarecorp.com For assistance: assistance@medibios.com...
- Page 4 The “mandatory” symbol is used to describe safety instructions and warnings to be complied with. Disposal: The correct disposal of your old product will help prevent potential negative consequences for our environment and human health. Do not dispose of your old products with your normal household waste.
-
Page 5: Table Of Contents
Index 1. Safety instructions and warnings p. 7 2. General p. 9 3. Technical characteristics p. 10 4. Chart of consumption and emission duration p. 10 5. List of visible external elements p. 11 6. Labelling p. 11 7. General norms of usage p. - Page 6 7.3.7.2.3. Disabling weekly automatic start p. 29 7.3.8. Disinfection/disinfestation cycle p. 31 7.3.8.1. Manual start p. 31 7.3.8.1.1. Program selection p. 31 7.3.8.1.2. Program start p. 31 7.3.8.2. Automatic cycle start p. 33 7.3.8.3. Washing cycle 7.3.8.4. Cycles stop p. 35 7.3.9.
-
Page 7: Safety Instructions And Warnings
1. Safety instructions and warnings Here following is a list of warnings to be observed in order to safely operate the device and to avoid risks to people and animals or damage to the instrumentation. Before using this device it is mandatory to observe the safety and usage instructions described in the present manual. - Page 8 ▪ Periodically check the state of the power supply cable and never operate the device when the cable shows any anomaly or is in any way damaged in its structure. ▪ Don't pull the cables to detach them from the device panel, but take them in your fingers to extract them from the sockets.
-
Page 9: General
▪ When opening the delivery package, verify that the device is intact, paying special attention to any signs of damage. In case of damage, please immediately contact Customer Assistance (see Introduction). ▪ Take hold of the device exclusively from the specifically provided handle. ▪... -
Page 10: Technical Characteristics
3. Technical characteristics ▪ Power: 1000 WATT ▪ Supply voltage: 120 Volt ± 3% or 230 Volt ± 3% ▪ Mains frequency: 50 - 60 Hertz ▪ Fuses: 10 A or 6,3 A ▪ Turbine rotating speed: 22000 rpm ▪ Bottles capacity: 1 Lt ▪... -
Page 11: List Of Visible External Elements
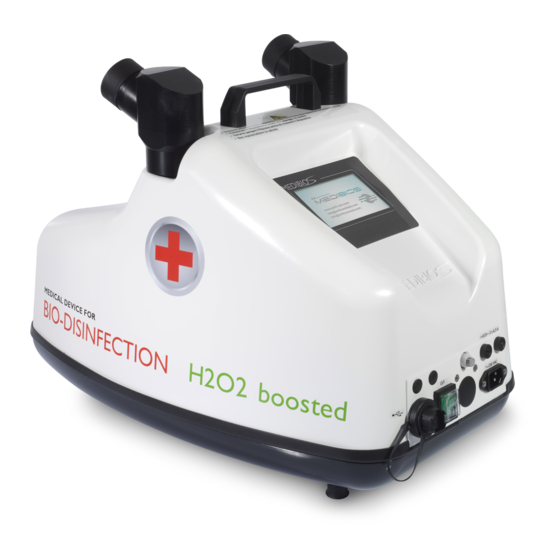
5. List of visible external elements On the device, there are applied warning (the complete list of warnings are described in this manual in section 1) and/or descriptive phrases and images of some components. 6. Labelling... -
Page 12: General Norms Of Usage
7. General norms of usage Unpacking the device The device is delivered inside a delivery package, check that it is intact and therefore in good conditions. Open the package without turning it upside-down. Lift the apparatus by its handle to extract it from the cardboard box. - Page 13 ▪ Turn the bottle upside-down and insert it in the recess provided applying light pressure downwards until it bottoms ▪ Connect the mains cable to the device and to the electrical wall plug ▪ Orientate the nozzles of the device according to need, while avoiding directing them in converging directions, so as not to cross its flows and avoiding directing them towards the control panel ▪...
-
Page 14: Control Panel
Control panel 7.3.1 General features The electronic unit can execute the following programs: ▪ 15 programs pre-set as follows: from program 1 to program 5 the protocol 1ml/m is applied, from program 6 to program 10 the protocol 3ml/m is applied, from program 11 to program 15 the protocol 5ml/m is applied. -
Page 15: Turning The Device On
Every key on the keyboard is associated to a backlighting LED. The LEDs associated to the keys STAND-BY, PROGRAM MODE and START/STOP have specific warning functions that will be described in the dedicated paragraphs. 7.3.3 Turning the device ON During the start up of the electronic unit, effected by external general switch, the display shortly shows the name of the producer and of the instrument and the software version currently installed (x.xx). -
Page 16: Idle On State
7.3.5 Idle-on state To turn on the electronic unit it is sufficient to press the STAND-BY key; the LED corresponding to the STAND-BY key will turn on. Note: when the LED corresponding to the PROGRAM MODE key remains fixedly lit, this means that the timer is active for the automatic start of a cycle (program), but such cycle is not relative to the current day. -
Page 17: Programming
▪ with device unpowered, switch on while maintaining pressed the STAND-BY and DOWN keys To configure the electronic unit for the messages to be displayed in ENGLISH it is sufficient to act as follows: ▪ with device unpowered, switch on while maintaining pressed the STAND-BY and UP keys To configure the electronic unit for the messages to be displayed in SPANISH it is sufficient to act as follows:... - Page 18 press and keep pressed the PROGRAM MODE key for 5 seconds. The display will show: where gg/mm/aaaa indicate the date The first parameter to be set is the one related to the day of the month. To modify the day of the month it is sufficient to push on the DOWN or UP keys (increase / decrease of one unit for each pressing or rapid increase / decrease if the key is kept pressed).
- Page 19 current time has been set, pressing the PROGRAM MODE key will confirm the input and allow to continue to the setting of the minutes (mm blinking). Press the DOWN or UP keys to modify minutes. Once current minutes have been set, pressing the PROGRAM MODE key will confirm the input and allow to continue to the setting of the day of the week (YYYYYYY blinking).
- Page 20 With device in idle-on state, or with display showing for example repeatedly press the DOWN or UP keys to select the menu that allows entering the weekly programming environment. The display has to show: Press the PROGRAM MODE key to access the programming environment. The display will show: At this point the following operations allow to program the possible starts during the course of the week.
- Page 21 Press the DOWN or UP keys. Once set the minutes, pressing the PROGRAM MODE key will confirm the input and allow to continue to the setting of the desired cycle (1 blinking). Press the DOWN or UP keys to select the desired cycle. Having set the cycle, pressing the PROGRAM MODE key will confirm the input and allow to continue to the setting of the following day.
- Page 22 Press the DOWN or UP keys to select the desired cycle. Having set the cycle, pressing the PROGRAM MODE key will confirm the input and allow to continue to the setting of the following day. Since in our example on Wednesdays there is a rest and we don't need the automatic cycle start, it is sufficient to press the key UP to directly pass on to Thursday programming, or press the PROGRAM MODE key without programming time or minutes (the system recognizes 00.00 as OFF).
- Page 23 To modify the time it is sufficient to press the DOWN or UP keys. Once current time has been set, pressing the PROGRAM MODE key will confirm the input and allow to continue to the setting of the minutes (00 blinking). Press the DOWN or UP keys.
- Page 24 Press the DOWN or UP keys to select the desired cycle. Having set the cycle, pressing the PROGRAM MODE key will confirm the input and allow to continue to the setting of the following day. Pressing the PROGRAM MODE key it is possible to enter the planning of Saturday automatic start schedule: The display will show: The first parameter to be set is the one relative to time (00.
- Page 25 Pressing the PROGRAM MODE key it is possible to enter the planning of Sunday automatic start schedule: The display will show: The first parameter to be set is the one relative to time (00. blinking). To modify the time it is sufficient to press the DOWN or UP keys. Once current time has been set, pressing the PROGRAM MODE key will confirm the input and allow to continue to the setting of the minutes (00 blinking).
- Page 26 in order for the cycle to be performed with automatic start, the device has to be in idle-on condition. With the device in stand-by (OFF) state the automatic cycle, even if programmed, will not be performed. in idle-on condition lighting of the PROGRAM MODE LED is to point out that at least one weekly automatic start has been programmed, but it is not in the current day.
- Page 27 7.3.7.2.2 Editing the weekly timer To verify the timers programmed for weekly automatic start it is sufficient, from the state of idle-on, to move to the weekly menu by using the DOWN and UP keys; the display should show: At this point by pressing the PROGRAM MODE key the display will show: By means of the DOWN and UP keys select the day for which you intend to modify the automatic start schedule or the type of cycle, for example Sunday.
- Page 28 Press the DOWN or UP keys to select the possible new desired cycle. Having set the cycle, pressing the PROGRAM MODE key will confirm the input and return to the display relative to next day, in our case Monday. At this point it is possible to exit the programming environment by pressing the START/STOP key.
- Page 29 By pressing the PROGRAM MODE key enter the programming of automatic start schedule; the display will show (06. blinking): Press the DOWN or UP keys to bring the hours to 00. Once reset the hour, press the PROGRAM MODE key to confirm input and continue to the change of minutes (45 blinking).
- Page 30 7.3.8 Disinfection/disinfestation cycle 7.3.8.1 Manual start 7.3.8.1.1 Program selection Before starting any cycle it is necessary to select the most suitable program for the volume of the room to be treated. The electronic unit has 15 pre-set programs, as already mentioned, and for each program the volume subject to treatment can be modified at will by the user (press the PROGRAM MODE key and UP or DOWN keys).
- Page 31 To activate the program it is sufficient to press the START/STOP key. The START/STOP LED begins then to blink until the end of the cycle. The buzzer mounted on the board will send forth a brief intermittent acoustic signal for 15 seconds (countdown) to point out that a program has been activated. This countdown allows the user, once pressed the START/STOP key, to leave the room where the device is placed before the actual cycle starts (product emission).
- Page 32 Once the minutes/seconds of the program have passed, the START/STOP LED extinguishes while the display returns to show: In this condition the disinfection or disinfestation (pest control) cycle is taken as finished. 7.3.8.2 Automatic cycle start An automatic start cycle takes place with the same procedure as a manual start cycle (15 seconds countdown, cycle, end cycle).
- Page 33 7.3.8.3 Washing cycle To effect the washing cycle it is necessary to insert the bottle containing distilled water. Start the washing cycle by pressing the START/STOP key when the display shows: The START/STOP LED begins to blink until the end of the cycle. The buzzer mounted on the board sends forth a brief intermittent acoustic signal for 15 seconds (countdown) to point out that a program has been activated, in this example the washing cycle.
- Page 34 Cycles stop 7.3.8.4 At any moment it is possible to stop any program in execution before its normal finishing time by pressing the START/STOP key. The device turns into the idle-on state. Here following the Personal Protective Equipment (mandatory equipment) is described, which the operator has to wear in case of forced entrance into the treated spaces during product emission or before the necessary waiting time.
- Page 35 the purpose to point out to the user the necessity to contact technical assistance for a maintenance call. 7.3.10 Procedures in case of mains failure In case of interruption of mains electrical supply, when power is reinstated the unit goes back to the state (idle-on or stand-by) that it was in at the time of power failure. If during power outage a program (both with automatic and manual departure) is scheduled to start, this is aborted.
- Page 36 The seals provided on the instrument have to remain intact. Furthermore if anomalous corrosion of any parts confirms the use of other liquids not authorized by AMIL CARE CORP., this too would cause voiding and forfeiture of the guarantee.
- Page 37 Limitations of responsibility: a) AMIL CARE CORP. shall not be responsible towards the client, neither directly nor indirectly, for any breach or delay in the application of the guarantee obligations possibly caused by force majeure or from any other unexpected events extraneous to the wish of AMIL CARE CORP.
Need help?
Do you have a question about the MEDIBIOS bsc and is the answer not in the manual?
Questions and answers