Table of Contents
Advertisement
Quick Links
Advertisement
Table of Contents

Summary of Contents for aplegen Omega Fluor
- Page 1 Omega Fluor ™ Omega Fluor Plus ™ Gel Documentation Systems User Manual...
-
Page 2: Table Of Contents
Taking an Image on the Omega Fluor Selecting Your Light Source Capturing Your Image Omega Fluor Plus Taking an Image on the Omega Fluor Plus Selecting Your Light Source Capturing Your Image Omega Fluor and Omega Fluor Plus Overview of Software Features... -
Page 3: Omega Fluor
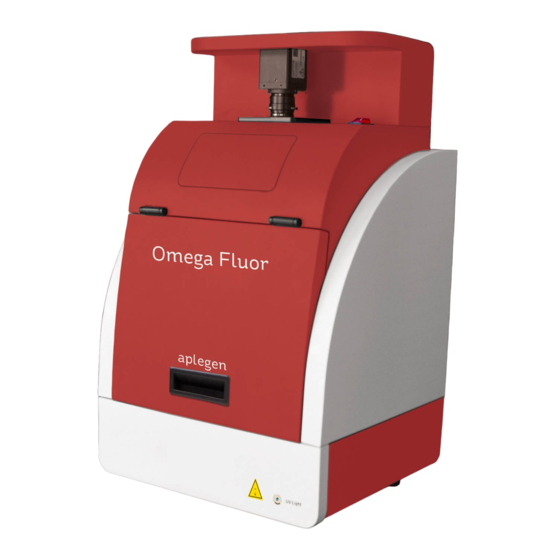
Congratulations on purchasing your Aplegen Omega Fluor Gel Documentation System. The Omega Fluor is a powerful yet simple tool for gel documentation and generating publication quality, 16bit tiff images. The Omega Fluor comes completely assembled for quick startup. It includes Omega Fluor Acquisition Software which is compatible with Microsoft Windows XP and Vista, Windows 7 (32 and 64 bit), and Windows 8 (32bit only). -
Page 4: Omega Fluor System Specifications
Omega Fluor 01/2014 Omega Fluor System Specifications Specifications • 5MP for high resolution images Camera • USB connection for simple set up • Fast refresh rate for live imaging • High quality images ideal for downstream analysis Lens 8mm F1.4 Lens... -
Page 5: System Placement
System Placement As with all electrical instruments, the Omega Fluor imaging system should be located away from water, solvents, or corrosive materials, on a flat and stable surface with adequate clearance on all sides. The top of the system should have at least 10 cm clearance to allow sufficient air flow around the camera head. -
Page 6: Software Installation
01/2014 Software Installation The Omega Fluor Acquisition Software is provided on the included USB drive. Installation should be completed by a user with administrator rights. A complete list of system requirements can be found in Appendix D. Windows 8, 32 Bit Installation To install the software on a Windows 8, 32 bit operation system you will need to disable the Secure Boot feature prior to installing the software and drivers. - Page 7 Omega Fluor 01/2014 Select Troubleshoot. • Select Advanced Options. • Select Startup Settings. • Select Restart. • • Use the USB keyboard to select number 7 (hit F7 or the number 7 key). The system will restart. You are now ready to install the printer driver.
- Page 8 Omega Fluor 01/2014 With the Secure Boot disabled, plug in the USB. Select the Omega Fluor Setup Program • from the launch window. • Follow the directions on the screen. • You are now ready to use your Omega Fluor.
- Page 9 USB drive. • Follow the instructions on the screen. A pop up may appear that says the Omega Fluor Camera has not passed Windows Logo testing. The camera driver is a standard camera driver and has been extensively tested to ensure compatibility.
- Page 10 Omega Fluor 01/2014 Windows XP Software Installation • To install the software on a Windows XP machine, plug in the USB. When prompted, select Omega Fluor • Setup Program from the launch window. • Follow the instructions on the screen.
- Page 11 When prompted click Finish to complete • installation of the camera driver. A pop up may appear that says the Omega Fluor Camera has not passed Windows Logo testing. The camera driver is a standard camera driver and has been extensively tested to ensure compatibility.
-
Page 12: Introduction
16bit tiff images. The Omega Fluor Plus comes completely assembled for quick startup, and includes Omega Fluor Acquisition Software. It has a clean user interface and simple tools for annotations and contrast adjustments. For more in depth analysis, the data can be exported to a gel analysis software. -
Page 13: Omega Fluor Plus System Specifications
Omega Fluor Plus 01/2014 Omega Fluor Plus System Specifications Specifications • 5MP for high resolution images Camera • USB connection for simple set up • Fast refresh rate for live imaging • High quality images ideal for downstream analysis Lens 8mm F1.4 Lens... -
Page 14: System Placement
System Placement As with all electrical instruments, the Omega Fluor Plus imaging system should be located away from water, solvents, or corrosive materials, on a flat and stable surface with adequate clearance on all sides. The top of the system should have at least 10cm clearance to allow sufficient air flow around the camera head. - Page 15 Aplegen recommends a surge protecting powerstrip to protect against potential damage from power surges. • Turn on the power to the tablet computer. Select the Omega Fluor tile from the startup screen. You are now ready to start using your Omega Fluor Plus.
-
Page 16: Omega Fluor And Omega Fluor Plus
01/2014 Taking an Image The Omega Fluor Acquisition Software allows the user to take images with their Omega Fluor system, modify the visual aspects such as contrast and saturation, make general annotations and has simple arithmetic options. The user can also open and modify previously acquired images. -
Page 17: Omega Fluor
Omega Fluor 01/2014 Taking an Image on the Omega Fluor Centering Your Image Place your gel either directly on the UV transilluminator or in one of the optional sample trays available from Aplegen. • Gel Handling Tray for UV Applications •... -
Page 18: Capturing Your Image
Omega Fluor 01/2014 Capturing Your Image The Omega Fluor UV transilluminator emits at a wavelength of 302nm (365nm optional). It can be controlled through the Image Capture Window. Once you have selected the appropriate light source and sample tray or conversion screen, launch the Omega Fluor Acquisition Software. - Page 19 Omega Fluor 01/2014 • When the calculation is complete the marquee will change from red to green. If satisfied with the preview, select Image • Capture. Your image will be captured and open in a new window. Once the image is captured it can be further adjusted for contrast, annotations added, saved, and printed.
-
Page 20: Taking An Image On The Omega Fluor Plus
Omega Fluor Plus 01/2014 Taking an Image on the Omega Fluor Plus Centering Your Image Place your gel either directly on the UV transilluminator or in one of the optional sample trays available from Aplegen. • Gel Handling Tray—UV • Gel Handling Tray—White Light Conversion Screen Selecting Your Light Source Use this table to determine the lighting source for your application. - Page 21 Omega Fluor Plus 01/2014 The Omega Fluor Plus has three lighting sources: the UV transilluminator, the EPI Blue lights, and the EPI White lights. • Begin the aquisition by selecting your light source. • Select your filter. Click the Acquire icon.
-
Page 22: Capturing Your Image
Omega Fluor Plus 01/2014 Capturing Your Image Click on the Auto Exposure icon for • a preview of the image or use the manual exposure icons to adjust the image preview. • When using Auto Exposure the rotating marquee will appear in the bottom left of the Image Capture window. -
Page 23: Omega Fluor And Omega Fluor Plus
Overview of Software Features The Omega Fluor Software has a simple user interface. The top left Omega Fluor icon accesses the Application Menu, while all image acquisition and annotation functions can be accessed from the home tab. Software functions include: File Tab •... - Page 24 Omega Fluor & Omega Fluor Plus 01/2014 Resize—An image can be resized up to 3 times its original size, or to a max size of 7776 – 5832 pixels. Resize to size—Manually enter the size in pixels of the image desired.
- Page 25 Omega Fluor & Omega Fluor Plus 01/2014 • Annotations Menu Pointer—This is the object selector. It allows selection of text boxes, objects, lines, etc in order to edit or delete them. For example, to change the color of a box, select the pointer, double click on the box to be changed, then select the color select tool and click on the color desired.
- Page 26 Omega Fluor & Omega Fluor Plus 01/2014 Zoom In—Zoom in on the desired area, the capture size is indicated on the lower left frame. Zoom Out—Zoom back out up to the original size. Capture Image—Capture the image at the selected parameters.
-
Page 27: Omega Fluor Uv Cutoff Switch
Omega Fluor & Omega Fluor Plus 01/2014 Omega Fluor UV Cutoff Switch The Omega Fluor has a UV cutoff switch to protect against accidental UV exposure when opening the cabinet door. The cutoff switch can be overridden to allow the user to visualize or excise bands. -
Page 28: Common Imaging Questions
The orange filter on the view port blocks UV an improves visual contrast. However it does not block all wavelengths of light that the bulbs emit. Therefore, the bulbs are still visible. The emission filter on the end of the Omega Fluor camera lens by contrast eliminates all emissions, except in the 590/50nm range, so the bulbs are not visible in the final image. -
Page 29: Appendix A-Ordering Information
Omega Fluor & Omega Fluor Plus 01/2014 Appendix A—Ordering Information Product Description Part Number Omega Fluor Includes imaging system with cabinet, camera and trans 302 nm configuration 302 nm UV and EPI White Light sources, and Omega Fluor capture software. -
Page 30: Appendix B-Routine Maintenance
Cleaning the Omega Fluor or Omega Fluor Plus Basic care is all that is required to keep your Omega Fluor or Omega Fluor Plus in great shape. Clean up any spills as they happen. Wipe down the UV glass with a soft cloth only to prevent scratching. A simple green solution can be used to clean heavier soil. - Page 31 Omega Fluor & Omega Fluor Plus 01/2014 2. Place a target with high resolution features in the center of the field of view. Most business cards are adequate for this step. You may leave the door open and focus by ambient light.
- Page 32 Omega Fluor & Omega Fluor Plus 01/2014 7. Slowly adjust focus ring only in the “FAR” direction until the image is perfectly focused. 8. Lock focus ring in place with focus ring locking screw. 9. Remove target. 10. Zoom out completely (tool will grey out).
-
Page 33: Appendix C-Regulatory
CE Conformity The following Omega Fluor Imaging Systems, Models: Omega Fluor and Omega Fluor Plus Are in conformity with the provisions of the following EC Directives, including all amendments, and national legislation implementing these directives: Low Voltage Directive 2006/95/EC... - Page 34 Copyright and Trademark Information All goods and services are sold subject to the terms and conditions of sale of the company within Aplegen International Inc. which supplies them. Aplegen, Inc. reserves the right, subject to any regulatory and contractual approval, if required, to make changes in specifications and features shown herein, or discontinue the product described at any time without notice or obligation.
- Page 35 Omega Fluor & Omega Fluor Plus 01/2014 Electrical Safety Precautions Be sure to take proper precautions when handling any electrical equipment. NEVER work on any live circuit, fixture, receptacle, or switch. Safety rules you should follow whenever working with any electrical appliance include: •...
-
Page 36: Appendix D-Mitsubishi Electric P-95D Printer Driver Installation
Omega Fluor & Omega Fluor Plus 01/2014 Appendix D—Mitsubishi Electric P-95D Printer Driver Installation Windows 8 Driver Signature Enforcement is a new feature of Windows 8 that has certain signature requirements not yet implemented in the Mitsubishi Electric P-95D Printer. In order to install the printer driver you must disable the Driver Signature Enforcement on startup, install the driver, and then reboot the system. - Page 37 Omega Fluor & Omega Fluor Plus 01/2014 Select Troubleshoot. • Select Advanced Options. • Select Startup Settings. • Select Restart. • • Use the USB keyboard to select number 7 (hit F7 or the number 7 key). The system will restart.
- Page 38 Omega Fluor & Omega Fluor Plus 01/2014 • Or, you may install the printer from the control panel. To reach the control panel, open the Charms bar, select Control Panel. Detailed driver installation instructions are available in the Mitsubishi Electric P-95D Printer Installation...
-
Page 39: Omega Fluor
Omega Fluor 01/2014 Appendix E—System Requirements The following are the minimum system requirements to run the Omega Fluor system software. Aplegen recommends using a system with higher than the minimum requirements for optimum performance. • Windows XP, SP3 and Windows 7, Home or Pro Editions •... -
Page 40: Omega Fluor Plus
Appendix F—Installing or Changing Emission Filters The Omega Fluor Plus has a three position sliding filter wheel. Optional filters may be purchased from Aplegen and installed by the user for those applications that require an emission band path that is different from the standard Orange filter (590/50nm). -
Page 41: Appendix G-Usb Installation Guide
Appendix G—USB Hub Installation Guide The Omega Fluor Plus comes with an optional USB hub for those systems that are not going to be connected to a wireless network. Please use the following guide for easy installation of the hub. - Page 42 Omega Fluor Plus 01/2014 5. Connect the Hub USB mini cable to the Hub. 6. Connect the Hub USB mini cable to the right angle adapter. 7. Plug in the USB Hub power supply. 8. Roll up excess USB cable and tuck it back into the...
-
Page 43: Appendix H-Basic Tablet Operations
Appendix H—Basic Tablet Operations The Omega Fluor Plus a touch screen tablet PC to run the imaging station. For in depth directions refer to the Acer Tablet User Manual. However, here are some basic navigation tips to help you get started.
Need help?
Do you have a question about the Omega Fluor and is the answer not in the manual?
Questions and answers