Table of Contents
Advertisement
Quick Links
RAS - Installation Instructions Plus+ Shade 4" Bottom Fascia Top Back Plate Manual
Self Tapping
Wood
Screws for
Screws
Aluminum
(If requested)
Self Tapping Phillips Screws
for Tension Device
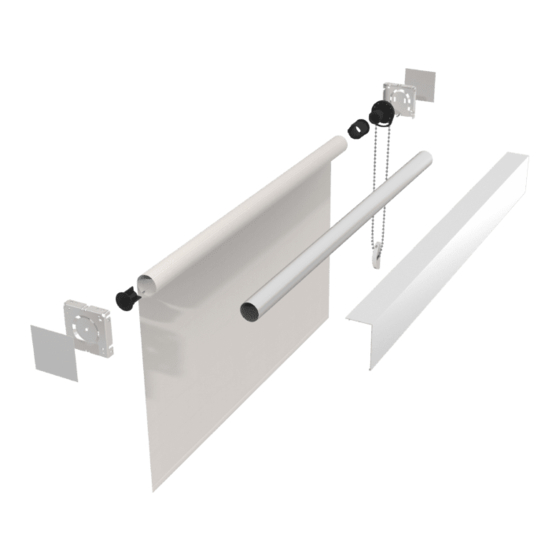
1. Attaching the Back Fascia and Brackets
Slide brackets onto Back Fascia as shown. Bottom of bracket slides
into grove at the bottom of the Fascia and top inside top of Bracket
to line up with attachment hole.
2. Install Bracket
Attach the brackets to the ceiling. With the back plate cassette, this
system can only be mounted to the ceiling.
2. Install Shade
Push the clutch straight into the indents in the bracket. The bottom
of the clutch should always point straight down (Fig A). Next, using
your finger or a flat end screwdriver, press in the pin end, keeping it
compressed (Fig B) while manuvering it into the hole in the pin end
bracket (Fig C).
Note: If you need to remove the shade, compress the pin end by
using a flat end screwdriver and pull the shade down and out.
www.rollashade.com
Hardware Included
Drywall
Anchors
Metal
Brackets
Stop Ball
© Copyright 2021 Roll-A-Shade Inc., All rights reserved. - Contractor #916075
Front Notched Fascia
Bracket Cover
(Optional)
Back Fascia
Fig A
Riverside, CA 92503
Click to Print
Phone: 888-245-5077
Click to Email
Fax: 951-245-5075
www.rollashade.com
Tools Required
Drill
TOP
Fig B
Rev: 03.25.2021 Page 1 of 2
12101 Madera Way
1/4" Hex Head
Phillips Head
Fig C
Advertisement
Table of Contents

Summary of Contents for Roll-A-Shade Plus+
- Page 1 Note: If you need to remove the shade, compress the pin end by using a flat end screwdriver and pull the shade down and out. Fig A Fig B Fig C www.rollashade.com © Copyright 2021 Roll-A-Shade Inc., All rights reserved. - Contractor #916075 Rev: 03.25.2021 Page 1 of 2...
- Page 2 Fasteners provided with the tension device may not be appropriate for all mounting surfaces. • Use appropriate anchors for the mounting surface conditions. www.rollashade.com © Copyright 2021 Roll-A-Shade Inc., All rights reserved. - Contractor #916075 Rev: 03.25.2021 Page 2 of 2...
Need help?
Do you have a question about the Plus+ and is the answer not in the manual?
Questions and answers