
Related Manuals for Dot Origin VTAP100-USB

Summary of Contents for Dot Origin VTAP100-USB
- Page 1 VTAP100-USB Installation Guide Hardware v2 to v3a, Firmware from v1.0.4.0 Revised April 2021 v1.0...
- Page 2 If you need help to set up or use VTAP100-USB, beyond what is contained in this Installation Guide, then please contact our support team. Email: support@dotorigin.com Download the latest documentation and firmware from https://vtap100.com/resources/ Telephone UK and Europe: +44 (0) 1428 685861...
-
Page 3: Table Of Contents
2.3 Check status in BOOT.TXT 3 Choose a location for your VTAP100 4 Design a custom label for the wallbox 5 Mount a VTAP100 wallbox 5.1 Hardware lock to prevent firmware or configuration change 6 Disposal VTAP100-USB INSTALLATION GUIDE PAGE I... - Page 4 Safety instructions WARNING: INTENDED USE The VTAP100-USB is a boxed product for end-users. Although the wallbox may be opened when the device is not connected, components mounted on the VTAP100 PCB are not user-serviceable. WARNING: ESD PRECAUTIONS If the wallbox is opened to access the PCB, we recommend careful handling of Electrostatic Sensitive Devices (ESDs) .
-
Page 5: Using This Guide
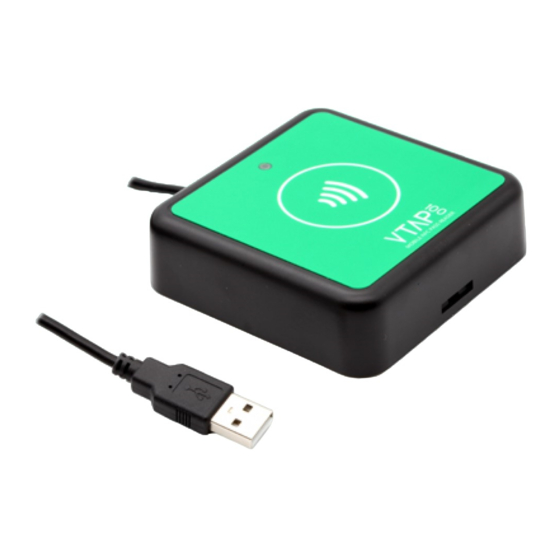
1 Using this guide This guide is for first-time users of the VTAP100-USB. Figure 1-1 VTAP100-USB It contains the information you need to physically install your VTAP100. Consult the complete VTAP100 Configuration Guide for more about custom configuration and maintenance features, including how to update the firmware on your VTAP100 unit, when a new release is available. -
Page 6: How The Vtap100 Works
When the VTAP100-USB is connected to a computer it appears as a generic mass storage device (like a memory stick). To configure your VTAP100, you simply edit or create text files. These will be read automatically, and control the operation of the VTAP100. -
Page 7: Provide Pass Reading Parameters And Keys
IDs and identify the keys to be used in each case. Note: Although the VTAP100 supports multiple Smart Tap IDs, Android Phones using Google Pay expect most users will need only one Smart Tap Collector ID configuration. VTAP100-USB INSTALLATION GUIDE PAGE 3... -
Page 8: Check Status In Boot.txt
BOOT.TXT file. Inspecting BOOT.TXT will give you essential information about your VTAP100 set up, which might be helpful when troubleshooting. Figure 2-1 Example BOOT.TXT file You are most likely to need: VTAP100-USB INSTALLATION GUIDE PAGE 4... - Page 9 1970/00/00 00:00:00. 'VCP enabled' - indicates that the virtual COM port has been enabled. 'Status' - should be 0 if operating normally, anything else indicates an error state. VTAP100-USB INSTALLATION GUIDE PAGE 5...
-
Page 10: Choose A Location For Your Vtap100
3 Choose a location for your VTAP100 Position the VTAP100-USB so that users can easily tap their smartphone against the label, on top of the device. The wallbox for a VTAP100 is 86mm x 86mm and 25.5mm deep. Figure 3-1 VTAP100-USB... -
Page 11: Design A Custom Label For The Wallbox
You can design and affix your own branded label to the unit. The size of the label recess is 72.33 x 72.33 mm with 4mm radius rounded corners as shown below. If you need help branding units do contact support@dotorigin.com. Figure 4-1 Dimensions of label recess in wallbox VTAP100-USB INSTALLATION GUIDE PAGE 7... -
Page 12: Mount A Vtap100 Wallbox
A software lock leaves some files visible. A hardware lock means that the VTAP100 will no longer be detected as a composite USB device. Users of a VTAP100-USB will need to open the wallbox to locate the jumper labelled LOCK (close to the MicroUSB connector) on the PCB. - Page 13 At any time you can remove the jumper across LOCK. When you restart the VTAP100 it will be detected as a USB mass storage device and you will be able to make firmware or configuration changes again. VTAP100-USB INSTALLATION GUIDE PAGE 9...
-
Page 14: Disposal
VTAP100 reaches the end of its life, it is recycled in accordance with WEEE Regulations within the EU. VTAP100 (PCB, antenna and cables) should not be disposed of in general waste. If you wish to discard electrical and electronic equipment (EEE), please contact your supplier for further information. VTAP100-USB INSTALLATION GUIDE PAGE 10...
Need help?
Do you have a question about the VTAP100-USB and is the answer not in the manual?
Questions and answers