Table of Contents
Advertisement
Advertisement
Table of Contents

Summary of Contents for DiroDi xTreme
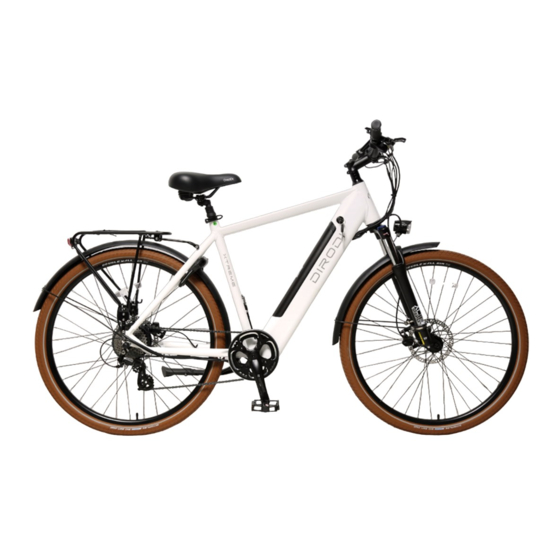
- Page 1 DiroDi ASSEMBLY GUIDE xTreme...
- Page 2 CONTACT Address G18, 425 Smith Street, Fitzroy VIC 3065 Melbourne, Australia Phone 1800 571 930 E-mail mailus@dirodi.com.au Website www.dirodi.com.au @ dirodiofficial...
- Page 3 TABLE OF CONTENTS...
-
Page 4: Table Of Contents
STEP 0 Tools required STEP 1 Opening the box STEP 2 Removing protective materials STEP 3 Handlebars assembly STEP 4 Front wheel assembly STEP 5 Front mudguard & light assembly STEP 6 Installing pedals... - Page 5 STEP 7 Installing the seat post STEP 8 Pumping the tyres STEP 9 Disk brake adjustment STEP 10 Rear derailleur adjustment STEP 11 Operating the bike...
-
Page 6: Step 0
STEP 0 Tools required... - Page 7 DiroDi xTreme Assembly Guide - Tools required Tools required for the assembly: 1x 10mm Wrench 1x 15mm Wrench 1x 4mm Alen key 1x 5mm Alen key > 1...
-
Page 8: Step 1
STEP 1 Opening the box... - Page 9 DiroDi xTreme Assembly Guide - Opening the box 1. Cut the plastic straps of the bike carton (photos 1 & 2). > 1 > 2 2. Open the carton door and take care so that the staples do not cut you (photo 3).
- Page 10 DiroDi xTreme Assembly Guide - Opening the box 3. Remove the protective foams (photos 4 & 5). > 4 > 5 4. Remove the small accessories box (photo 6). > 6...
- Page 11 DiroDi xTreme Assembly Guide - Opening the box 5. Lay the carton on the floor and Pull the bike out of the carton (photo 7). It is better to put a mat in front of the carton so that the bike frame does not get scratched.
-
Page 12: Step 2
STEP 2 Removing protective materials... - Page 13 DiroDi xTreme Assembly Guide - Removing protective materials 1. Remove all protective material from the bike (photos 1, 2 & 3). ** Please take care so that the bike frame does not get scratched. > 1 > 2 > 3...
- Page 14 DiroDi xTreme Assembly Guide - Removing protective materials 2. Remove the front wheel off the pedal. In order to release the wheel from the pedal, it might be easier if you lift the rear wheel and turn the left pedal anti-clockwise a bit and then remove the wheel from the pedal (photos 4 &...
- Page 15 DiroDi xTreme Assembly Guide - Removing protective materials 4. After all protective materials are removed, your bike should look the same as that in photo 7. > 7...
-
Page 16: Step 3
STEP 3 Handlebars assembly... - Page 17 DiroDi xTreme Assembly Guide - Handlebars assembly 1. Turn the stem of the bike anti-clock wise until the stem and arch of the front fork faces forward (photos 1 & 2). > 1 > 2 2. Remove the 4 bolts and the stem plate by using a 4 mm Allen key (photos 3 &...
- Page 18 DiroDi xTreme Assembly Guide - Handlebars assembly 3. Put the handlebars in the stem. Ensure the handlebar is centered and brake levers are facing downward (photo 5). > 5 4. Now adjust the angle of the display (photo 6). > 6...
- Page 19 DiroDi xTreme Assembly Guide - Handlebars assembly 5. Now tighten the bots by an Alley key. Please tighten one bolt a bit and move to the next one and repeat until all bolts are tightened (photos 7 & 8). > 7...
-
Page 20: Step 4
STEP 4 Front Wheel assembly... - Page 21 DiroDi xTreme Assembly Guide - Front wheel assembly ** Please note for the front wheel assembly, the bike should not be on kickstand. 1. Remove plastic protectors from both side of front wheel (photos 1 & 2). After the protectors are removed the wheel should look the same as that in photo 3 &...
- Page 22 DiroDi xTreme Assembly Guide - Front wheel assembly 2. Remove the steel fork protector from the front fork by loosening the nuts on both sides (photos 5 & 6) > 5 > 6 3. Remove the plastic protector, which is between the brake callipers (photos 7 &...
- Page 23 DiroDi xTreme Assembly Guide - Front wheel assembly 4. The disk rotor should be inserted in the tiny space between the brake pads. **Please note this step is very sensitive and if done wrong, the brake pads or the disk rotor could be damaged.
- Page 24 DiroDi xTreme Assembly Guide - Front wheel assembly 5. Remove one nut and one spring from quick release skewer (photo 12) > 12 6. Insert the skewer from the disk side and from the other side attach the spring and then the nut and semi tighten the nut (Photos 13, 14 &...
- Page 25 DiroDi xTreme Assembly Guide - Front wheel assembly 5. At this stage, the front wheel should look the same as that in photo 16. Fasten the nut on the skewer until the lever becomes firm to close. If the lever can be closed without any force, then you need to fasten the nut on the other side further.
-
Page 26: Step 5
STEP 5 Front mudguard and light assembly... - Page 27 DiroDi xTreme Assembly Guide - Front mudguard & light assembly 1. Remove the bolt from the front suspension fork arch by an Allen key (photo 1) > 1 2. Install the front light and mudguard in a single step by using the same bolt, which was remove in the previous step (photo 2).
- Page 28 DiroDi xTreme Assembly Guide - Front mudguard & light assembly 3. Now take the 2 mudguard belts from the bike's accessories box (Photo 3) Remove the nut and the washer from each belt. Please put the washer removed aside. It won't be used in the assembly process.
- Page 29 DiroDi xTreme Assembly Guide - Front mudguard & light assembly 4. Now attach one belt to one side of the fork and Insert the end of the mudguard brace between the belt brackets. Push the two brackets on the belt together so that the two holes on the belt brackets come as close as possible to each other.
- Page 30 DiroDi xTreme Assembly Guide - Front mudguard & light assembly 5. Now fully tighten the bolt by an Allen key while holding the nut by a wrench (photo 5). Do the same on the other side of the fork. > 5...
-
Page 31: Step 6
STEP 6 Installing pedals... - Page 32 DiroDi xTreme Assembly Guide - Installing pedals ** This step is sensitive, if done wrong, the threads on the pedal or the crank might get stripped. You should tighten the pedals by hand as much as possible and then fully tighten them by using a wrench.
- Page 33 DiroDi xTreme Assembly Guide - Installing pedals 2. Tighten the left pedal to the left crank by turning it anti-clock wise by hand (photo2). You should be able to tighten the pedal almost all the way down by your hand.
-
Page 34: Step 7
STEP 7 Installing the seat post... - Page 35 DiroDi xTreme Assembly Guide - Installing the seat post 1. Open the lever and loosen the nut on the seat post clamp (photo 1) > 1 2. Insert the seat into the seat post, tighten the nut on the seat clamp until the lever on the clamp becomes firm to close.
-
Page 36: Step 8
STEP 8 Pumping the tyres... - Page 37 DiroDi xTreme Assembly Guide - Pumping the tyres 1. Pump front and rear tyres (photo 1). Tyre pressure should be in the range specified on the tyre. > 1...
-
Page 38: Step 9
STEP 9 Disk brake adjustment... - Page 39 DiroDi xTreme Assembly Guide - Disk brake adjustment 1. Brakes are adjusted in the factory but due to parts movement during shipment, some adjustments might be required. Please refer to the below video for hydraulic disk brakes adjustment (Please note the bolts that should...
-
Page 40: Step 10
STEP 10 Rear Derailleur Adjustment... - Page 41 DiroDi xTreme Assembly Guide - Rear Derailleur Adjustment 1. Rear Derailleur is adjusted in the factory but due to part movements during shipment, slight re-adjustments might be necessary. Derailleur adjustment are done by barrel adjuster and "H" and "L" screws as shown in photo 1.
-
Page 42: Step 11
STEP 11 Operating the bike... - Page 43 DiroDi xTreme Assembly Guide - Operating the bike 1. Turning on and riding the bike: Press and hold the power button until the bike's LCD turns on (photo 1). Then by pressing the '+' button, you can increase the pedal assist level from 1 to 6.
- Page 44 DiroDi xTreme Assembly Guide - Operating the bike 2. Changing the bike power mode: The bike has three power modes: (eco, normal & power). The "power" mode offers the maximum power while the "eco" mode offers the least power but the max range, and the "normal"...
- Page 45 DiroDi xTreme Assembly Guide - Operating the bike 3. Walk assist feature : This feature is designed to allow the motor to push the bike along while you walk beside it, up a parking ramp for example. In order to activate the walk assist feature, please turn on the bike and press and hold the "-"...
- Page 46 DiroDi xTreme Assembly Guide - Operating the bike > Now release the throttle and brake one more time > Turn on the panel. Now the 6 km limit is removed. You can put the throttle speed limit back, by doing the above steps one more time.
Need help?
Do you have a question about the xTreme and is the answer not in the manual?
Questions and answers