Summary of Contents for Zmartgear ZMG060
- Page 1 Zmartgear EV charger WARNING! 16A 230V only use 6A in regular household power outlets ZMG060...
-
Page 3: Table Of Contents
MENU Safety Guidance Product Overview 1.1 Product Appearance ................5 1.2 Reference Standard ................. 6 1.3 Product Specification ................6 1.4 Product Packing ..................7 1.5 Charging Principle ..................7 Technology Index 2.1 Environmental Performance .............. 8 2.2 Electrical Properties ................8 2.3 Mechanical Properties ................ -
Page 4: Safety Guidance
Safety Guidance ● Persons who install and use chargers must observe the principles and regulations to ensure safety. Before using charger, the electrical infrastructure should be checked by qualified electrician for suitability. Electrical infrastructure must comply with the charger specifications. ●... -
Page 5: Product Overview
● Disconnect the charger only by the plug and not by the cable. ● Do not disconnect the charger during the charging. ● Only remove the charging label by the plug and not by the cable of the power outlet. ●... -
Page 6: Product Appearance
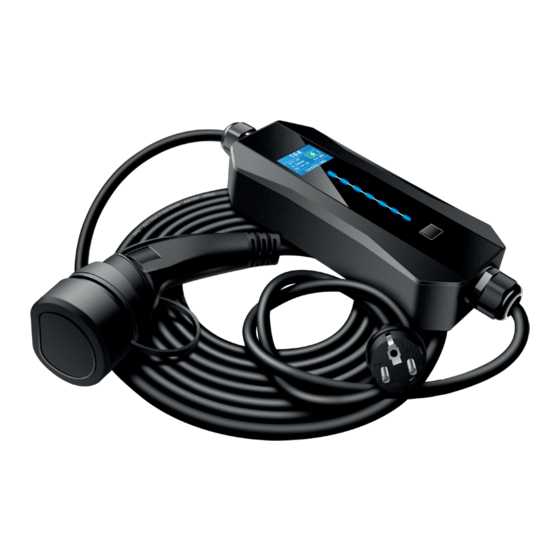
1.1 Product Appearance Figure 1: Portable EV charger... -
Page 7: Reference Standard
1.2 Reference Standard Standard No. Statement Electric vehicle conductive charging system IEC 61851-1:2017 – Part 1: General requirements In-cable control and protection device for mode 2 IEC/EN 62752:2016 charging of electric road vehicle (IC-CPD) Plugs, socket-outlets, vehicle connectors and vehicle inlets –Conductive charging of electric vehicles –... -
Page 8: Product Packing
1.4 Product Package Five-layer corrugated carton packaging is used to fit the charger measured 410mm(L)x 350mm(W)x 80 mm(H)for 1 pc. Outer package 1 PCS/CTN(425mm x 365mm x 95mm)or 7 PCS/CTN(600mm x 435mm x 410mm). 1.5 Charging Principle Figure 2: Charging Principle Charging Successful CP signal... -
Page 9: Technology Index
Technology Index 2.1 Environmental Performance Article Specification Working temperature -30℃~~60℃ Storage temperature -40℃~~70℃ Working humidity 5%~~95%,No condensation Control box IP67 IP level Plug on car(Unconnected)IP54 Plug on car(connected)IP55 Altitude ≤2000m Salt spray test MEET IEC/EN 62752:2016 Atmospheric pressure 80kPa~101kPa Temperature and humidity cycle MEET IEC/EN 62752:2016 Note:Avoided being used in the environment of corrosive liquids, flammable dust, strong corrosive environment. -
Page 10: Mechanical Properties
2.3 Mechanical Properties Article Specification CEE 16/32A PLUG 5000 times Life of plug-in and plug-out AC charging plug 10000 times Control box Meet: UL94 LV: V-0 Flammability EV Charging Plug Meet: UL94 LV: V-0 EV Charging Cable Meet: UL1581 LV: VW-1 EV rolling test Meet: IEC/EN 62752:2016 Cable Deflection... -
Page 11: Instructions And Status Display
Instructions and Status Display The operation steps are as follows: Step 1: Connect with the power, the control box starts to be energized, the blue light bar is always on, and the screen will display the gear and status. Step 2: Press the “Ampere button” to set charging current. Step 3: Schedule charging function 1) If you need to use the scheduled charging function, press the button... - Page 12 Step 4: Connect the vehicle and insert the plug into the vehicle socket. The control panel will automatically detect the connection status of the vehicle. After the connection is successful, the connection indicator (green) will be turned on and kept constant, and the screen will display the insertion status.
- Page 13 LCD Status Waiting for charging indicator Blue light is on constantly Connection indicator Green light is on constantly Charging indicator Green light breathes Fault notification Red light flashes LCD display instruction Thermometer Icon Real time current Temperature Real time voltage Status of Standby Power consumed Charging time or...
-
Page 14: After Sale Service
Product warranty does not include the following: 1. All man-made damage or damage to transport. 2. Users and unauthorized service agencies to dismantle and repair their own products. 3. Demolition of the standard, the use of improper use, such as damage caused by the appearance of the product.

Need help?
Do you have a question about the ZMG060 and is the answer not in the manual?
Questions and answers