Table of Contents
Advertisement
Quick Links
Welcome to the Flexia™ Community! Thank you for your purchase. Easy to follow videos on
Assembly, Introduction & Safety, and how to properly store your Flexia™ Reformer can be
found at http://Assembly.FlexiaPilates.com.
TOOLS NEEDED
Your Flexia™ Reformer comes with three wrenches and all of the bolts necessary to assemble:
5/32" Allen wrench
9/16" Open Ended Wrench
7/16" Open Ended Wrench
Bag of bolts, nuts, and washers
Note: If you have a ratchet and socket at home, these can be helpful. Pictured in the
assembly video is a 9/16" socket with an extender arm, and a smaller 7/16" socket.
PREPARE YOUR REFORMER FOR ASSEMBLY
Arrange your reformer in a rectangle on the floor. Consider padding the floor with a blanket
or carpet to protect your floor and your Flexia™ Reformer from damage. You will be
assembling your Flexia™ Reformer frame upside down. Upside down assembly is the easiest
way for one person. It will be easy, we promise.
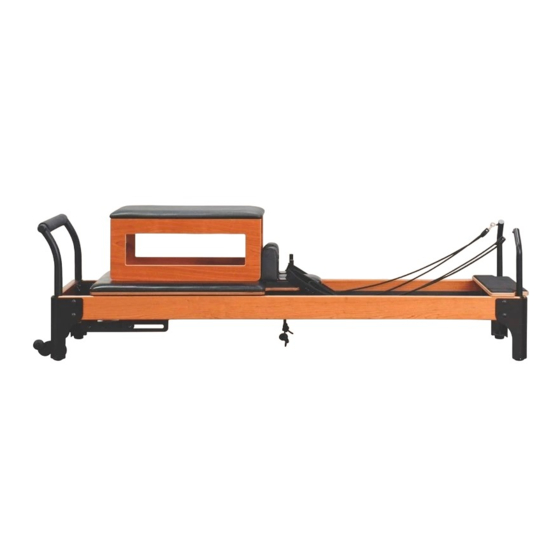
Springbar
Foot End
Assembling the Flexia™ Reformer
Foot Strap Anchor
Long Rail
Head End
1
Advertisement
Table of Contents

Summary of Contents for Flexia Reformer
- Page 1 9/16” socket with an extender arm, and a smaller 7/16” socket. PREPARE YOUR REFORMER FOR ASSEMBLY Arrange your reformer in a rectangle on the floor. Consider padding the floor with a blanket or carpet to protect your floor and your Flexia™ Reformer from damage. You will be assembling your Flexia™...
- Page 2 PREPARE THE HEAD END 1. Place the head end frame (the short piece of wood with a notched end) Head End Outer Corner 2. Place the head end outer corners that do not have wheels on them at the head end. 3.
- Page 3 Align the foot strap with the short wood piece so that the Flexia™ logo is upside down and facing away from the wood.
- Page 4 You’re now ready to turn the Flexia ™ Reformer right-side-up! 1. Before you flip the reformer, make sure that you have padded your floor to protect it and the reformer. Make sure you have enough space for the side that you're going to flip it...
- Page 5 FLIP THE FRAME, CONTINUED 2. Stand on one long side of the Reformer. Lift the side closest to you up and away from you, until the frame is on its side. 3. Balance the frame on its side and position yourself to easily control the Reformer on its descent into the right-side-up position.
- Page 6 2. Next, add the blue springs. The two blues go on either side of your black spring. 3. The orange spring goes on the outside. It doesn't matter which side, just one the outside. 4. Finally the white spring goes on the other outside position. 5.
- Page 7 Use the Flexia™ Reformer only as directed in these instructions and the assembly and Find Your Fit videos. — It is your responsibility to ensure all users of the Reformer understand and are following safety precautions. — Use the Reformer only on a level surface.
- Page 8 STANDING PLATFORM WARNING: Always secure the platform ONLY at the foot end or head end of the reformer. Do not place the platform in the middle of the equipment. Failure to do so could cause the platform to become unstable and cause injury and/or equipment damage.
Need help?
Do you have a question about the Reformer and is the answer not in the manual?
Questions and answers