Table of Contents
Advertisement
Advertisement
Table of Contents

Summary of Contents for AIBIEN GARDVIEW
- Page 1 AIBIEN GARDVIEW HOME SECURITY CAMERA USER MANUAL...
-
Page 3: Table Of Contents
Part 2 – Notice Before Using The Camera Part 3 – Starting Using The Camera 3.1 Connect The Power 3.2 Download The "Aibien" App 3.3 Account Sign Up (On Aibien App) 3.4 Add Device 3.5 How To Use The App 3.6 Install The Camera On The Wall Part 4 –... - Page 4 Part 7 – Alarm Setting 7.1 How To Turn On The Alarm 7.2 Motion Alarm 7.3 Flood Light 7.4 Camera Alarm Area Setting 7.5 Motion Sensitivity 7.6 Disable/Enable Push Notification Part 8 – Video Lock Part 9 – SD Card 9.1 Local Storage...
-
Page 5: Part 1 - Product Details
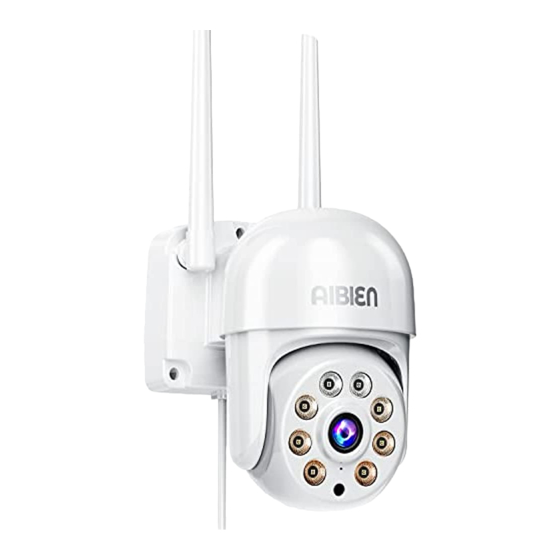
Part 1 – Product Details Speaker Lens Microphone Reset Night Vision Switch Sensor Night Vision IR Led Power Port Micro SD Card Slot Aibien Camera Power Adapter Reset Needle Pack of Screws User User Manual Quick Guide Punch Positioning User... -
Page 6: Part 2 - Notice Before Using The Camera
Wi-Fi amplifier. Contact us at support@aibien.net for more advises if necessary. If you need any help when installing or using the camera, here are the ways to follow: 1. -
Page 7: Part 3 - Starting Using The Camera
Part 3 – Starting Using The Camera Now Let Start Using the Aibien Gardview! 3.1 Connect The Power 1. It takes 30 seconds to get ready after connecting the power. The camera will stay silent during this 30 seconds. -
Page 8: Account Sign Up (On Aibien App)
2). Allow Aibien to receive pushed messages, otherwise the phone will not receive an alarm push message. 3). Allow Aibien to use the microphone when you want to use 2 way audio function. 3.3 Account Sign Up (On Aibien App) 1. -
Page 9: How To Use The App
Use the reset needle (can be found in the package) to hold the reset button for several seconds, until you hear deng~deng~deng~ prompt voice means the camera has been reset successfully. If you still can’t bind the camera, please contact us for more advises. - Page 10 Tap this icon to enter the full-screen mode. Tap this icon to enable or disable audio. Tap this icon to modify the image quality. Tap this icon to adjust the monitoring area Tap this icon to enter the 1/4windows division menu.
- Page 11 * Insert Micro SD Card (not included) Tip: Video playback function requires a micro SD card inserted. Open the bottom micro SD Card slot cover. Insert a micro SD card 8G, 16G and 32G micro SD cards, the format must be FAT32.
-
Page 12: Install The Camera On The Wall
3.6 Install The Camera On The Wall Paste the drilling location mark on the wall, then drill the hole according to the mark and Insert the anchors, pass the screws through the back of the bracket, and fix the top of the bracket on the wall. -
Page 13: Part 4 - Camera Management
Part 4 – Camera Management After the camera is powered on, wait for about 30 seconds, the camera rotates left and right up and down to complete the self-check. 4.1 Add New Camera Pay attention to the following points before add the camera in the app. (For new users) 1. - Page 14 support@aibien.net...
- Page 15 & Connect to your Wi-Fi network (only support 2.4GHZ Wi-Fi router), Enter your WiFi password. If your wireless network does not have a password, click on the 'No Wi-Fi password' box. Then click 'Next' . Check if the WiFi password is entered correctly, if it is correct, click this icon confirm.
-
Page 16: Editing The Camera Information
4.2 Editing The Camera Information To modify your camera name, please follow the steps below: 1. Click 'Setting' > 'Camera information' > 'Name' . 2. You can change the camera name in the field, then enter the name and click 'OK' to... -
Page 17: Delete Camera
4.3 Delete Camera Tap 'Setting' and choose 'Delete' on the screen. Enter the login password for your account and click 'OK' to delete. 4.4 Reset Camera To rest the camera, use the provided reset needle to hold the reset button for several seconds, until you hear "deng~deng~deng~"... -
Page 18: Image Flip
4.5 Image Flip When you need to flip the camera, you can flip it in the APP setting screen Step: Click the 'Setting' > ' Image flip' > Option the camera put way > Click 'OK' to save. -
Page 19: Part 5 - Live Viewing
Part 5 – Live Viewing To view the live video source, press anywhere on the camera screen to enter the Live View. Tap this icon to enter the full-screen mode. Tap this icon to enable or disable audio. Tap this icon to modify the image quality. -
Page 20: Manually Adjust The Camera Monitoring Area
5.1 Manually Adjust The Camera Monitoring Area 1. Tap this icon to open the operation panel. 2. Press and hold the orange area drag the orange dot to the direction you want to adjust, adjust to a suitable screen, and release your finger. -
Page 21: Video Quality
5.3 Video Quality In the tab, you can click 'HD' , 'SD' or 'smooth' to select the video stream type according to your needs. Note: 1.SD: By default, the live video will stream in SD. 2.HD: The highest-quality stream, clear stream has the highest quality of picture, but it also consume more bandwidth 3.Smooth: Lower quality streams consume less bandwidth... -
Page 22: Record Live Video/Take Pictures
5.4 Record Live Video/Take Pictures Record live video 1. Click this icon , when the icon turn into this , indicating that it is recording, click again, the recording ends. 2. The recording time is displayed on the screen, and the video is stored in your phone. - Page 23 Note: You can view the recorded video in the phone album or APP album. Take live photos 1. Tap this icon to take a live view photo. The photos are stored in your phone. 2. You can view the recorded video in the phone album or APP album.
-
Page 24: Multi-Person Sharing
5.5 Multi-person Sharing Each camera can be managed by several Aibien app. The camera can be shared with up to 14 accounts for simultaneous viewing. 1. After you setup the camera connected to your home Wi-Fi, go to setting page. -
Page 25: Part 6 - Playback
Part 6 – Playback This part will cover how to play back the videos recorded to your Micro SD card. Playback is only available when the SD card is inserted and recognized by the camera. 6.1 How To View Video Playback 1. -
Page 26: Set Recording Video Quality
6.2 Set Recording Video Quality You can set the quality of the recorded video in the APP. Please follow the steps below Steps: Go to 'Settings' > 'Video storage' > Choose the picture quality you need. Note: You can set the recording video quality and real-time image quality separately, they are different functions. -
Page 27: Part 7 - Alarm Setting
Part 7 – Alarm Setting When the system detects a movement change, it will trigger an alarm and prompt the camera to take the following actions: sound an alarm, push a notification to your smartphone, and record the movement to your Micro SD card. -
Page 28: Motion Alarm
7.2 Motion Alarm Steps: Go to 'Settings' > ' A larm' >turn on ' A larm' >turn on ' A larm Siren' > Setting 'Opening time' . Set the alarm time according to your needs. During the opening time, if movement is detected, the camera will sound an alarm. -
Page 29: Camera Alarm Area Setting
7.4 Camera Alarm Area Setting Set up key monitoring areas, such as windows, swimming pools, gates, etc. When someone enters the areas, the alarm will sound, and the APP will push notifications to your smartphone. The camera will record movement on your micro SD card. -
Page 30: Motion Sensitivity
7.5 Motion Sensitivity The camera has 3 types motion sensitivity Detecting Distance (for Detecting Distance (for Sensitivity moving and living things) moving vehicles) Up to 4 meters (13ft) Up to 10 meters (33ft) Up to 6 meters (20ft) Up to 12 meters (40ft) -
Page 31: Disable/Enable Push Notification
Receive alarm information on your smartphone, please open ' A llow notifications' on the APP. There are two ways to open: Way 1: Go to 'Settings' > 'Notifications' on your smartphone, and then click Aibien Camera App to allow notifications. Way 2: Click 'setting' on the camera management page and follow the icon. -
Page 32: Part 8 - Video Lock
Part 8 – Video Lock This chapter will cover how to set video lock in APP. When you turn on the camera, you need to enter a gesture to open it to better protect your privacy. Step: Go to 'Settings' > 'Video lock' > 'Create video lock' > Draw gesture > Draw gesture again >... - Page 33 support@aibien.net...
-
Page 34: Part 9 - Sd Card
Part 9 – SD Card 9.1 Local Storage Aibien cameras support SD card storage (default 24/7 recording). If you don’t need it, you can choose to turn off this feature. There are three emotional modes for the resolution of locally stored videos: smooth / SD / HD, smooth is the most space-saving, and HD is the clearest. -
Page 35: Part 10 - Pc Software
The device must be connected on the mobile app before using the PC software. Login your account and all the camera will be automatically showed on the PC software. PC software download link: aibien.net/support/pcsoftware... - Page 36 View all the devices under your account, click on the device, the right window will display the device. Click this icon to switch window display type. Close selected window. Click this icon to modify the picture quality Click this icon to set alarm information Click to see the cameras on the next page or previous page.
-
Page 37: Part 11 - Specification
Part 11 – Specification Product Name Aibien Gardview Model Aibien Power 12V/1A Power Cable Length 1.5m WiFi Frequency Bands Support 802.11b/g/n 2.4 GHz Resolution 2304*1296 Field of View 105° diagonal Picture Sensor 1/3CMOS Infrared Sensor Support Storage Maximum support 128G Operating Temperature 14°F - 131°F (-10°C -55°C) - Page 38 Do not use the device in an environment where the temperature is too high or too low. The suitable temperature for Aibien cameras and accessories is 14°F - 131°F (-10°C -55°C). This symbol indicates that the product must not be discarded as domestic waste and should be sent to an appropriate recycling facility.
-
Page 39: Part 14 - Faq
3. Why can't I receive the notifications on my phone? 1) Make sure to allow Aibien app to send notifications in the phone settings. 2) Make sure to turn on all the options in the push notification settings: Setting-Receive Notification. - Page 40 4. Why is there no video recorded? 1) Please confirm whether the camera is powered off, the SD card is working normally, and the SD card will not continue to record after the device is powered off. 2) Verify that the SD card is correctly inserted into the camera: Without a Micro SD card, the camera can work but cannot record video, and can accept notifications, but cannot view the alarm video.
-
Page 41: Part 15 - Warranty & Technical Support
Part 15 – Warranty & Technical Support Visit aibien.net/register or scan the QR code Register NOW to make sure your product is under the life-time NRRR protection! Just let us know if you have any issue with the product by contacting us at support@aibien.net . - Page 42 Technical Support & Software Upgrade Service How to get our technical support 1. Starting a live chat at aibien.net (Mon-Fri 8:00 am - 5:00 pm pst) 2. Emailing us at support@aibien.net (reply in 12 working hours) 3. Submit an online form at aibien.net/contact How to upgrade the software 1.
- Page 44 https://bit.ly/aibienfb https://bit.ly/aibienyt https://bit.ly/aibienins https://bit.ly/aibientw...
Need help?
Do you have a question about the GARDVIEW and is the answer not in the manual?
Questions and answers