Table of Contents
Advertisement
Quick Links
Advertisement
Table of Contents

Summary of Contents for SpeedComfort Trio Set
- Page 1 Installation and User Instructions February 2021 Version 03.00...
- Page 2 Disclaimer SpeedComfort makes no representations or warranties with respect to this manual and, to the maximum extent permitted by law, expressly limits its liability for breach of any warranty that may be implied to the replacement of this manual with another. Furthermore, SpeedComfort reserves the right to revise this publication at any time without incurring an obligation to notify any person of the revision.
-
Page 3: Table Of Contents
Main components Safety Instructions 3.1. How to Use the Product Safely Installation 4.1. Determine the type of your radiator 4.2. Connect the SpeedComfort to the Radiator 4.3. Optimize the Central Heating Maintenance 5.1. How to Maintain the SpeedComfort Troubleshooting Disposal 7.1. -
Page 4: Preface
This installation manual is intended for the end-user, the general homeowner, who wants to install one or more SpeedComforts on the radiators in his home. The user does not need to be skilled, trained or certified to install the SpeedComfort. 1.2. -
Page 5: Obtaining Documentation And Information
SpeedComfort at +31 85 666 62 23. 1.5.3. Documentation feedback If you are reading SpeedComfort product documentation on the internet, any comments can be submitted on the support website. Comments can also be sent to UKsupport@speedcomfort.com. We appreciate your comments. -
Page 6: Description Of The Product
2.1. Intended Use and Reasonably Foreseeable Misuse The SpeedComfort is intended to be used as a ventilator that is intended to be attached to a radiator or convector, which is connected to the central heating system. The SpeedComfort is intended to draw heat from the radiator to help heat the room more effectively. -
Page 7: Technical Data
2.3. Technical Data Parameter Unit Product name SpeedComfort Technical lifespan: SpeedComfort 10 years Technical lifespan: Power adapter 4 years Power 0.55 W Annual energy consumption < 1 kWh Noise level < 20 dB(A) Airflow 30 m /hour Width x length... -
Page 8: Main Components
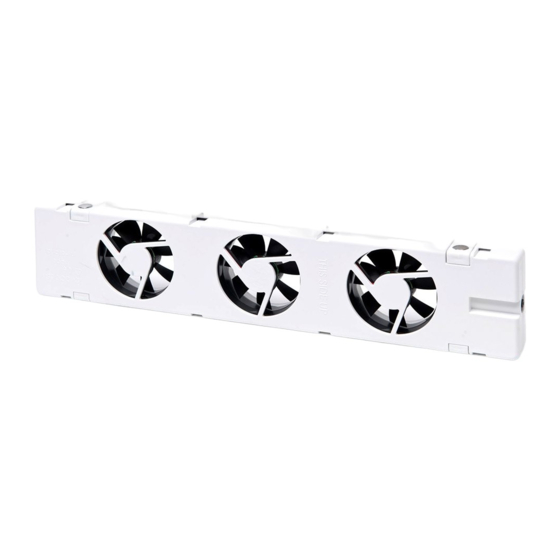
2.4. Main components A. SpeedComfort B. Adjustable magnets (4x) C. Feet (4x) D. Power adapter E. Temperature sensor (with Velcro) F. Connecting cable (included with Duoset, Trioset and Extension Set) G. 60 cm cable (optional) H. 120 cm cable (optional) Dummy blocks (4x - without function) -
Page 9: Safety Instructions
3. Safety Instructions Read and understand this manual and its safety instructions before using the SpeedComfort and matching components. 3.1. How to Use the Product Safely 3.1.1. Safety information for vulnerable people • Never leave children alone with packaging material. There is a risk of suffocation. - Page 10 3.1.5. Safety information regarding the use • Never use the product outdoors. The product is intended for indoor use only. • Check all components (including cables) for any damages before installing the product. Immediately remove the power adapter from the wall socket in the event of visible damage, strong odour or overheating of the components.
-
Page 11: Installation
4. Installation 4.1. Determine the type of your radiator The SpeedComfort can be installed on different types of radiators. Each type of radiator requires its own way of installation. Determine the type of your radiator: Determine the radiator types on which you want to install the SpeedComfort. -
Page 12: Connect The Speedcomfort To The Radiator
4.2. Connect the SpeedComfort to the Radiator The SpeedComfort can be installed on different types of radiators. Each type of radiator requires its own way of installation. Follow the specific installation steps for this type of radiator. 4.2.1. Connect the SpeedComfort to a wide radiator (plates ≥ 70 mm apart) Make sure that the SpeedComfort (A) faces upwards and that the female connectors (1) point towards the wall socket (see fig. 1). - Page 13 Identify a space where the radiator wall brackets and connecting clips are not in the way. Attach the SpeedComfort (A) at the bottom between the radiator plates with the adjustable magnets (B) (see fig. 2). The SpeedComfort (A) can also be attached on top of the radiator and under a cover.
- Page 14 The Duoset and the Trioset include several SpeedComforts. Fig. 4 - Connect additional SpeedComforts (A). Turn on your central heating system. Wait for the SpeedComfort (A) to automatically switch on. This happens when the radiator temperature exceeds 33°C. It automatically switches off when the radiator cools down to 25°C.
- Page 15 Adjust the adjustable magnets (B) to the correct width. Repeat step 1 – 7 as for the wide radiator. Use the adjustable magnets (B) to hang the SpeedComfort (A) between the plates (see fig. 5 and 6). You can align the SpeedComfort on the front of the radiator.
- Page 16 4.2.4. Connect the SpeedComfort to a convector Attach the feet (C) by pushing them into the slots (2) of the SpeedComfort (A). Make sure that the SpeedComfort (A) faces upwards and that the female connectors (1) point towards the wall socket (see fig. 9).
- Page 17 The sensor can be attached to a copper pipe or any other non-magnetic location using the provided Velcro. 4 × Fig. 8 - Attach a foot (C). Fig. 9 - Position the SpeedComfort (A) on the convector.
-
Page 18: Optimize The Central Heating
Install 3 to 5 SpeedComforts (A) (with matching components) in an (average) living room. Install SpeedComforts (A) in all regularly used rooms. This ensures that all the air in the room circulates once per hour (since one SpeedComfort circulates 30 m /h). -
Page 19: Maintenance
To replace components: Exchange broken components, still under warranty, at the supplier. The SpeedComfort has a ten year guarantee and the power adapter has a 2 year warranty. NOTICE For safety- and control reasons (CE), alterations or modifications of this product are not permitted. -
Page 20: Troubleshooting
Speedcomfort with a narrow radiator. the radiator plates. SpeedComfort There is too little space. Place the SpeedComfort (A) on top (A) does not fit at of the radiator. This will not influence the bottom of the performance. The bottom is only radiator. - Page 21 The SpeedComfort The SpeedComfort (A) Turn the SpeedComfort (A) over so that the SpeedComfort (A) is facing (A) does not seem to may be facing downwards. increase the radiator This causes the air to flow upwards.
- Page 22 Make sure the SpeedComfort (A) does not switch (E) is not switching it off. (A) is properly connected to a temperature sensor (E). off when the radiator is off / cold. You can find answers to frequently asked questions (FAQs) at www.speedcomfort.com.
-
Page 23: Disposal
7. Disposal 7.1. Disposal of the Product The symbol on the product indicates that this product must not be treated as unsorted municipal waste, but must be collected separately! Dispose of the product via a collection point for the recycling of waste electrical and electronic equipment if you live within the EU and in other European countries that operate separate collection systems for waste electrical and electronic equipment. - Page 24 SpeedComfort adaptor & sensor handleiding etc. www.speedcomfort.com www.speedcomfort.com...
Need help?
Do you have a question about the Trio Set and is the answer not in the manual?
Questions and answers