Advertisement
Quick Links
RAS - Installation Instructions for Sun Sensor Eclipse
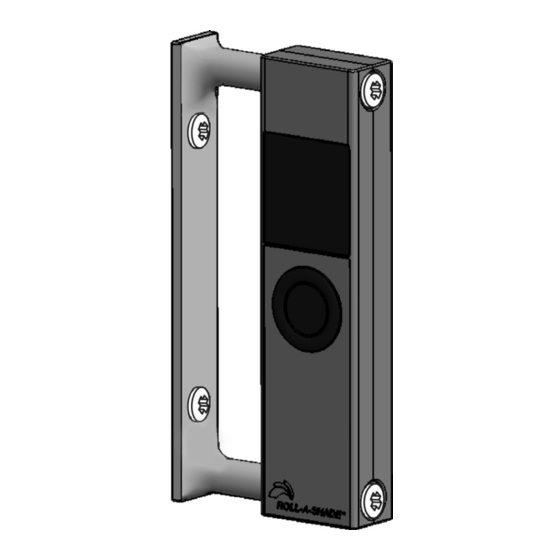
Sun sensor bracket
A. Reawaken From Sleep Mode
1.
Use paper Clip to press rest button
2.
Check for Battery level on screen.
If low use usb charger to fully charge.
3.
Test shades pairing with up or down buttons.
•
If paired, move to Section "___" Installation
•
If not paired, go to either Section "____" for
specific motor manufaturer
Note: Once plugged into Sun Sensor, you may plug the other
end into any port you have available.
MAIN MENU
Shade pairing
Position adjust
Sunshine
Timer
Configuration
www.rollashade.com
Hardware Included
Sun sensor
MICRO USB
RESET BUTTON
UP
BACK
SELECT
FORWARD
DOWN
© Copyright 2020 Roll-A-Shade Inc., All rights reserved. - Contractor #916075
x2
Eclipse screws
x2
#8-18 x 3/4"
USB micro b
Screws
If shades are paired (Both Somfy and RAS):
1.
If shades are paired and sunshine is enabled there will be a
number next to the sun image on the screen with the arrows.
2.
The shades will also be able to operate by using the arrows.
3.
If both steps one and two work, then Date and Time can
be set.
a. Configuration > Date and Time
4.
Eclipse can now be mounted in the window frame.
12101 Madera Way
Riverside, CA 92503
Click to Print
Phone: 888-245-5077
Click to Email
Fax: 951-245-5075
www.rollashade.com
Tools
Required
Phillips head
Drill
Rev: 06.25.2020 Page 1 of 6
Advertisement

Summary of Contents for Roll-A-Shade Eclipse
- Page 1 MAIN MENU Eclipse can now be mounted in the window frame. Shade pairing Position adjust Sunshine BACK SELECT FORWARD Timer Configuration DOWN www.rollashade.com © Copyright 2020 Roll-A-Shade Inc., All rights reserved. - Contractor #916075 Rev: 06.25.2020 Page 1 of 6...
-
Page 2: Side Installation
Install Sun Sensor bracket into mullion vertically or horizon- Note: Must be at least two screws in every bracket. TOP INSTALLATION BOTTOM INSTALLATION SIDE INSTALLATION www.rollashade.com © Copyright 2020 Roll-A-Shade Inc., All rights reserved. - Contractor #916075 Rev: 06.25.2020 Page 2 of 6... - Page 3 Connect the equipment into an outlet on a circuit different from that FRONT BACK to which the receiver is connected. • Consult the dealer or an experienced radio/TV technician for help. www.rollashade.com © Copyright 2020 Roll-A-Shade Inc., All rights reserved. - Contractor #916075 Rev: 06.25.2020 Page 3 of 6...
- Page 4 WHEN SHADES ARE NOT PAIRED 4. Final step in programming is to set date and time. 1. To pair shades to Eclipse, go to Main Menu > Shade Pairing > a. Configuration > Date and Time Pair with shade > Make sure shade is on > Either press button on motor head OR press programming button on back of remote 8 times >...
- Page 5 Press the programming button on back of remote with paperclip until shade jogs. b. QUICKLY switch to Eclipse and go all the way to the left to copy and paste the programming into the eclipse. i. The screen with the arrows will quickly flash “PROG”...
- Page 6 ® operated under normal conditions from the date of purchase. If Eclipse is found to be defective and covered by the warranty, we will, at our option, repair or replace it free of charge. This product warranty does not cover any conditions or damages resulting from misuse or abuse, accidents, alterations, neglect, damage by others, natural disasters, exposure to the elements, or failure to follow Roll-A-Shade’s instructions with respect to installation, use and maintenance.
-
Page 7: Upside Down
Pair Adjust Timer Config DISPLAY Orientation MAIN MENU Pair Adjust Timer Config ORIENTATION Landscape Landscape right Portrait Upside down PORTRAIT UPSIDE DOWN www.rollashade.com © Copyright 2020 Roll-A-Shade Inc., All rights reserved. - Contractor #916075 Rev: 06.25.2020 Page 7 of 6...
Need help?
Do you have a question about the Eclipse and is the answer not in the manual?
Questions and answers