Table of Contents
Advertisement
Quick Links
Advertisement
Table of Contents

Summary of Contents for HOA HDX S120
- Page 1 HDX™ Cast Coupler Installation & User Manual...
- Page 2 © 2013 HOA Manufacturing Inc. Eugene, OR USA. All rights reserved. Any use of the editorial or pictorial content of this publication is strictly prohibited without express written permission from HOA Manufacturing Inc. Printed in the USA (02/13). DCN HDX-IUM-01-20130216...
-
Page 3: Table Of Contents
Warnings & Precautions ..............29-30 Switch Box Overview ................ 31 Engaging Attachment ................ 32-35 Disengaging Attachment ..............36 Lifting Loads with Coupler Installed ..........37 Maintenance Procedures ..............38-39 Troubleshooting ................40 HOA Manufacturing HDX™ Cast Coupler Installation & User Manual... -
Page 4: Welcome & Contact Information
The HDX™ coupler will deliver enhanced productivity of your excavator. This coupler brings you the design, quality and workmanship you expect from a HOA Manufacturing product. The advantages of the HDX™ coupler become apparent when a bucket or attachment change is necessary. -
Page 5: Important Notes & Warranty Information
Manufacturing. Products manufactured by others are covered only by the warranties extended to HOA Manufacturing by its suppliers. Warranty claims must be made to HOA Manufacturing in advance of any repairs by submitting a Warranty Claim Number and Warranty Claim Form, which can be obtained by contacting HOA Manufacturing. -
Page 6: General Information
Verify the coupler machine number on the Serial Number ID Tag (Fig. 3-1) matches the machine you are attempting to install the coupler on. Fig. 3-1 (Coupler Serial Number ID Tag) HOA Manufacturing HDX™ Cast Coupler Installation & User Manual... - Page 7 DANGER Failure to comply with information in this HOA Manufacturing HDX™ Cast Coupler User Manual may result in injury, death, damage to property, and/or damage to the coupler. Ensure all personnel have read and understand the information in this manual before attempting to install, maintain, and/or operate the HDX™...
-
Page 8: Part Identification Charts
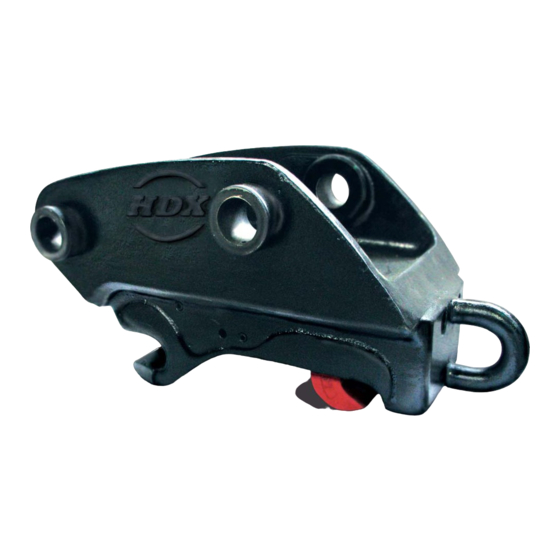
This section provides diagrams for identification of the excavator, the coupler, and the Coupler Installation Kit. These charts will also familiarize you with the terminology used in this manual. Chart 1 – Excavator Parts Chart 2 – Coupler/Attachment Parts HOA Manufacturing HDX™ Cast Coupler Installation & User Manual... - Page 9 The HDX™ coupler is designed to pick up multiple pin diameters. Refer to this chart for the appropriate pin diameter to match your HDX™ coupler. HDX™ Coupler Model Pin Diameter S120 60-65-70 mm S200 70-80 mm S250 80-90 mm S350 90-100 mm S450 100-110 mm HOA Manufacturing HDX™ Cast Coupler Installation & User Manual...
- Page 10 Tubular Hose Retainer Bracket IMPORTANT HOA Manufacturing makes every attempt to supply you with the appropriate fittings to install your coupler. However, due to the variety of excavators, you will need to provide the specific fittings needed to tie into the pilot pressure system and the hydraulic reservoir tank of your excavator.
- Page 11 1/4” x 20” x 3/4” #8 x 1/2” x Mounting Screws Hydraulic Control Valve (24V Vickers) Sub Plate Mounting Screws Mounting Sub Plate 1025 Mounting Screws Control Valve Wiring Harness Control Valve Mounting Bracket HOA Manufacturing HDX™ Cast Coupler Installation & User Manual...
- Page 12 Nut for Bulkhead Fittings #6 O-Ring x #6 JIC Male Upper & Lower Bulkhead Fittings Brackets #6 2500 psi Single Braid Hydraulic Hose Protective Hose Sleeve Wire Ties Tubular Hose Retainer Bracket HOA Manufacturing HDX™ Cast Coupler Installation & User Manual...
-
Page 13: Hydraulic & Electrical Specifications
CAUTION Only use parts recommended by HOA Manufacturing (or parts meeting the specifications above). Failure to use parts recommended by HOA Manufacturing may result in damage to the coupler and/or machine. HOA Manufacturing HDX™ Cast Coupler Installation & User Manual... -
Page 14: Hdx™ Coupler Familiarization
FEA contoured for low stress. between the coupler frame and the sliding lever. Because the locking system pushes away from the front pin, the coupler remains tight, even as it begins to wear. HOA Manufacturing HDX™ Cast Coupler Installation & User Manual... - Page 15 Once the attachment is engaged, the locking lever can only be retracted by applying positive pressure to the retract port. This is done by placing the control box switch to the release position. HOA Manufacturing HDX™ Cast Coupler Installation & User Manual...
-
Page 16: Recommended Welding Procedures
General Information Recommended Welding Procedures HOA Manufacturing high strength, low alloy steels require greater than normal precautions when welding. Follow this list of welding recommendations and procedures when installing and maintaining your coupler. When welding, always use proper welding protection and work in a well ventilated area. -
Page 17: Installation Instructions
DANGER Failure to comply with information in this HOA Manufacturing HDX™ Cast Coupler User Manual may result in injury, death, damage to property and/or damage to the coupler. Ensure all personnel have read and understand the information in this manual before attempting to install, maintain, and/or operate the HDX™... - Page 18 HDX™ couplers are designed to be used only with a HOA Manufacturing Coupler Installation Kit. Installing a coupler with anything other than components from a HOA Manufacturing Coupler Installation Kit results in an unauthorized modification to the coupler.
-
Page 19: Removing Attachment
6. Operate the excavator controls to remove the excavator arm from between the ears of the attachment. 7. Rest the excavator arm securely on firm, level ground. HOA Manufacturing HDX™ Cast Coupler Installation & User Manual... -
Page 20: Connecting Coupler To Excavator Arm
Use a rubber mallet to drive 7. Your coupler is now connected to the exca- the pin into place. vator arm. HOA Manufacturing HDX™ Cast Coupler Installation & User Manual... -
Page 21: Installing Hose Brackets
See your excavator dealer for the appropriate Lock Out tag. 5. Release the hydraulic tank pressure by op- erating the release valve on the hydraulic tank. HOA Manufacturing HDX™ Cast Coupler Installation & User Manual... - Page 22 Position the tubing in the center of the link and weld using the recommended welding procedures on page 13. 14. You have now mounted the necessary brackets and are ready to route the hydraulic hoses. HOA Manufacturing HDX™ Cast Coupler Installation & User Manual...
-
Page 23: Hydraulic Hose Assembly
Installation Instructions Hydraulic Hose Assembly This section details the process of making the hydraulic hoses required for the coupler installation. HOA Manufacturing makes every attempt to provide adequate hose length for your coupler installation. However, depending on your excavator, you may find you need extra hose. See the hose specifications listed on the Coupler Installation Kit component list on page 7, to determine if you will need extra hose. -
Page 24: Hydraulic Hose Routing
2. Install the 90 degree #6 O-ring x #6 JIC male fittings into the extend and retract ports on the cylinder. HOA Manufacturing HDX™ Cast Coupler Installation & User Manual... - Page 25 WARNING Be sure to eliminate any twisting of the hoses before tightening the connections. Do not put hands into moving excavator linkage. HOA Manufacturing HDX™ Cast Coupler Installation & User Manual...
- Page 26 Secure the hoses to the ma- chine using the plastic tie wraps supplied in the Coupler Installation Kit. Repeat this procedure for both sides. HOA Manufacturing HDX™ Cast Coupler Installation & User Manual...
-
Page 27: Control Valve, Filter & Switch Box
The 3-light switch box connects to the control valve using the wiring harness provided. The switch box and wiring harness leads are color coded for easier installation. HOA Manufacturing HDX™ Cast Coupler Installation & User Manual... - Page 28 The filter is mounted in-line, be- tween the mounting sub plate and the tank. HOA Manufacturing HDX™ Cast Coupler Installation & User Manual...
- Page 29 Newer excavators may provide auxiliary ports for connections from aftermarket attachments. Contact your excavator dealer’s service department need additional guidance. HOA Manufacturing HDX™ Cast Coupler Installation & User Manual...
- Page 30 Match the color coded wires and connect them in accordance with standard electrical practices. Refer to SAE J2030 Heavy Duty Electrical Connector Performance Standard. HOA Manufacturing HDX™ Cast Coupler Installation & User Manual...
- Page 31 Engaging Attachment section on pages 32-35. CAUTION After completing the installation, the bleed screws on the cylinder must be bled before the coupler can be tested. HOA Manufacturing HDX™ Cast Coupler Installation & User Manual...
-
Page 32: Operation & Maintenance
DANGER Failure to comply with information in this HOA Manufacturing HDX™ Cast Coupler User Manual may result in injury, death, damage to property, and/or damage to the coupler. Ensure all personnel have read and understand the information in this manual before attempting to install, maintain, and/or operate the HDX™... - Page 33 During inspection and maintenance of your coupler, use safety protection such as: hard hats, face shields, work gloves, safety shoes, work clothes and safety glasses. Maintenance work should only be performed by experienced and qualified personnel. HOA Manufacturing HDX™ Cast Coupler Installation & User Manual...
-
Page 34: Switch Box Overview
Buzzer sounds Buzzer sounds Cylinder rod on coupler Hydraulic flow to the Cylinder rod on coupler extends coupler is shut off retracts ALWAYS OPERATE COUPLER IN LOCK POSITION HOA Manufacturing HDX™ Cast Coupler Installation & User Manual... -
Page 35: Engaging Attachment
1. Engage attachments completely clear of all personnel. 2. Test connections away from all personnel. 3. Never swing coupled attachments over workers’ heads. HOA Manufacturing HDX™ Cast Coupler Installation & User Manual... - Page 36 All coupler/attachment combinations should be checked for possible interference before operating the coupler. Ensure the coupler engages and disen- gages properly and easily with each attachment. Keep in release position while engaging attachment HOA Manufacturing HDX™ Cast Coupler Installation & User Manual...
- Page 37 After the front lever engages, allow time for the rear lever to engage. Do not assume the rear lever is engaged just because the front lever is engaged. You must allow the rear lever time to engage the attachment’s link pin. HOA Manufacturing HDX™ Cast Coupler Installation & User...
- Page 38 DANGER The switch must remain in the lock position when operating the excavator with coupled attachments. Never swing coupled attachments over workers’ heads. HOA Manufacturing HDX™ Cast Coupler Installation & User Manual...
-
Page 39: Disengaging Attachment
Never swing coupled attachments over workers’ coupler out. heads. Do not force the coupler off of the attachment. DANGER Always disengage attachments away from personnel. HOA Manufacturing HDX™ Cast Coupler Installation & User Manual... -
Page 40: Lifting Loads With Coupler Installed
Curl the the coupler’s lifting eye while coupled to coupler inward when lifting loads. This is an attachment. the preferred method for lifting. HOA Manufacturing HDX™ Cast Coupler Installation & User Manual... -
Page 41: Maintenance Procedures
If gap is more than 1/32”, After buildup is complete, grind both then the C-casting needs sides smooth. to be built up. HOA Manufacturing HDX™ Cast Coupler Installation & User Manual... - Page 42 1 rear lever damage to the HDX™ coupler. 1 yoke 1 front lever 1 set of springs 1 set of spring pins HOA Manufacturing HDX™ Cast Coupler Installation & User Manual...
-
Page 43: Troubleshooting
450 psi. If severely worn, cut inside diameter of boss until loose in bore. Remove boss. Install replacement boss from HOA Manu- facturing and weld, as specified in the above bullet. HOA Manufacturing HDX™ Cast Coupler Installation & User Manual...
Need help?
Do you have a question about the HDX S120 and is the answer not in the manual?
Questions and answers