
Summary of Contents for FOOING FY-70A
- Page 1 COMPRESSOR WINE COOLER User Manual Model:FY-70A / FY-90A / FY-150B Please read this user manual before using this product...
-
Page 3: Table Of Contents
CONTENT 1. Before First Use..................4 2. Important Safety Measures and Instructions........4 3. Warning and Cautions................. 5 4. Specifications..................6 5. Device Overview...................7 6. Before Initial Operation................9 7. Temperature Setting................10 8. Operation..................... 11 9. Energy Saving..................11 10. Cleaning and Maintenance.............11 11. -
Page 4: Before First Use
Thank you for choosing our product. If operated and taken care of properly in accordance with these instructions, this appliance will be useful for many years. 1. Before First Use Before first use, remove any stickers or similar from the appliance except for the ... -
Page 5: Warning And Cautions
3. Warning and Cautions Do not connect the appliance to the mains if the appliance itself or the power cord or the plug are visibly damaged. Never try to repair the appliance yourself. If the appliance does not operate properly, ... -
Page 6: Specifications
Do not stand or lean on the base,the drawers,the doors etc of the appliance. Do not put hot liquids or hot foodstuff into the appliance. 4. Specifications MODEL FY-70A FY-90A FY-150B VOLUME 150L VOLTAGE AC 110V AC 110V... -
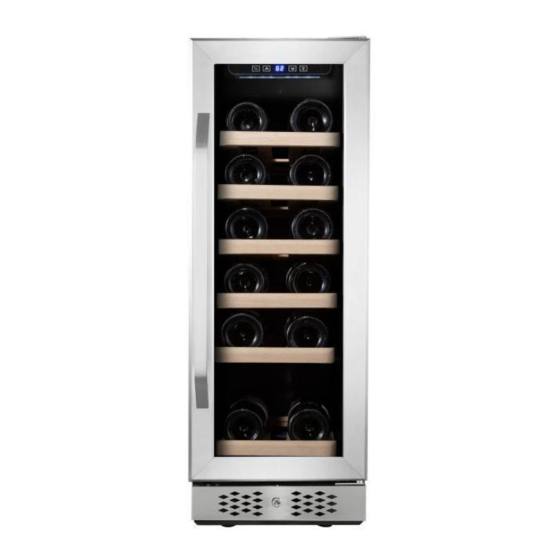
Page 7: Device Overview
5. Device Overview Model No.: FY-70A 1. Upper Hinge 2. Lighting Switch 3. Temp. Button 4. Display 6. ℉/℃ Switch 5. Temp. Button 7. LED Light 8. Cooling Fan 9. Carbon Filter 10. Temp.Sensor 11. Evaporator 12. Shelf 13. Exhaust Window 14. - Page 8 Model No.: FY-90A 1. Upper Hinge 2. Lighting Switch 3. Temp. Button 4. Display 5. Temp. Button 6. ℉/℃ Switch 7. LED Light 8. Cooling Fan 9. Carbon Filter 10. Temp.Sensor 11. Evaporator 12. Shelf 13. Exhaust Window 14. Foot 15.
-
Page 9: Before Initial Operation
Model No.: FY-150B 1. Temp.Sensor 2. LED Light 3. Carbon Filter 4. Cooling Fan 5. Temp.Button 6. Evaporator 7. Temp.Button 8. ℉/℃ Switch 9. LED Light 10. Temp.Sensor 11. Lighting Switch 12. Cooling Fan 13. Shelf 14. Evaporator 15. Exhaust Window 16. -
Page 10: Temperature Setting
7. Temperature Setting Model No.: FY-70A & FY-90A Temp. Lighting ℉/℃ Display Switch Switch Temp. Temp. Increase Decrease Temperature range: 40-66℉(5-18℃). Flashing LED = Setting mode of the temperature. Constant LED = Cooling temperature. Model No.: FY-150B... -
Page 11: Operation
8. Operation The appliance can only reach the relevant temperatures when: The ambient temperature meets the climatic class. The doors close properly. You do not open the doors too often or too long. The door seals are in proper condition. The appliance is properly positioned. -
Page 12: How To Move The Appliance
External Cleaning Use a moist cloth and a mild, non-acid detergent. Use clear water to rinse. Try the cleaned surfaces with a cloth. Internal Cleaning Clean the shelves and the other removable parts with warm water and a mild, ... - Page 13 For model FY-70A & FY-90A,unscrew the upper door hinge while the second person hold the door.Remove the upper hinge and carefully lift the door off the bottom hinge.Unscrew the bottom hinge and install it on the left side of the unit.Flip the door around so that the...
- Page 14 FY-90A FY-150B...
- Page 15 To cover the hole on the left front corner of the body. Round rubber plug To cover the holes on the left (FY-70A & FY-90A) x 2 front corner of the body. (FY-150B) x 3 Extra coated rack To take the place of one (FY-70A) x1 wooden shelf.
-
Page 16: Trouble Shooting
13. Trouble Shooting POSSIBLE CAUSE MEASURE The plug of the appliance is not Check the corresponding socket by connected to the socket. connecting it with another appliance. The plug has become loose. Check the fuse box. • The socket is not supplied with energy. Compare the data on the model plate with •... -
Page 17: Decommission
Decommission If the appliance is not used for a longer period of time: raw the plug out of the socket. 1. D Remove all food stored in the appliance. Dry the inside of the appliance with a cloth and leave the door open for a few days. While away on an average vacation/holiday (14–21 days): ... -
Page 18: Electrical Circuit Diagram
15. Electrical Circuit Diagram Model No.: FY-70A Model No.: FY-90A... - Page 19 Model No.: FY-150B...
Need help?
Do you have a question about the FY-70A and is the answer not in the manual?
Questions and answers